To paint furniture without stripping, start by thoroughly cleaning the surface with soap and water, then use a deglossing agent like Krud Kutter Gloss-Off or Zero Scratch Scotch Brite to remove sheen and improve adhesion. Follow with a suitable primer, applying two thin coats for best results. Use quality brushes or sprays for smooth application, and finish with a protective top coat. Continue exploring these steps to achieve professional-looking furniture that lasts.
Key Takeaways
- Thoroughly clean the furniture with soap and water to remove dirt and grease before painting.
- Use deglossers like Krud Kutter Gloss-Off or Scotch Brite to chemically remove gloss without sanding.
- Apply a bonding or oil-based primer directly over the existing finish to improve adhesion.
- Use high-quality, thin coats of paint and lightly sand between coats for a smooth finish.
- Finish with a protective top coat like polyurethane to seal and enhance durability without stripping.
Assessing and Preparing Your Furniture for Painting
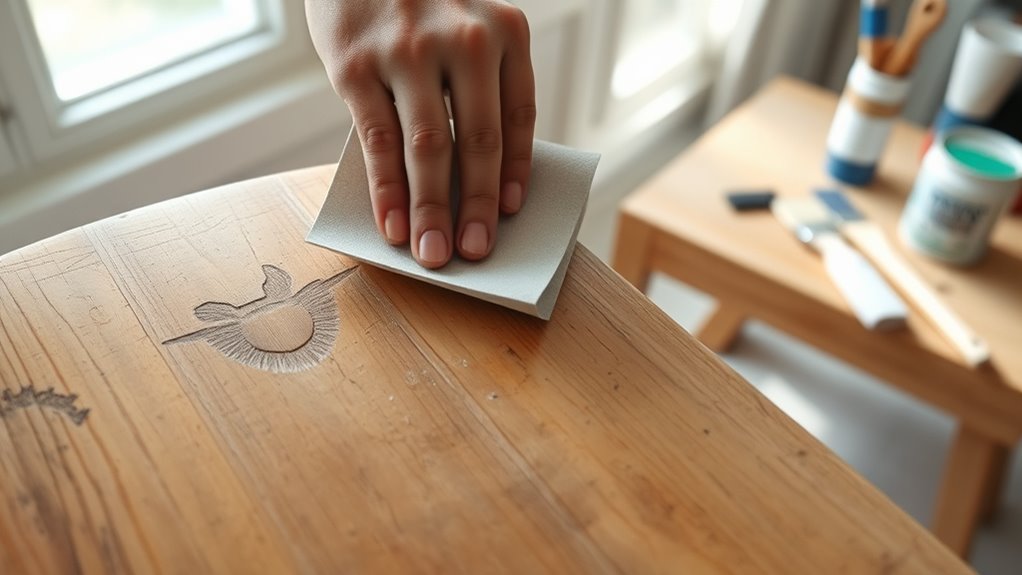
Before you start painting, it’s essential to assess and prepare your furniture properly. Begin by cleaning the surface thoroughly with a mixture of liquid Ivory dish soap and water, scrubbing gently to remove dirt and grease. Use a deglosser or liquid TSP to strip the sheen and improve adhesion, especially on glossy or varnished finishes. Next, evaluate the existing finish by wiping it with mineral spirits; how the surface reacts will tell you if it’s suitable for refinishing. If needed, lightly sand the surface to create a rougher texture for better primer adhesion. Don’t forget to repair any cracks, dents, or chips with appropriate fillers, ensuring a smooth surface. Remove all hardware and fill old holes before drilling new ones, setting the stage for a flawless finish. Additionally, consider testing for proper adhesion by applying a small amount of primer or paint in an inconspicuous area to ensure your surface is well-prepared for painting. For optimal results, understanding the role of surface preparation in achieving a professional-looking finish is crucial.
Choosing the Right Cleaning and Surface Preparation Methods
Selecting the appropriate cleaning and surface preparation methods is essential for achieving a smooth, durable paint finish. Start with thorough cleaning using a mixture of liquid Ivory dish soap and water, scrubbing detailed areas with a soft sponge or brush to remove dirt, grease, and residue. For surfaces with a shiny or slick finish, use a deglosser like Krud Kutter Gloss-Off or Zero Scratch Scotch Brite to remove the sheen and grime without sanding, improving paint adhesion. Inspect the surface by wiping with mineral spirits to identify any areas needing repair or extra prep work. Fill small cracks with wax fill sticks or epoxy putty, then lightly sand if necessary. Remove hardware, repair damage, and make sure the surface is dry and dust-free before applying primer and paint. Proper surface preparation not only enhances adhesion but also contributes to a professional, long-lasting finish. Additionally, ensuring good air quality during painting by working in a well-ventilated area can help achieve better results and reduce fumes. Incorporating environmentally friendly paints can also facilitate easier cleanup and reduce fumes, making the process safer and more environmentally friendly. Understanding the history of pinball machines can inspire themed furniture or decorative touches that reflect vintage style.
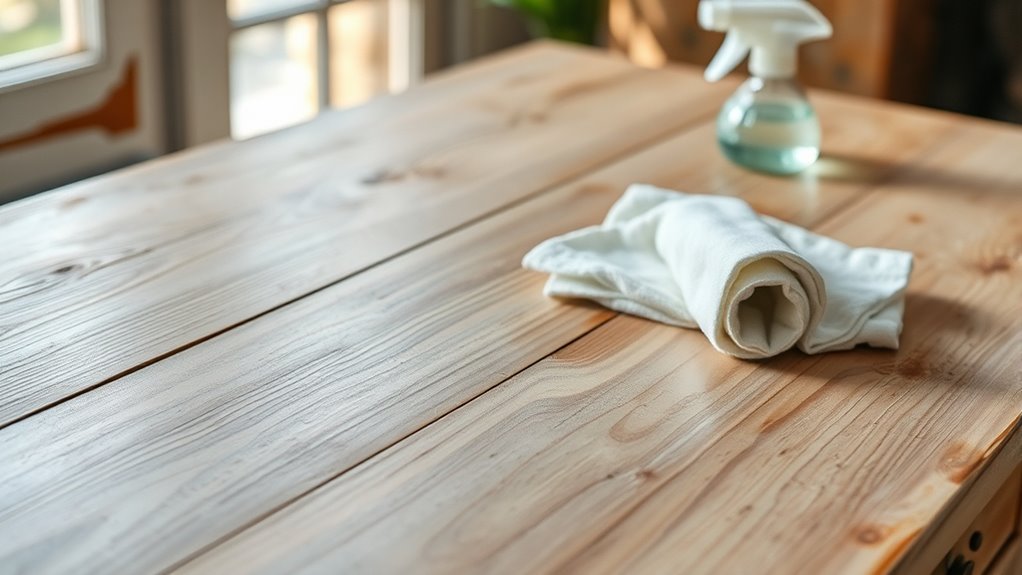
Using Deglossers to Achieve a Smooth Surface

Using a deglosser can save you time and effort by skipping sanding while still creating a smooth surface. When applied with a lint-free cloth in circular motions, it guarantees even coverage and better paint adhesion. Afterward, wiping the surface clean and letting it dry prepares your furniture perfectly for the next step. For added durability, consider choosing a high-quality paint suitable for furniture projects. Incorporating automation in business processes can further streamline your furniture refinishing workflow, making the entire project more efficient. Additionally, understanding affiliate disclosures can help you make informed choices about products and tools to ensure quality results. Recognizing the importance of proper surface preparation and supporting sustainable practices can also contribute to more eco-friendly furniture refinishing.
Benefits of Deglossers
Deglossers offer a fast and effective way to prepare furniture surfaces for painting by chemically removing existing gloss and coatings. With a deglosser like Krud Kutter Gloss-Off, you can achieve better paint adhesion and a smooth, matte finish without sanding. This quick alternative simplifies surface prep, especially on high-gloss furniture, ensuring the paint sticks evenly and reduces peeling or chipping. Using a deglosser creates a primer-like layer that enhances durability and results in a professional finish. Here’s a quick comparison:
| Method | Sheen Removal | Surface Prep | Time |
|---|---|---|---|
| Sanding | Yes | Yes | Longer |
| Deglosser | Yes | Yes | Faster |
| Chemical Strip | Yes | No | Moderate |
| No Prep | No | No | Not recommended |
Additionally, incorporating rustic decor elements can complement the farmhouse style and create a more authentic look. Understanding surface preparation techniques can further improve the durability of your painted furniture and ensure a professional appearance, especially when considering paint adhesion qualities. Proper surface preparation, including adhesion promotion, is essential for long-lasting results.
Application Techniques
To achieve a smooth, matte surface ready for painting, apply the deglosser with a lint-free cloth or sponge, working in circular motions. This surface prep method effectively removes the surface sheen, enhancing paint adhesion without sanding. Use appropriate pressure to ensure thorough residue removal, especially in detailed areas and carvings. After deglossing, rinse the surface with a damp cloth to eliminate any remaining residue, then dry completely before applying paint. Deglossers like Krud Kutter Gloss-Off chemically etch the surface, creating a matte finish that mimics sanding results. Proper application techniques ensure a smooth finish, reduce prep time, and minimize mess. Incorporating natural language processing insights can help identify areas needing additional cleaning or prep to optimize results. Understanding the benefits of deglossing can further improve your furniture painting process. Mastering these steps guarantees maximum paint bonding, leading to durable, professional-looking furniture. Additionally, selecting the right skincare products can help maintain the surface and prevent damage during the painting process.
Selecting and Applying the Perfect Primer
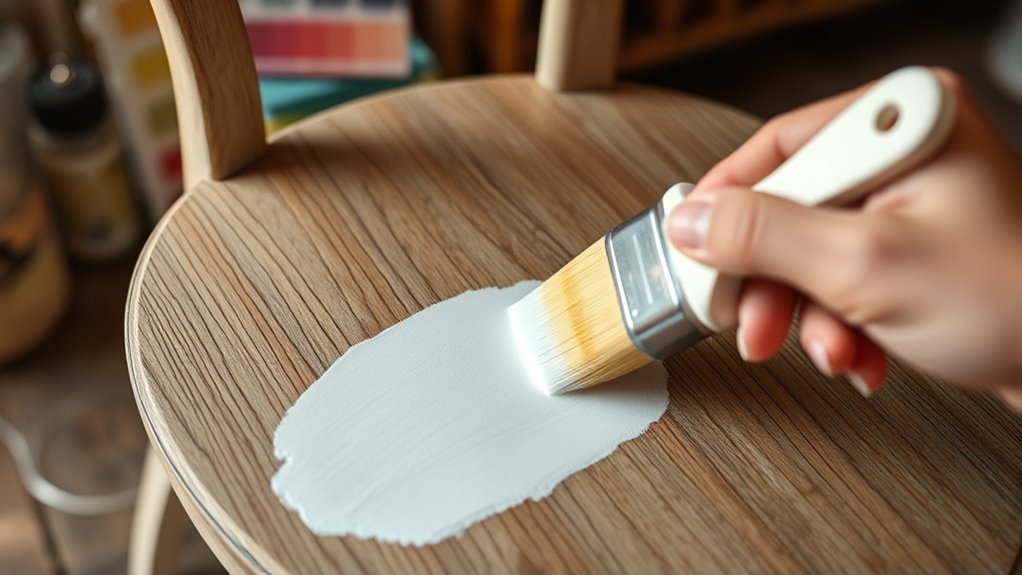
Choosing the right primer is vital for a smooth finish, especially on glossy or laminate surfaces. You should select a bonding or oil-based primer and apply two thin coats for the best adhesion. Follow the manufacturer’s instructions closely to guarantee your primer bonds well and lasts longer. Ensuring proper surface preparation can enhance primer effectiveness breast cancer symptoms. When working on surfaces that require high performance, selecting a primer with the appropriate paint sprayer compatibility can improve overall results and durability. Additionally, understanding the influence of digital distractions on creativity can help you better prepare your workspace and materials for painting projects. Proper environmental considerations, such as choosing eco-friendly primers, can also contribute to a more sustainable project environmental impact.
Primer Compatibility Tips
Selecting the right primer is essential for guaranteeing your paint adheres properly and lasts long, especially on glossy or previously coated surfaces. To maximize adhesion, choose a primer formulated specifically for these surfaces. Oil-based primers, like Cover Stain, are excellent for bonding to laminate or varnished wood without sanding. Always match the primer type—oil-based or water-based—with your chosen paint to ensure compatibility and a smooth finish. For ideal coverage, apply two coats of primer, allowing proper drying time between each. Using spray primers outdoors can give you a more even application and reduce brush marks, especially when aiming for a stain-blocking, durable base. Proper primer selection and application are key to achieving a professional-looking, long-lasting finish.
Applying Primer Techniques
Applying primer effectively starts with picking the right type for your project. For glossy or coated surfaces, choose a primer formulated for adhesion without sanding. Use a brush or spray for application; spray offers quick, even coverage, especially on large or detailed furniture. Apply two coats, thoroughly allowing each to dry according to manufacturer instructions. This guarantees a solid, durable coating that promotes proper adhesion and prevents peeling later. For difficult surfaces, an oil-based primer improves adhesion and helps handle existing gloss or paint layers. Always verify primer compatibility with your paint type—latex, oil-based, or chalk paint—to maximize durability and finish quality.
| Primer Type | Best Use | Application Tips |
|---|---|---|
| Oil-based | Difficult, glossy, or coated surfaces | Apply thoroughly, dry completely |
| Spray | Large or detailed furniture pieces | Even coverage, reduces brush marks |
| Compatibility | Matches your paint type | Ensures maximum adhesion and finish |
Painting Techniques for a Flawless Finish
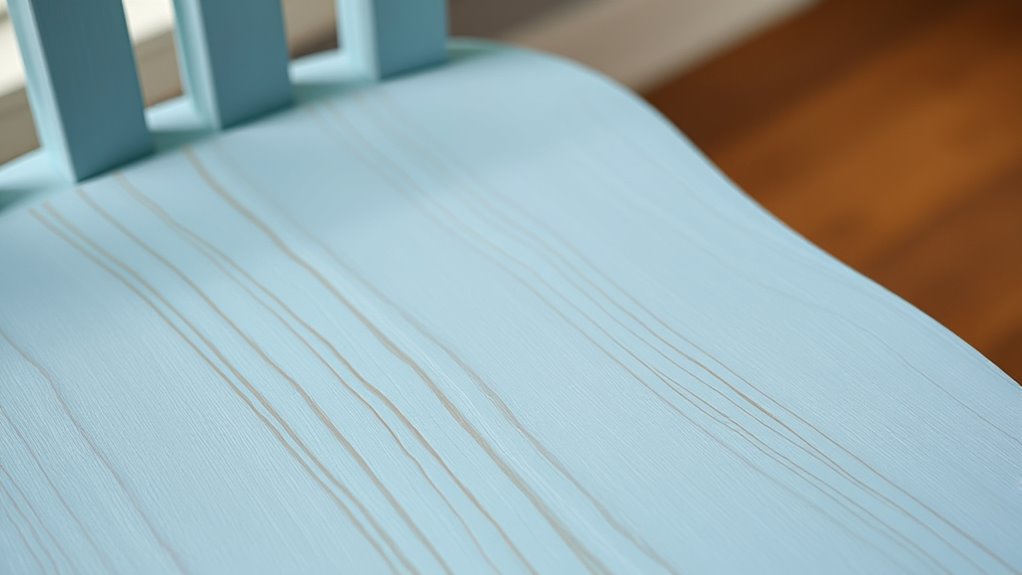
To achieve a flawless finish when painting furniture, focus on technique and attention to detail. Use quality application tools to ensure smooth, even coats and minimize brush marks. Apply multiple thin coats—two or three—rather than one thick layer, which enhances finish quality. Work in long, continuous strokes to maintain a wet edge, preventing lap marks and brush strokes from showing. Sand lightly with very fine grit between coats to smooth imperfections and improve adhesion. Be patient; allow each coat to dry fully before applying the next. Remember, consistent technique creates a professional look.
- Feel the satisfaction of even, streak-free surfaces
- Enjoy the beauty of a smooth, high-quality finish
- Revel in the confidence of your flawless craftsmanship
Tips for Reassembling and Touching Up Your Piece
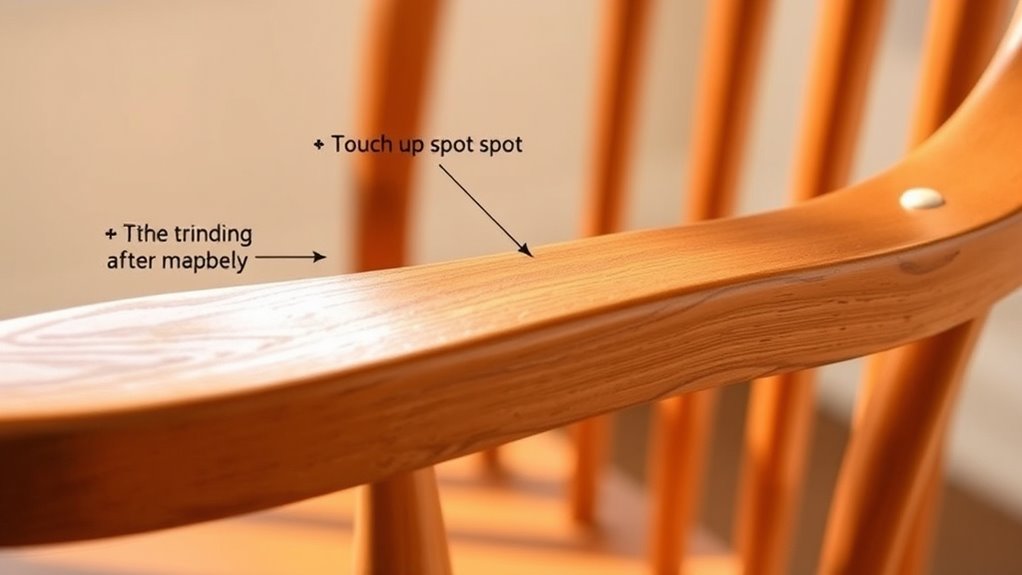
Reassembling your furniture carefully is essential to guarantee a professional-looking finish. Before tightening the hardware, reassemble the piece in its final location to account for uneven flooring and ensure proper alignment. Use a small brush to touch up any paint or finish around hardware and joints after reassembling. If doors or drawers don’t fit properly, adjust them with a wood plane or sandpaper for smooth operation. Replace the hardware only after finishing touch-ups to avoid smudges on fresh paint. Once everything is in place, lightly buff the entire piece with a soft cloth to blend touch-up spots and create a seamless, polished final finish. These steps help maintain a cohesive look and ensure your furniture looks expertly restored.
Protecting Your Furniture With the Right Top Coat
Choosing the right top coat is essential to safeguard your freshly painted furniture and ensure it looks great for years to come. A good top coat, like polyurethane, creates a durable protective barrier that resists scratches, chipping, and moisture damage. Applying two layers of high-quality finish protection enhances durability and longevity. To achieve a smooth, professional look, lightly sanding between coats improves adhesion and prevents bubbles. When applying the top coat, brush in the grain for an even, glossy finish. Remember, a durable paint deserves the best protection.
- Feel confident knowing your furniture is shielded from daily wear and tear
- Enjoy a finish that maintains its luster over time
- Create a professional, flawless look with minimal effort
Final Steps to Achieve a Durable and Beautiful Finish

After applying your final coat of protective finish, it’s crucial to let it cure fully before handling or using the furniture. The curing time, usually 24-48 hours, allows the protective top coat to reach maximum hardness and durability. During this period, avoid any contact that could damage the finish. To ensure a smooth surface, lightly sand between coats with fine-grit sandpaper, which improves adhesion and enhances the final look. Use quality application tools like a soft brush or foam applicator to prevent bubbles and streaks. Once cured, consider buffing the surface with a soft cloth to boost sheen and add extra protection. These final steps will give you a long-lasting, beautiful finish that resists chipping and looks professional.
Frequently Asked Questions
Can I Paint Furniture Without Stripping?
Yes, you can paint furniture without stripping if the surface is in good condition, clean, and free of peeling paint or damage. Just clean it thoroughly with a deglosser or TSP, and use a high-quality primer suitable for glossy or sealed surfaces. Light sanding or repairs might help, but extensive stripping isn’t necessary. This approach saves time and preserves the existing finish while ensuring good paint adhesion.
How Do You Get Paint off Furniture Without Ruining the Finish?
To get paint off furniture without ruining the finish, you should start by testing a small area with a gentle solvent like mineral spirits or a specialized paint remover. Use a plastic scraper or nylon brush to lift the paint carefully. Applying heat with a low-temperature heat gun or softening paint with steam can also help. Always work slowly, and check frequently to make certain your finish stays intact.
Can I Paint Over Varnished Wood Without Sanding?
Yes, you can paint over varnished wood without sanding if the surface is clean, glossy, and in good condition. First, thoroughly clean and degloss the surface using a product like Krud Kutter Gloss-Off. Then, apply a high-quality bonding or oil-based primer to ensure proper adhesion. Lightly scuff or clean the area beforehand, but skip sanding unless the surface is heavily worn, which might affect paint adhesion.
Should You Paint Furniture With a Brush or Roller?
Imagine delicately tracing intricate patterns with a brush, or swiftly covering large surfaces with a roller. When painting furniture, use a brush for detailed edges, ornate designs, and tight spots where precision matters. Opt for a roller on broad, flat surfaces to save time and achieve a smooth finish. Combining both tools guarantees your furniture appears professional, with sharp details and even coverage that transforms your piece effortlessly.
Conclusion
Now that you’ve revealed the secrets to painting furniture without stripping, your piece is ready to shine like a star in your home’s constellation. With patience and the right techniques, you’ll turn a tired old find into a masterpiece that tells your story. Think of your furniture as a blank canvas waiting for your personal touch—trust the process, embrace the transformation, and watch your space come alive with color and character.