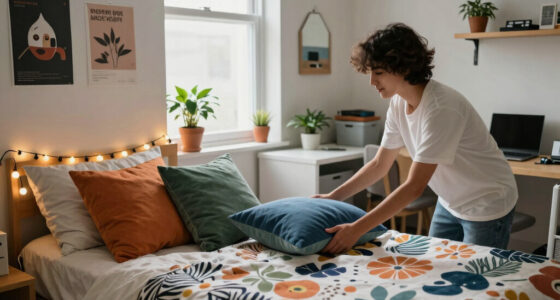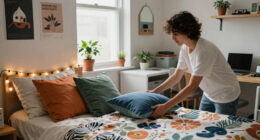

This guide helps students decorate their dorm rooms with creative ideas that personalize their space. It covers practical tips for making the room cozy, organized, and reflective of your style. Suitable for beginners, this process takes approximately 2 to 4 hours. Follow these steps to turn a plain dorm room into a welcoming retreat.

Floating Bedside Shelf Organizer with Adhesive Mount, No Damage Removable Wall Shelf, Dorm Room & Bedroom Decor
- ✔ Mounting Type: Wall Mount
- ✔ Room Type: Bathroom, Bedroom, Living Room
- ✔ Shelf Type: Floating Shelf
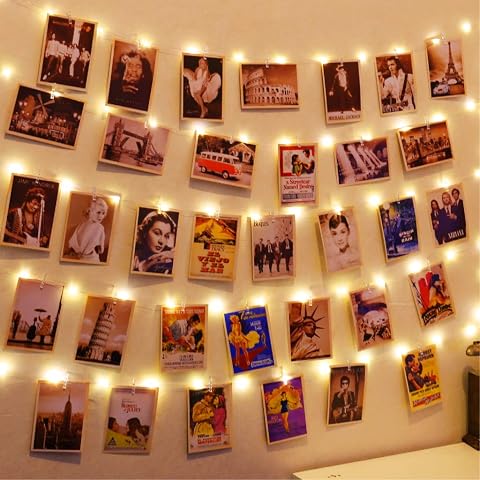
HXWEIYE 120LED 40Ft Fairy String Light with Clips & Hooks, USB Powered, Waterproof, 8 Modes & Timer
- ✔ LED Count: 120 LEDs
- ✔ Length: 40 feet
- ✔ Power Source: USB
Difficulty: Beginner | Time: 2-4 hours
What You’ll Need
Tools & Materials:
- measuring tape
- scissors
- hot glue gun (optional)
- command hooks or adhesive strips
Knowledge:
- basic understanding of space organization
- ability to use common tools like scissors or tape
Gather all materials before starting to save time. Check dorm policies on hanging or attaching items to walls.
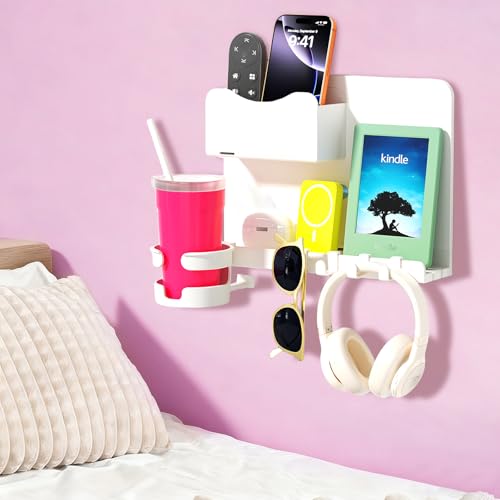
Floating Shelves for Bedside Shelf, Stick On Accessories Organizer, Dorm Room Essentials, Wall Mount Shelf, Cute Room Decor Aesthetic, Girls Room Decor, Cool Stuff For Bedroom Storage And Organization
【UPGRADE DAMAGE-FREE REMOVAL】We understand that you are worry about damaging your wall when remove the shelf, now look...
As an affiliate, we earn on qualifying purchases.
Floating Bedside Shelf Organizer with Adhesive Mount, No Damage Removable Wall Shelf, Dorm Room & Bedroom Decor
This floating wall shelf prioritizes damage-free removal with strong adhesive tapes, making it perfect for dorms and rental rooms. Its widened design incorporates a cup holder, removable hooks, and a spacious upper slot, offering versatile storage for phones, cosmetics, or small essentials. Compared with traditional drilled shelves, this model sacrifices some weight capacity — supporting only up to 6 lbs — but it excels in ease of installation and renter-friendliness. Its plastic finish is easy to wipe clean, though wall type compatibility may vary, and adhesive effectiveness depends on wall texture. This pick is ideal for those who want a clutter-free, stylish solution without damaging walls but may not be suitable for heavier items or textured surfaces.
Pros:
- Damage-free removal with strong adhesive tapes
- Multi-functional with cup holder and hooks
- Easy to install without tools or drilling
Cons:
- Limited to 6 lbs weight capacity
- Adhesive may not work on all wall types
- Requires 4-6 hours for adhesive to set
Best for: Renters or students seeking damage-free, multipurpose storage
Not ideal for: Those needing to store heavier objects or with textured walls
Bottom line: A practical, damage-free wall shelf ideal for small essentials, but limited in weight capacity and wall compatibility.
“A practical, damage-free wall shelf ideal for small essentials, but limited in weight capacity and wall compatibility.”

HXWEIYE 120LED Warm White 40Ft Fairy String Light with 52 Clear Clips & 12 Hooks, USB Powered, Waterproof, 8 Modes & Timer, Perfect for Indoor/Outdoor, Bedroom, Party, Wedding Decor
Upgrade 120LED Photo Clips String Light: Our Copper Wire Fairy String Light have 120LED; Total 40ft long with...
As an affiliate, we earn on qualifying purchases.
HXWEIYE 120LED 40Ft Fairy String Light with Clips & Hooks, USB Powered, Waterproof, 8 Modes & Timer
This 40-foot fairy string light transforms dorm rooms into cozy retreats with 120 LEDs, photo clips, and hooks for endless decorating possibilities. Its waterproof design makes it suitable for outdoor use, while USB power provides portability—though it does limit placement options to near a USB port. The lights feature 8 modes and a timer, controllable via remote, offering customization for any mood or occasion. Compared with simpler string lights, this model provides a richer feature set but requires a nearby power source, which could be a constraint in some dorm setups. Its flexibility makes it ideal for seasonal decor or special events, but some users might find the setup slightly complex and the remote range limiting for larger spaces.
Pros:
- Flexible length with photo clips and hooks
- Waterproof and portable for indoor and outdoor use
- Multiple lighting modes and timer for customization
Cons:
- Limited placement options without nearby USB port
- Remote control range may be insufficient for large rooms
- Setup can be slightly complex for first-time users
Best for: Students wanting to add ambiance with customizable lighting and decorative clips
Not ideal for: Spaces without accessible USB power sources or requiring extensive remote control range
Bottom line: A versatile, customizable string light set perfect for creating cozy atmospheres, with some limitations on placement and control range.
“A versatile, customizable string light set perfect for creating cozy atmospheres, with some limitations on placement and control range.”
As an Amazon Associate we earn from qualifying purchases.
Before You Start
Ensure your dorm room is clean and free of clutter. Confirm any restrictions on hanging or attaching items to walls or furniture to avoid policy violations. Measure your space to plan layout options.
Step-by-Step Instructions
Step 1: Assess your space and set a theme
Measure your dorm room dimensions and identify available wall, desk, and floor space. Decide on a color scheme or theme that matches your personality or interests.
Tip: Use painter’s tape or masking tape to mark out areas on the wall for visualization before hanging items.
Check: You have clear measurements and a defined theme, with a rough layout plan.
Step 2: Choose a color palette and decorative elements
Select bedding, curtains, rugs, and accessories that match your theme and color scheme. Purchase or gather these items accordingly.
Tip: Stick to 2-3 main colors to create a cohesive look and avoid cluttered visuals.
Check: All major decor items match your chosen palette, creating a harmonious look.
Step 3: Arrange furniture for optimal space and flow
Position your bed, desk, and storage units to maximize space and create a comfortable layout. Leave walking space and easy access to outlets.
Tip: Use a floor plan app or draw a simple sketch to experiment with arrangements before moving furniture.
Check: Furniture is arranged to maximize space, with clear pathways and accessible outlets.
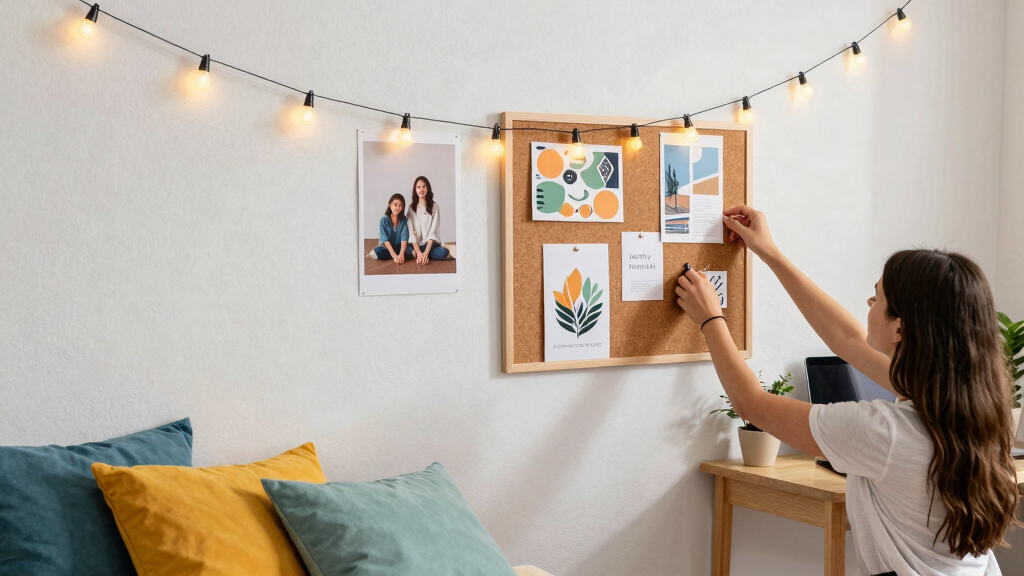
Step 4: Decorate walls with posters, photos, and artwork
Hang posters, pictures, or artwork using command hooks, adhesive strips, or poster putty. Arrange them in a balanced, visually appealing layout.
Tip: Create a gallery wall for a personalized display or cluster items for impact.
Check: Walls display your chosen decor securely, with a balanced, attractive arrangement.
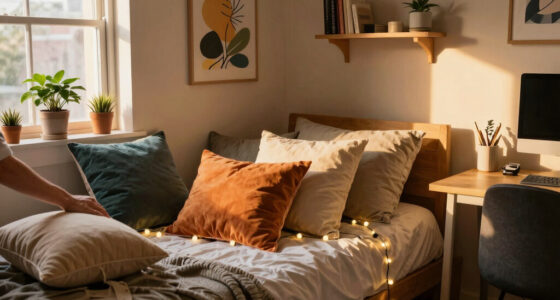
Step 5: Add lighting to create ambiance
Set up string lights, desk lamps, or LED strips to add warm, adjustable lighting. Avoid overly bright or harsh lights.
Tip: Ensure cords are safely tucked away and use extension cords if necessary.
Check: Room has layered lighting options that create a cozy, inviting atmosphere.
Step 6: Incorporate functional and decorative storage
Use storage bins, under-bed storage, and decorative baskets to keep your space organized without sacrificing style.
Tip: Label storage containers for easy access and maintain neatness.
Check: Your space remains tidy with accessible storage solutions, and decor remains uncluttered.
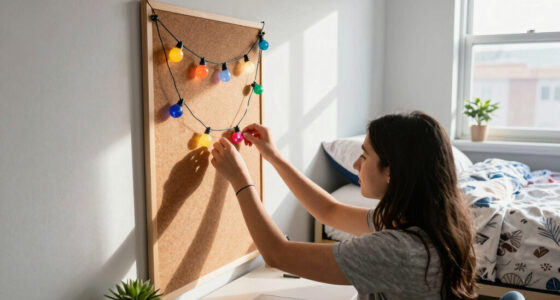
Step 7: Personalize with DIY projects or mementos
Create DIY decor, such as painted canvases, customized photo boards, or handmade wall hangings. Display souvenirs or personal items that bring you comfort.
Tip: Use inexpensive materials and simple techniques for DIY projects to keep costs low.
Check: Your room features unique, personal touches that make it feel truly yours.
Common Mistakes to Avoid
- Overcrowding the walls or surfaces with too many decorations — Limit items to avoid clutter; use a balanced layout and leave some empty space for a clean look.
- Ignoring dorm policies on hanging or attaching items — Review dorm rules beforehand and choose damage-free hanging methods like command hooks or lightweight posters.
- Choosing too many bright or conflicting colors — Stick to a cohesive color palette; balance bright accents with neutral tones for harmony.
Troubleshooting
Problem: Decor items falling or not sticking to the wall
Solution: Use appropriate adhesive hooks or strips designed for your wall type; avoid overloading them.
Problem: Limited space making the room feel cramped
Solution: Opt for multi-functional furniture, vertical storage, and keep surfaces clear to maximize open space.
Problem: Lighting not providing enough ambiance
Solution: Add more layers of lighting, such as string lights or softer bulbs, and position lamps for even coverage.
What Success Looks Like
Your dorm room reflects your personality with a cohesive color scheme, personalized decor, and functional layout. Walls are decorated securely, lighting creates a cozy atmosphere, and clutter is minimized. The space feels welcoming, organized, and uniquely yours.
Next Steps
Regularly update your decor with new photos or accessories to keep the space fresh. Maintain organization by re-evaluating storage solutions periodically. When moving out, pack decor carefully or take photos to recreate the look in your next space.
Frequently Asked Questions
How can I decorate my dorm without damaging the walls?
Use damage-free options like command hooks, adhesive strips, or poster putty. Avoid nails or staples that leave marks or damage paint.
What are affordable ways to personalize my dorm?
Create DIY decor, print personal photos, or repurpose items you already own to add a personal touch without spending much.
How can I make a small dorm room feel larger?
Use light-colored decor, mirrors, and vertical storage to create an illusion of space. Keep surfaces tidy and avoid clutter.
What should I avoid when decorating a dorm room?
Avoid heavy or permanent fixtures that violate dorm policies, overly dark colors that make the space feel small, and cluttered arrangements that hinder movement.