
Transforming your kitchen for $200 is doable with smart planning, DIY upgrades, and creative solutions. Focus on key areas like invigorating cabinets with paint or new hardware, repurposing vintage crates for storage, and adding open shelves to maximize space. Use budget-friendly fixtures and colorful accents to boost style without overspending. Properly organizing and choosing impactful updates can lead to a stunning before-and-after you’ll love. Keep going, and you’ll uncover how to make your kitchen truly shine on a tight budget.
Key Takeaways
- Focused on high-impact, budget-friendly updates like new hardware, paint, and repurposed storage solutions to transform the space.
- Repainted cabinets and replaced handles to refresh the look without costly replacements.
- Used affordable DIY projects such as open shelves and clear containers to improve organization and style.
- Swapped outdated fixtures and added small accessories to enhance functionality and aesthetics.
- Documented the transformation with before-and-after photos to showcase the dramatic change within a $200 budget.
Planning and Budgeting for a Budget-Friendly Makeover
Before you begin your kitchen makeover, it’s essential to plan carefully and set a realistic budget. Start by evaluating what needs updating most, whether it’s appliance upgrades or fresh storage solutions. Focus on affordable options that deliver the biggest impact, like swapping out outdated appliances for budget-friendly models or adding inexpensive storage solutions such as shelves or baskets. Prioritize your spending on items that improve functionality and appearance without overspending. Make a list of must-haves versus nice-to-haves, and track all costs to stay within your $200 limit. Being strategic and realistic about your goals helps you avoid overspending while still creating a fresh, functional space. Proper planning ensures your renovation stays on track and within budget. Additionally, understanding dog names can inspire creative and personalized touches in your home decor, making your space uniquely yours.
DIY Upgrades and Creative Solutions
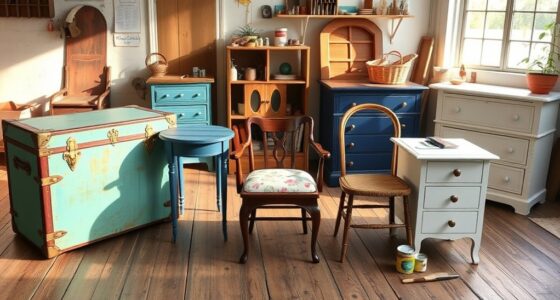
Once you’ve planned your budget and identified key updates, it’s time to get hands-on with DIY upgrades and creative solutions. Start by upgrading appliances—consider repainting or replacing cabinet handles for a fresh look without spending much. You can also repurpose items, like turning vintage crates into storage solutions for utensils or pantry essentials. Maximize your space with clever storage solutions; install open shelves or use tension rods under cabinets to hang mugs. Reorganize existing cabinets to optimize space, and use clear containers to keep everything visible and tidy. Incorporating smart storage solutions can greatly improve your kitchen’s functionality while staying within budget. These small, budget-friendly upgrades make a big difference in functionality and style. With a little creativity and effort, you’ll transform your kitchen into a more organized, inviting space without breaking the bank.
Painting and Wall Treatments to Refresh the Space
Painting and wall treatments are some of the most cost-effective ways to give your kitchen a fresh new look. Choosing the right color schemes can brighten the space and set the mood, whether you prefer bold contrasts or soft neutrals. Experimenting with wall textures, like adding a faux finish or applying textured wallpaper, can add depth and character without breaking the bank.
Consider these tips:
- Select colors that complement your cabinets and countertops for a cohesive feel
- Use painter’s tape and stencils to create patterns or accents
- Incorporate textured wall treatments to add visual interest and dimension
Updating Fixtures and Accessories on a Dime
Updating your fixtures and accessories is a simple way to make a big impact without overspending. Swapping out old cabinet hardware for fresh, modern pulls can instantly elevate your kitchen’s look. Look for affordable options at thrift stores or discount retailers to save money. Consider easy appliance upgrades like replacing outdated faucets or adding a new sink fixture to boost functionality and style. Small changes, such as switching out light fixtures or installing a new backsplash, can also add personality. These updates are budget-friendly and quick to implement, transforming your space without the need for major renovations. By focusing on key fixtures and accessories, you can refresh your kitchen’s appearance and enjoy a more polished, cohesive look—all within your $200 budget.
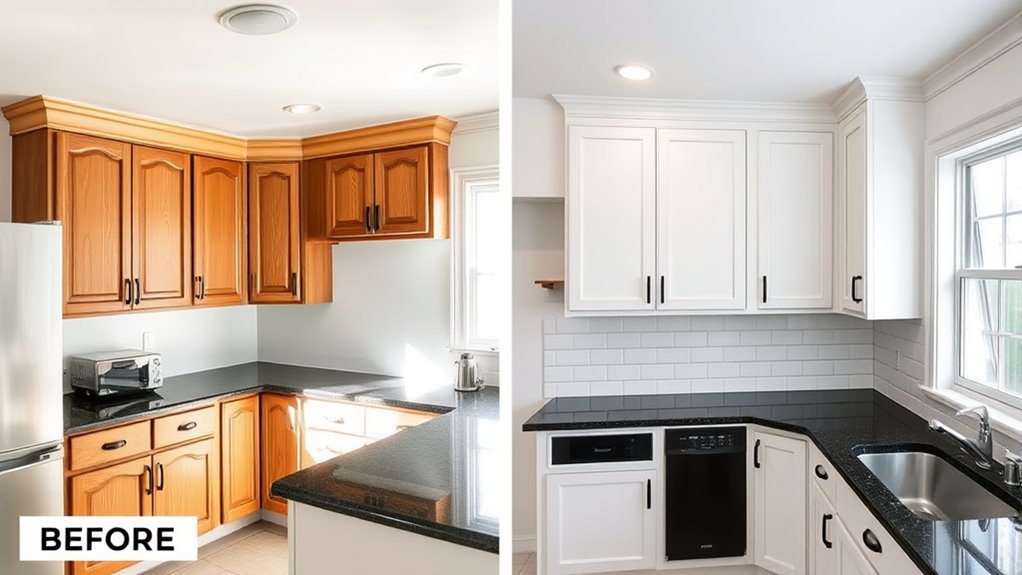
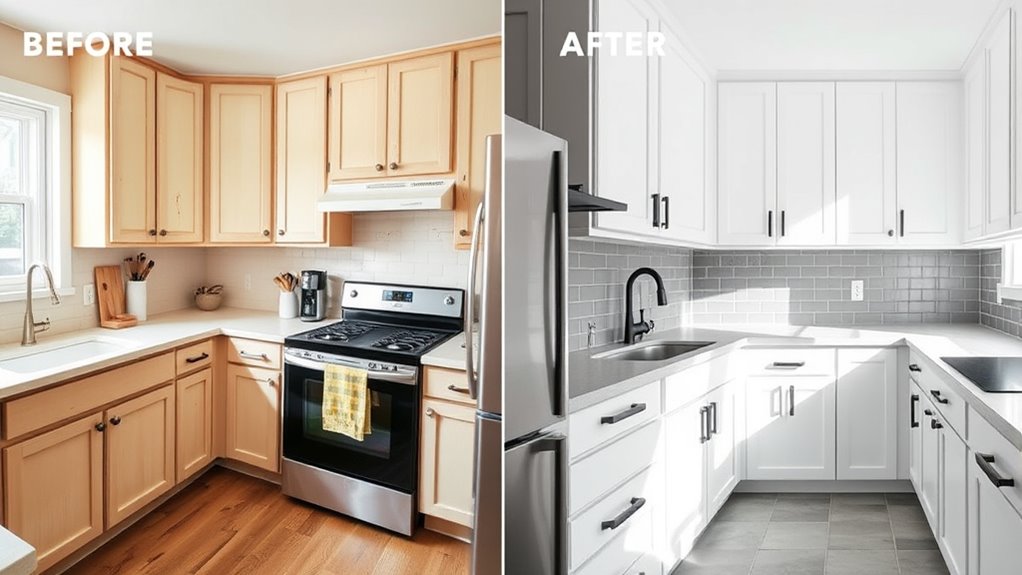
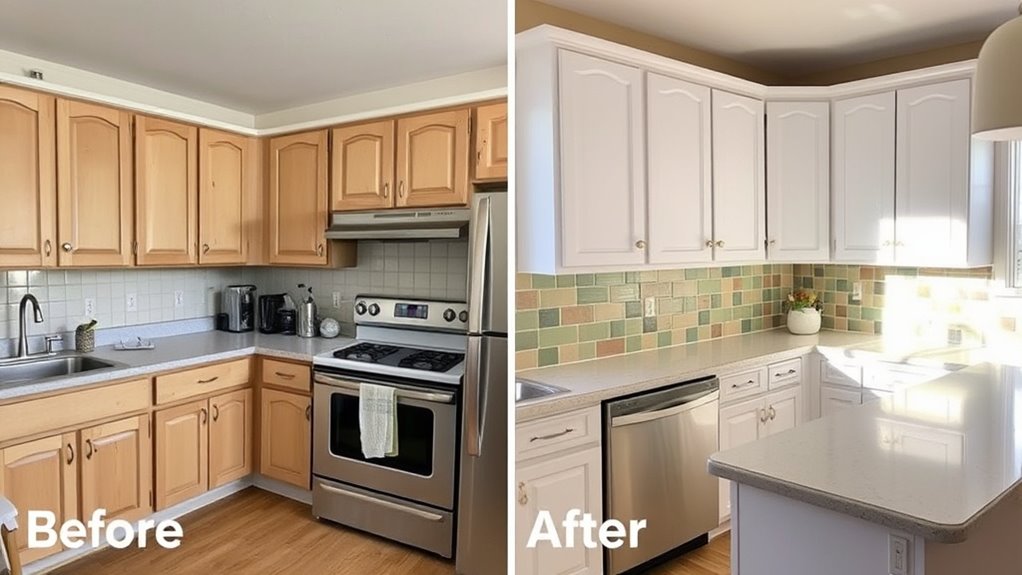
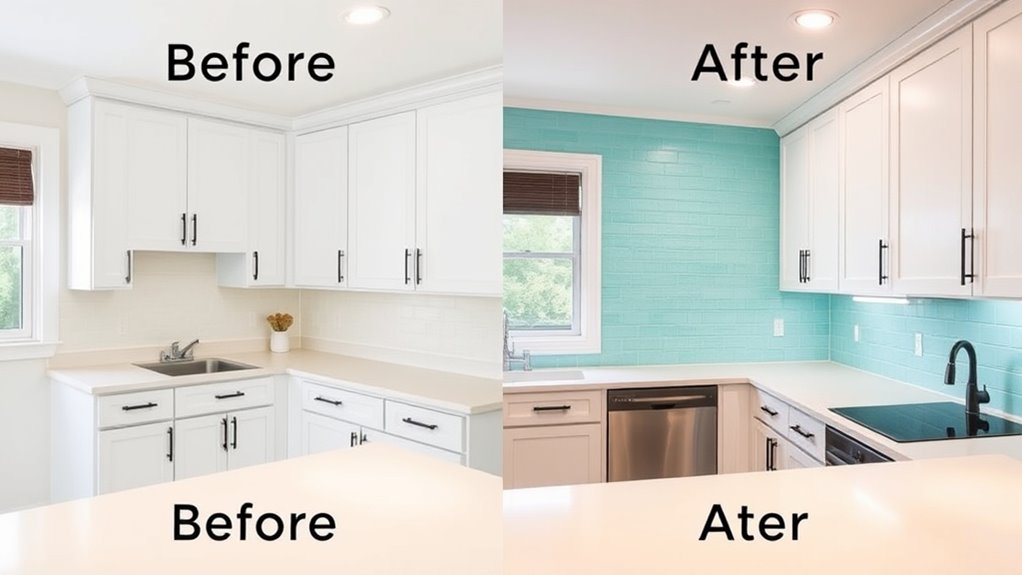
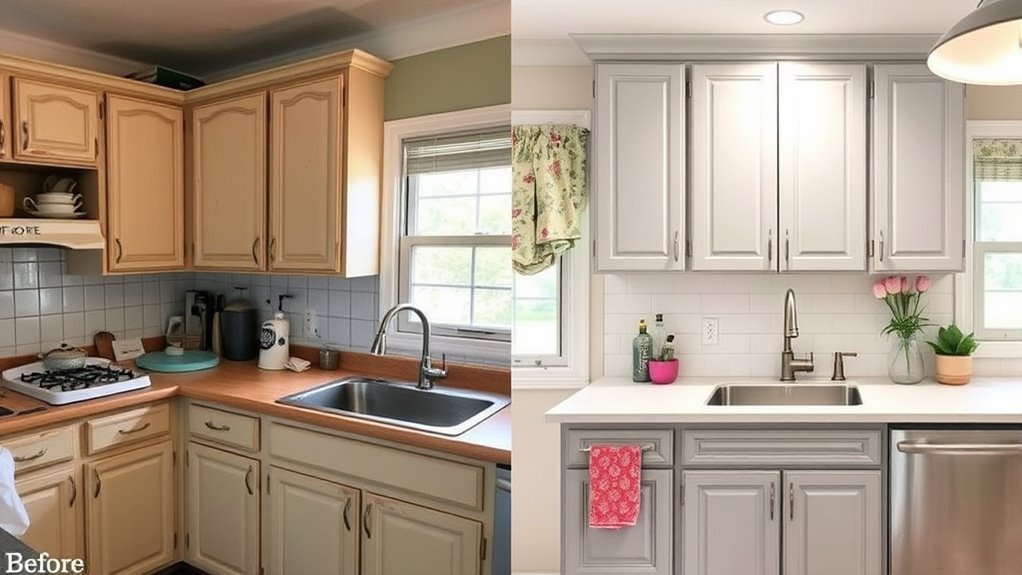
The Final Reveal: Before and After Transformations
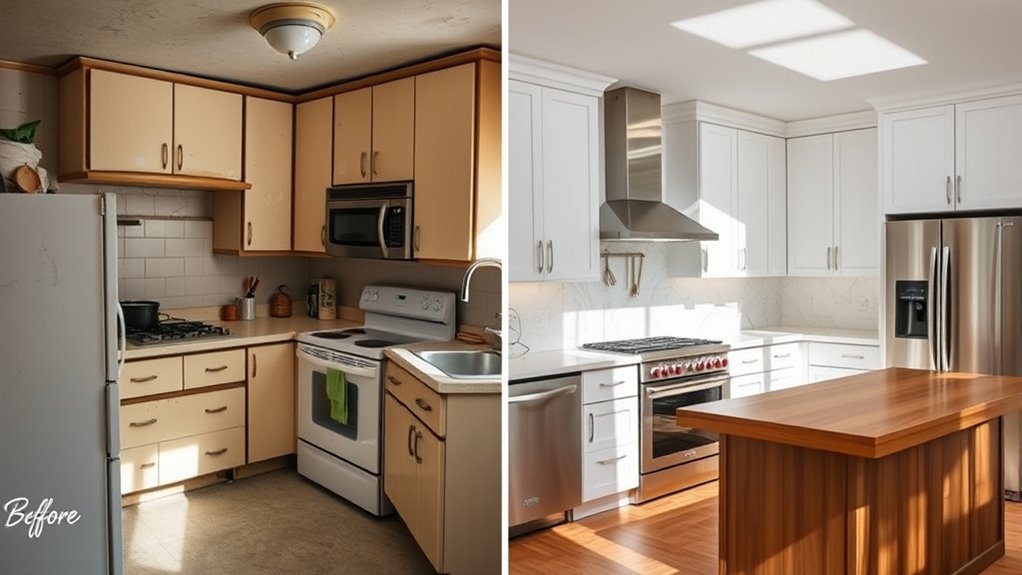
Seeing your kitchen’s transformation firsthand is the most rewarding part of your project. The before and after photos showcase your effort and creativity, proving that a small budget can yield big results. As you admire your new space, consider how your skills in cooking techniques and appliance maintenance enhance its functionality. Properly maintaining appliances not only prolongs their life but also keeps your kitchen efficient and safe. Remember, the key to ongoing success lies in consistent upkeep and smart design choices. Color accuracy can also play a role in making your new kitchen feel more vibrant and inviting, especially if you incorporate colorful appliances or decor.
Frequently Asked Questions
How Did You Prioritize Which Areas to Upgrade First?
You should start by evaluating your kitchen’s most urgent needs, then create a budget plan that aligns with your goals. Prioritize upgrades that make the biggest impact, like fixtures or cabinets, while sourcing affordable materials through thrift stores or sales. This approach helps you stay within budget, ensures efficient use of resources, and keeps your renovation focused on areas that will transform your space the most.
What Unexpected Challenges Did You Face During the Renovation?
During your renovation, unexpected delays and material shortages caught you off guard, making progress slower than planned. You had to adapt quickly, sourcing alternative materials or adjusting timelines to stay on track. These surprises tested your patience, but you managed to stay focused and flexible. In the end, overcoming these challenges helped you complete the project within budget, proving that careful planning and persistence are key.
Did You Need Any Special Permits or Approvals for Your Updates?
You might think permits required are just a hassle, but skipping them can turn into a disaster. During the approval process, you’ll need to check local regulations and submit plans if necessary. I found that understanding the permit requirements upfront saved me from costly fines or having to undo my work. Always verify what approvals are needed to guarantee your renovation stays legal and stress-free—trust me, it’s worth the effort!
How Did You Stay Within the $200 Budget Throughout the Project?
To stay within your $200 budget, focus on budget tips like shopping at thrift stores and repurposing materials. Use DIY strategies for tasks like painting and installing fixtures, which save money and add a personal touch. Plan your project carefully, avoiding unnecessary purchases. By staying disciplined and creative, you can transform your space without overspending, making the most of your budget while achieving impressive results.
What Tips Do You Have for Maintaining the New Look Long-Term?
To keep your kitchen looking fresh, focus on simple decor maintenance like regular cleaning and organizing to prevent clutter. Stick to budget tips by repurposing items and DIY projects for updates. Avoid overspending on trendy decor and instead, invest in timeless pieces. Consistent upkeep, like wiping surfaces and checking for minor repairs, will make sure your space stays inviting without breaking the bank.
Conclusion
With a little creativity and a splash of determination, you’ve turned your kitchen from dull to dazzling on a shoestring. Like a painter with a bright palette, you’ve crafted a space that feels fresh and inviting—all without draining your wallet. Your budget-friendly makeover proves that with clever ideas and hands-on effort, you can transform any room into a masterpiece. Now, your kitchen shines brighter than ever, a shining jewel in your home’s crown.