
To install a suction pool cleaner, start by checking your skimmer and suction line to make sure they’re clean and clear. Attach the hose to the cleaner, then adjust its length to match your pool size by cutting or adding sections. Connect the hose securely to the skimmer or dedicated suction port, ensuring all fittings are tight to keep good suction. If you want to make sure your cleaner works perfectly, keep going to learn more steps.
Key Takeaways
- Inspect and prepare pool equipment, ensuring skimmer port and suction line are clean and ready.
- Prime the hose by fully submerging it in water to prevent floating and secure to cleaner.
- Connect the hose to the cleaner and attach it firmly to the skimmer or dedicated suction port.
- Adjust hose length as needed by cutting or adding sections for proper fit and movement.
- Turn on the pool pump, check for leaks, and observe cleaner’s movement to ensure effective coverage.
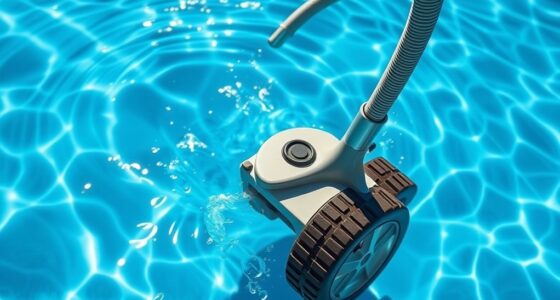
Installing a suction pool cleaner is a straightforward process that can save you time and effort in maintaining your pool. When you’re setting up your cleaner, you’re taking an important step toward easier pool maintenance and more consistent cleaning schedules. Proper installation guarantees that your cleaner operates efficiently, helping you keep your pool pristine with less manual effort.
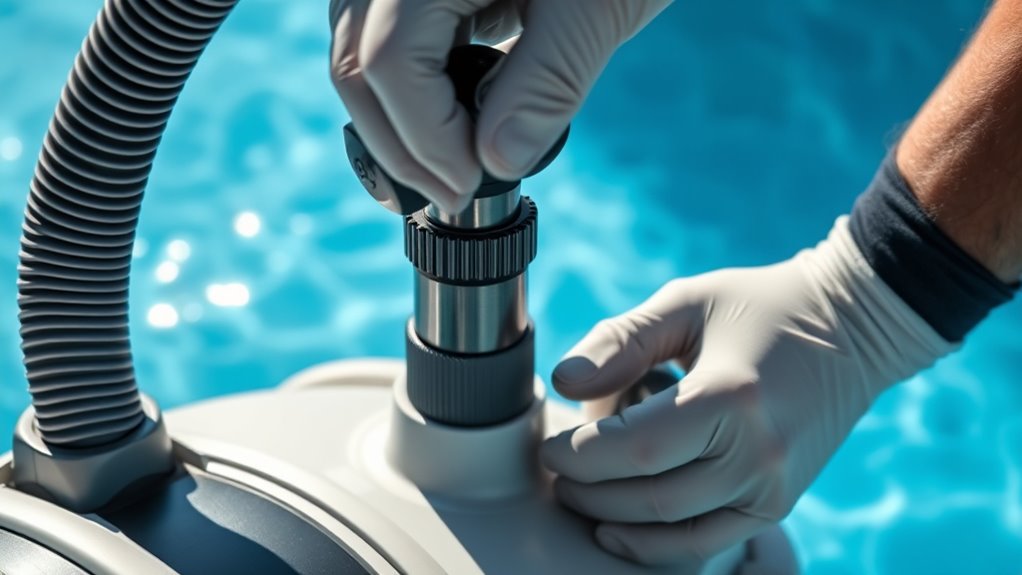
Begin by inspecting your pool’s equipment and identifying the skimmer and dedicated suction line. Most suction pool cleaners connect to the skimmer’s suction port or a dedicated suction line. If you’re using the skimmer port, make sure it’s clean and free of debris so the cleaner can work effectively. Attach the hose to the cleaner, making sure it’s fully extended and free of twists or kinks. This prevents interruptions during operation and guarantees optimal cleaning coverage. When connecting the hose, you might need to adjust the length to fit your pool’s size, cutting excess or adding hose sections as necessary.
Inspect and clean the skimmer or suction line before connecting the hose for optimal cleaning.
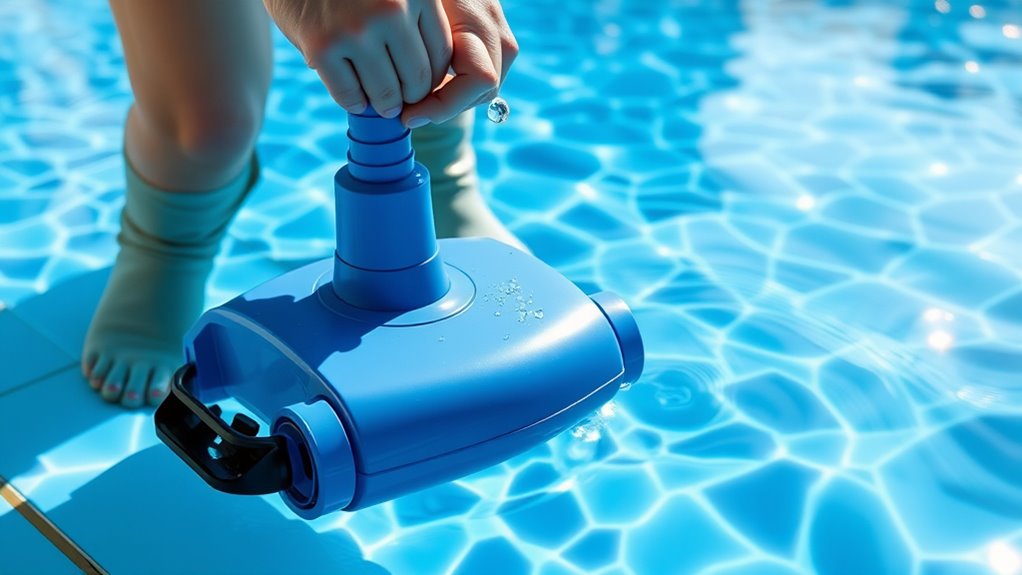
Next, you’ll want to prime the hose. This step involves submerging the hose in the pool to fill it with water, which prevents it from floating and ensures steady movement during operation. Once submerged, connect the hose to the cleaner and then to the skimmer or suction port. Make sure all connections are secure, as leaks can reduce suction power and impair cleaning performance. Some models come with a weight or float to help the hose stay submerged and balanced in the water. Regularly checking the hose and connections can help maintain optimal suction and cleaning efficiency. Additionally, understanding pool equipment and ensuring it functions correctly can further improve your cleaner’s performance.
For best results, consider water circulation patterns in your pool, as they can influence the cleaner’s ability to cover all areas effectively. After setup, turn on your pool pump to start the suction. Observe the cleaner’s movement and ensure it’s moving smoothly across the pool floor and walls. If it’s not moving properly, check for obstructions, hose kinks, or improper connections. Adjust the hose length if necessary, and verify that the cleaner is getting enough suction power from the pump. Proper installation and regular checks will help you maintain an effective cleaning schedule, reducing the need for manual scrubbing and skimming. A good understanding of suction power can also help troubleshoot performance issues and ensure efficient cleaning. Remember, a well-maintained hose and connections are essential for consistent cleaning results. Additionally, consulting your pool’s manual can provide specific instructions tailored to your cleaner model.
Keter Delivery Box for Porch with Lockable Secure Storage Compartment to Keep Packages Safe, One Size, Brown
DIMENSIONS: Exterior: 20. 9 in. W x 24. 4 in. D x 44 in. H
As an affiliate, we earn on qualifying purchases.
Frequently Asked Questions
Can I Use a Suction Pool Cleaner on All Pool Types?
You might wonder if a suction pool cleaner works on all pool types. While they’re compatible with many pools, check for pool compatibility first, especially if you have an above-ground or fiberglass pool. For best results, follow maintenance tips like cleaning the filter regularly and inspecting hoses. This guarantees your cleaner performs at its best and extends its lifespan, keeping your pool spotless regardless of the pool type.
How Often Should I Clean or Replace the Cleaner’S Filter?
Like a trusty sidekick from a bygone era, your pool cleaner’s filter needs regular attention. You should clean the filter once a week during peak use and perform a replacement according to the manufacturer’s recommended schedule, usually every 1-3 months. Proper filter maintenance guarantees peak suction power and prolongs the cleaner’s life. Don’t wait for performance to falter; stay proactive with your replacement schedule.
Is It Necessary to Remove the Cleaner After Each Use?
You don’t need to remove your suction pool cleaner after each use, but proper maintenance tips suggest doing so regularly to prolong its lifespan. Storing solutions involve rinsing the cleaner thoroughly and drying it before storage to prevent mold and damage. Keeping it in a cool, dry place when not in use helps avoid unnecessary wear. Regular maintenance ensures your cleaner stays effective and ready for your next swim season.
Will a Suction Cleaner Work in a Very Shallow Pool?
Ever wonder if your suction cleaner can handle a very shallow pool? It can, but keep in mind that in a shallow pool, the cleaner’s effectiveness might decline because of limited water volume and debris movement. Will it clean as thoroughly as in a deeper pool? Not always. You might need to manually assist or adjust the cleaner to make sure it reaches all areas, maximizing its cleaning efficiency in a shallow pool.
How Do I Troubleshoot if the Cleaner Isn’T Moving Properly?
If your pool suction cleaner isn’t moving properly, start with pool suction issues—check for clogs or debris blocking the skimmer, pump basket, or hoses. make certain the hoses are properly connected and not kinked. Next, examine the cleaner for tangled brushes or obstructions. For cleaner troubleshooting, verify the vacuum plate is correctly positioned and the water flow is adequate. Adjust the flow rate if needed to improve movement and cleaning efficiency.

VEVOR Package Delivery Boxes for Outside, 38.6 in Mailbox for Parcel with Lock, Galvanized Steel Package Drop Box with Anti-Theft Design, Weather-Resistant Package Mailbox for Home and Office, Black
Anti-Theft Protection: Our parcel delivery boxes, with sophisticated internal anti-theft plate design, can avoid hands reaching in from...
As an affiliate, we earn on qualifying purchases.
Conclusion
Now that you know how to install your suction pool cleaner, you’ll enjoy a cleaner pool with less effort. Did you know that properly installed pool cleaners can reduce algae growth by up to 70%? That means less scrubbing and more relaxing in your crystal-clear water. Keep your cleaner maintained and follow the steps carefully, and you’ll save time and money. Happy swimming!

Gxzsk Handheld Vacuum Cordless, 15000PA Strong Suction Hand Held Car Vacuum Cleaner Rechargeable, Portable Hand Vacuum with Multi-Nozzles & Washable Filter for Home Office, Car, Pets
🌀【15000PA Strong Suction Power】The handheld vacuum cordless is equipped with an advanced high-speed motor that provides powerful suction...
As an affiliate, we earn on qualifying purchases.

Shark WANDVAC Cordless Hand Vac, Lightweight, Versatile and Portable at 1.4 lbs., Powerful Suction for Pet Hair, Charging Dock, One-Touch Empty for Car & Home, Duster Crevice Tool, Black, WV201BK
SHARK IS THE #1 HAND VACUUM BRAND IN THE US ABOVE $50* *Source: Circana, LLC, Retail Tracking Service,...
As an affiliate, we earn on qualifying purchases.