
To restore scratched headlights with a toothpaste hack, select a non-gel, mild abrasive toothpaste, and apply a generous amount to a soft, damp cloth. Gently buff the surface in circular motions, avoiding harsh pressure or abrasive materials like steel wool. Make certain the headlight is clean and dry beforehand. After polishing, applying a UV sealant helps preserve the clarity. For deeper scratches or long-term results, more advanced steps may be needed—learn more to get the best results.
Key Takeaways
- Use a non-gel, mild abrasive toothpaste for effective headlight polishing.
- Apply toothpaste with a soft cloth in gentle, circular motions to avoid scratches.
- Clean headlights thoroughly before applying toothpaste to prevent debris-induced damage.
- Avoid excessive pressure during buffing to prevent dull spots or fine scratches.
- Seal the headlights with UV protective coating after restoration for longer-lasting clarity.
If your car’s headlights have become cloudy or yellowed, you might be surprised to learn that a simple household item like toothpaste can help restore their clarity. This DIY restoration method is popular because it’s affordable, easy, and doesn’t require any specialized tools. However, it’s essential to understand the proper technique to avoid common mistakes that could cause more harm than good. Many car owners jump into this process without enough research, leading to subpar results or even damaging their headlights further.
Using toothpaste to restore headlights is affordable and easy but requires proper technique to avoid damage.
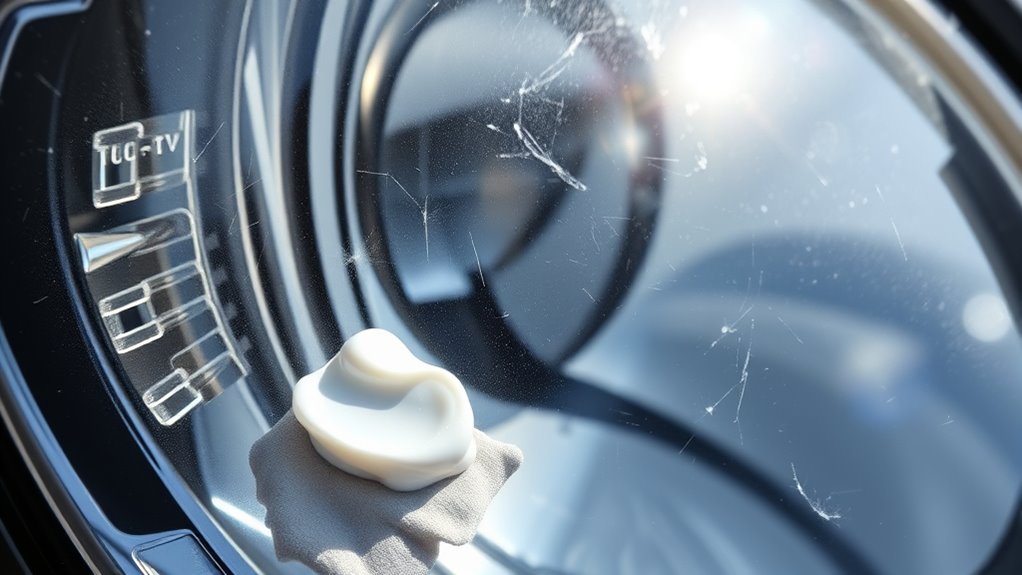
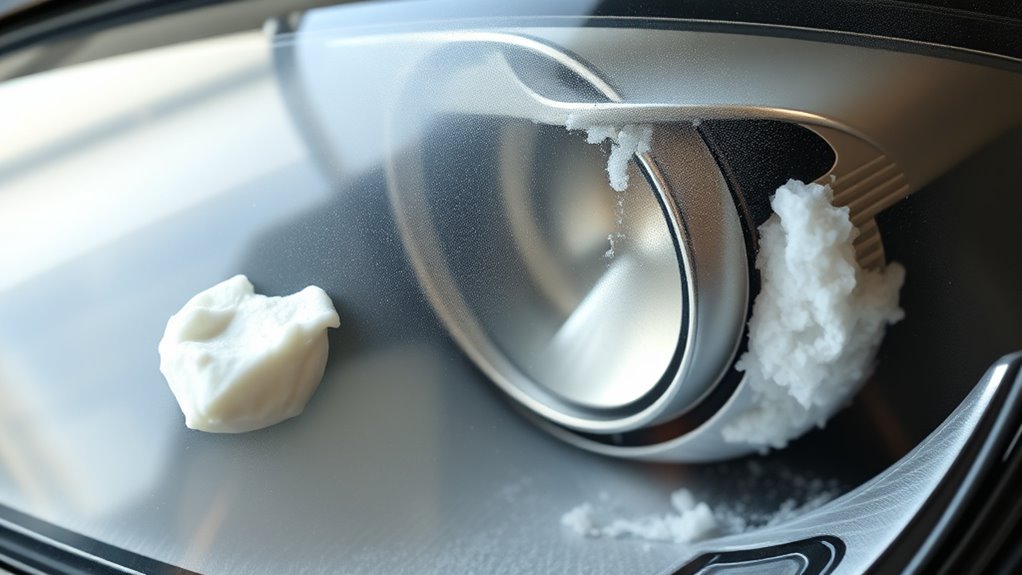
The first step is to pick the right toothpaste. You should use a non-gel, abrasive toothpaste that contains baking soda or similar mild abrasives. Gel toothpastes are less effective because they tend to lack the scrubbing power needed for headlight restoration. Once you’ve selected the appropriate toothpaste, apply a generous amount to a soft, damp cloth or a microfiber towel. It’s important to avoid harsh scrubbing or using abrasive materials like steel wool, which can scratch the plastic surface. Instead, use gentle, circular motions and apply consistent pressure to buff out the oxidation.
Many people make the common mistake of rushing through this process or skipping the cleaning step. Before starting, wash the headlights thoroughly with soap and water to remove dirt, grime, and debris. Otherwise, these particles can cause scratches during the polishing process. After cleaning, dry the surface completely to ensure the toothpaste adheres evenly. When you start buffing, don’t press too hard—excessive force can create fine scratches or dull spots that are difficult to fix later. Take your time, and work in small sections, frequently checking your progress.
Another mistake is neglecting to protect the headlight after the restoration. Once you’re satisfied with the clarity, it’s advisable to apply a clear coat or UV sealant to prevent future yellowing or oxidation. This extra step extends the life of your DIY restoration and keeps your headlights looking clear longer. If you skip this, you might find yourself repeating the process more often, which defeats the purpose of a quick fix.
While toothpaste can be effective for minor scratches and oxidation, it’s not a permanent fix. For deeper scratches or severe cloudiness, professional headlight restoration kits or professional services might be necessary. Always remember that DIY restoration with toothpaste is best suited for superficial damage. By avoiding common mistakes—such as using the wrong toothpaste, rushing the process, or neglecting headlight protection—you’ll maximize your chances of restoring your headlights effectively without causing additional damage. Additionally, understanding the types of headlight materials can help determine whether toothpaste is suitable for your headlights or if a different approach is needed.
Frequently Asked Questions
Can Toothpaste Fix Deep Scratches or Only Surface Blemishes?
You might wonder if toothpaste can fix deep scratches or just surface blemishes. Generally, toothpaste, especially with gentle chemical abrasives, only works on minor scratches and surface marks. It’s not effective for deep scratches because the abrasives can’t reach deep enough to smooth out significant damage. For deep scratches, you’ll need professional repair or specialized products designed to remove or fill in deeper imperfections.
How Long Does the Headlight Restoration Last After Using Toothpaste?
After using toothpaste to restore your headlights, the longevity typically lasts a few months, depending on driving conditions and exposure to elements. To maximize headlight longevity, follow regular maintenance tips like applying a UV sealant and parking in shaded areas. Keep your headlights clean and avoid harsh chemicals. This way, your restored headlights stay clearer longer, ensuring better visibility and safety on the road.
Is There a Specific Type of Toothpaste Best for Headlight Repair?
They say “a stitch in time saves nine,” so choosing the right toothpaste matters. For headlight repair, use a non-gel, plain white toothpaste with low abrasiveness and moderate fluoride content. Avoid gels or whitening kinds, as they can worsen scratches. The best toothpaste gently buffs out scratches without causing more damage. Remember, the less abrasive, the better your headlights will look and last longer.
Are There Any Risks or Damages From Using Toothpaste on Headlights?
Using toothpaste on headlights can cause risks like damaging the material integrity due to abrasive particles. You might trigger chemical reactions that weaken the surface or cause further scratches. If you’re not careful, it could lead to cloudiness or uneven aging over time. Always opt for a gentle, non-abrasive cleaner designed for automotive surfaces to avoid unintended damage and preserve your headlights’ clarity and durability.
Can Toothpaste Be Used on Plastic or Glass Headlights?
Think of headlights as the eyes of your car, needing clarity to see clearly ahead. You can use DIY solutions like household remedies, including toothpaste, on plastic or glass headlights. Toothpaste acts like a gentle polish that can reduce cloudiness and scratches. Just remember, it’s a quick fix and may not work for severe damage. Always test a small area first, and avoid harsh abrasives to prevent further harm.
Conclusion
Just like the phoenix rising from the ashes, your headlights can regain their clarity and brilliance. With this simple toothpaste hack, you hold the power to restore your car’s glow and confidence on the road. Don’t let scratches dull your shine—embrace this easy fix and bring back that new-car sparkle. Remember, every journey deserves to be seen clearly; your headlights are the beacon guiding you home.