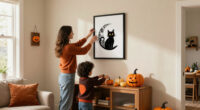
Make a spooky Halloween wall-art panel featuring a dark sky, a glowing moon, and flying bats, then hang it securely indoors. This beginner-friendly project uses an inexpensive canvas or sturdy cardboard, acrylic paint, and paper or cardstock shapes. It suits adults and older children working with adult help for cutting or hanging. Allow about 2-3 hours of hands-on work, plus drying time.

Get decor and gifts delivered free — and shop member deals
- Fast, free delivery on millions of items
- Access to Prime Big Deal Days deals on October 6–7
- Prime Video, Amazon Music and more included

Whaline Halloween Wall Art Prints, 10-Piece Set, Unframed
- ✔ Print count: 10
- ✔ Material: Paper
- ✔ Small-size quantity: 3 prints at 8 × 10 in

97 Decor Vintage Halloween Wall Art, 12 Unframed Gothic Ghost Prints
- ✔ Brand: 97 Decor
- ✔ Print count: 12
- ✔ Material: Paper

Vintage Ghost and Black Cat Canvas Wall Art Print, Unframed, 8 x 10 Inches
- ✔ Material: Canvas
- ✔ Size: 8 × 10 in
- ✔ Format: Unframed art print
Difficulty: Beginner | Time: 2-3 hours, plus drying time
What You’ll Need
Tools & Materials:
- Small or medium stretched canvas, or a flat piece of sturdy cardboard
- Acrylic paint in black or navy, white, yellow, and optional orange
- Paintbrushes, including one broad brush and one small detail brush
- Water cup and palette or disposable plate
- Pencil and scrap paper
- Black cardstock or construction paper
- Scissors
- Glue stick or craft glue
- Painter’s tape
- Drop cloth, old newspaper, or another work-surface covering
- Picture-hanging strip or suitable wall hook
Knowledge:
- Basic painting and scissor skills
- Ability to choose a wall location and follow the hanging hardware’s instructions
- Adult supervision for children using scissors or hanging the finished piece
Choose a panel that is light enough for the hanging method you have. Check the package weight limit for adhesive hanging strips, and use a wall hook or another rated fastener if the panel is too heavy. Protect the work surface and wear clothes that can get paint on them. Keep paint and small cutouts away from pets and young children.
Whaline Halloween Wall Art Prints, 10-Piece Set, Unframed
For shoppers who want a wall to read as a Halloween display at a glance, the Whaline 10-piece set offers the most useful balance of subject variety and arrangement options in this lineup. Bats, pumpkins, ghosts, skulls, crows, and witchy designs give us more to work with than a collection centered mainly on ghosts and gothic figures. Its three listed print sizes also make it easier to create a staggered gallery rather than a uniform grid, or to spread the art across a party area and nearby room.That flexibility is why we rank it ahead of the 97 Decor set, which has more prints but lists them all at the same 10 × 8-inch dimensions. Whaline is still paper, not canvas or rigid wall décor, and the set arrives without frames. Buyers should account for the added framing or mounting effort, and paper needs more care than a finished, framed piece. Choose this set when variety and wall coverage matter more than having a single sturdy focal artwork; skip it if you want a ready-to-hang item or a cohesive ghost-only look.
Pros:
- Ten prints cover a broad range of Halloween subjects.
- Three sizes support a more varied gallery arrangement.
- Can be distributed across several indoor rooms or party spaces.
- Creepy vintage and witchy themes suit a traditional spooky display.
Cons:
- Frames are not included, so displaying the paper prints takes extra planning.
- Paper may be less durable than framed or rigid wall art.
Best for: Decorators who want a varied Halloween gallery across a bedroom, living room, office, or party space.
Not ideal for: Buyers seeking framed, ready-to-hang art, a single substantial focal piece, or a narrowly ghost-themed collection.
Bottom line: We recommend Whaline for the most adaptable spooky gallery, provided you are comfortable sourcing frames or choosing another display method.
“We recommend Whaline for the most adaptable spooky gallery, provided you are comfortable sourcing frames or choosing another display method.”
97 Decor Vintage Halloween Wall Art, 12 Unframed Gothic Ghost Prints
If the desired look is less mixed Halloween imagery and more vintage ghost gallery, the 97 Decor 12-print set is the clearest match. Its subjects include ghosts, witches, bats, and ravens, bringing a gothic mood without relying on pumpkins and skulls as the main visual cues. The set’s 12 portrait-format prints offer enough pieces to build a repeated gallery pattern or decorate more than one small indoor area.Compared with Whaline, this set supplies two additional prints but gives up the size variety that can make a display feel layered. All 12 are listed at 10 × 8 inches, so the arrangement will look more consistent and may be less useful when a wall needs a mix of larger and smaller artwork. Like Whaline, it is paper and unframed; unlike the single canvas option, it gives you a collection rather than one material-forward accent. It is explicitly intended for indoor use, so we would keep it to interior walls. Pick it for a consistent ghostly mood, but consider Whaline if varied subjects and scale are more important.
Pros:
- Includes 12 prints for a multi-piece gallery arrangement.
- Ghost, witch, bat, and raven subjects create a coherent gothic mood.
- Uniform listed dimensions make a regular grid easier to plan.
- Intended for indoor spaces such as bedrooms, offices, and bathrooms.
Cons:
- Unframed paper prints require a separate display solution.
- All prints share the same listed dimensions, limiting size contrast.
- Indoor use is specified, so it is not the choice for outdoor decoration.
Best for: Shoppers planning an indoor gallery with a vintage, gothic, and ghost-forward Halloween look.
Not ideal for: Anyone needing outdoor art, framed prints, varied print sizes, or a single large focal image.
Bottom line: Choose 97 Decor when a consistent vintage ghost gallery matters more than mixed sizes or broad Halloween subject variety.
“Choose 97 Decor when a consistent vintage ghost gallery matters more than mixed sizes or broad Halloween subject variety.”
Vintage Ghost and Black Cat Canvas Wall Art Print, Unframed, 8 x 10 Inches
Not every spooky wall needs a dozen prints. This vintage ghost and black cat canvas is the most focused option here: one image in an 8 × 10-inch format, with a dark, mystical look that can work as a small Halloween accent or fit into year-round gothic and dark-academia décor. Its fade-resistant canvas material distinguishes it from the two paper collections, which are designed to create a broader display through multiple images.The difference in purpose is important. Whaline and 97 Decor make more sense when we need enough artwork to fill a wall or establish a whole gallery; this piece is better suited to a shelf-side wall, a small nook, or a larger arrangement that needs one Halloween-themed image. It is still unframed, and the compact size limits its impact when hung alone on a broad wall. The supplied orientation information is not fully consistent: the description calls it 8 × 10 inches, while the specs list landscape orientation, so buyers who need a precise layout should verify the listing details. Choose it for a smaller, more enduring gothic accent, not as a substitute for a multi-print set.
Pros:
- Canvas construction sets it apart from the paper print collections.
- Fade-resistant material is specified in the product description.
- Unframed format leaves the framing choice open.
- Ghost and black cat artwork can suit Halloween and year-round gothic styling.
Cons:
- At 8 × 10 inches, it may look undersized as a standalone piece on a large wall.
- No frame is included.
- The orientation details should be checked if a specific layout is essential.
Best for: Buyers who want one small Halloween canvas that can complement gothic or dark-academia décor beyond the season.
Not ideal for: Anyone covering a large wall, wanting a coordinated multi-print gallery, or expecting a frame to be included.
Bottom line: This canvas is the right pick for a compact gothic accent, but Whaline or 97 Decor will serve buyers who need a full spooky wall display better.
“This canvas is the right pick for a compact gothic accent, but Whaline or 97 Decor will serve buyers who need a full spooky wall display better.”
As an Amazon Associate we earn from qualifying purchases.
Before You Start
Pick a simple composition before painting: a moon near one upper corner, a dark sky, and three to five bats flying across the open space. Decide whether you are painting on canvas or cardboard. Canvas is sturdier and has a finished edge; cardboard is a low-cost option but may bend if it gets wet. Test colors and glue on scraps if you are unsure how they will look or dry. Do not hang the art until every painted area and glued shape is fully dry.
Step-by-Step Instructions
Step 1: Prepare the panel and work area
Cover a flat table with newspaper or a drop cloth. Set the panel on the covered surface and wipe off dust. If using cardboard, check that it lies flat; trim ragged edges before painting. Use painter’s tape along the canvas sides or around the cardboard face if you want a clean border.
Tip: Keep a paper towel and clean water nearby for paint spills. Avoid soaking cardboard, which can warp.
Check: The panel is clean, stable, and positioned face-up with enough space around it to paint.
Step 2: Plan the moon and bat placement
Lightly sketch a large circle for the moon and a loose flight path for the bats with a pencil. Place the moon off-center rather than directly in the middle, and leave clear space around the shapes. Draw a few small bat silhouettes on scrap paper, or use a simple wide-winged shape that will be easy to cut out.
Tip: Keep the bats large enough to cut cleanly. Tiny details may disappear against a dark background.
Check: The layout has a visible focal point, room for the bats, and no crowded shapes touching the panel edges.
Step 3: Paint the night sky
Use a broad brush to cover the panel with black or navy acrylic paint, working around the penciled moon. If it is easier, paint over the moon area too and add a pale moon later. Apply a thin, even coat rather than a thick puddled layer. Let the first coat dry according to the paint label, then add a second coat where the panel shows through.
Tip: Brush in one direction for the final pass to reduce visible streaks. Leave the panel flat while the paint dries.
Check: The background looks evenly dark, with no wet pools or bare patches, and feels dry before you continue.
Step 4: Create the moon
Paint the moon with white or pale yellow acrylic, filling the penciled circle with smooth strokes. For a softly eerie look, dab a small amount of white into the yellow while the paint is still slightly wet, then blend the edge lightly. Let the moon dry. If you painted the whole panel dark, build the moon with two thin coats instead of one thick coat.
Tip: Do not keep brushing paint that has started to tack up; that can lift the underlying color and leave rough marks.
Check: The moon is opaque enough to stand out from the sky and has a clean, readable outline.
Step 5: Cut out the bats
Trace the bat shapes onto black cardstock and cut them out with scissors. Make a mix of sizes if you want distance in the scene: use smaller bats near the moon and larger ones closer to the panel edges. Lay the cutouts on the dry panel before gluing so you can adjust the spacing.
Tip: For children, an adult should handle cutting detailed shapes. A few broad, simple silhouettes usually look clearer than many tiny bats.
Check: The cutouts have intact wings and bodies, and the arrangement looks balanced before adhesive is applied.
Step 6: Attach the bats and add details
Apply a small amount of glue to the back of each bat, especially the body and wing tips, then press it onto the panel. Hold each shape in place briefly. Add optional small details, such as a few white stars, orange dots, or a thin halo around the moon, using a detail brush. Keep decorations sparse so the main shapes remain easy to see.
Tip: Use glue sparingly. Excess glue can seep around paper edges or wrinkle the cardstock.
Check: The bats lie flat and stay attached when the panel is moved gently, and any added paint details are dry.
Step 7: Dry, inspect, and finish the panel
Leave the artwork flat until the paint and glue have dried completely; follow the product labels for drying times. Remove painter’s tape slowly by pulling it back over itself. Touch up any small gaps with a fine brush, then check the panel edges and back for loose paper, wet paint, or drips.
Tip: Do not apply a clear spray finish unless its label says it is compatible with your paint and paper, and use it only with suitable ventilation.
Check: The artwork is dry to the touch, the cutouts are secure, and the edges and back are clean enough to handle.
Step 8: Hang the art securely
Choose an indoor wall away from heat sources, damp areas, and busy doorways. Attach a picture-hanging strip or hook using its package directions and the panel’s weight. Press the panel into place, then step back and check that it is level and visible from the room entrance. If using adhesive strips, wait the stated set time before hanging or loading them.
Tip: Do not rely on an adhesive strip with a weight rating below the panel’s weight. Avoid hanging the piece above a crib, bed, or place where a falling object could hurt someone.
Check: The panel sits level, does not shift when lightly checked, and is supported by hardware rated for its weight.
Common Mistakes to Avoid
- Painting a thick, wet coat that wrinkles cardboard or takes a long time to dry. — Use thin coats, avoid adding water to cardboard, and let each coat dry before adding another.
- Cutting bats too small or adding too many details. — Use a few bold silhouettes that remain visible against the dark background; test their size on the panel before gluing.
- Gluing the cutouts before the painted surface is dry. — Wait until the paint is dry to the touch so the paper does not slide, wrinkle, or lift paint.
- Using hanging hardware that cannot support the finished panel. — Check the panel’s weight and the hardware rating, follow its installation instructions, and choose a stronger fastener when needed.
Troubleshooting
Problem: The dark paint looks streaky or the panel shows through.
Solution: Let the coat dry, then add another thin coat with a broad brush. Use consistent strokes and avoid repeatedly brushing paint that is already drying.
Problem: The moon looks patchy against the dark background.
Solution: Allow it to dry fully, then apply another thin coat of pale yellow or white. Keep the strokes inside the moon outline and let each coat dry before adding the next.
Problem: The cardstock bats curl or lift at the edges.
Solution: Press them flat while the glue sets, using a clean sheet of paper and a light book as a weight if the surface is level. Add a small dab of glue under any loose wing tip and let it dry flat.
Problem: The panel tilts or begins to come away from the wall.
Solution: Remove it and check the wall surface, panel weight, and hanging hardware instructions. Replace an under-rated or poorly attached strip with hardware suitable for the weight and wall type.
What Success Looks Like
The finished piece has an evenly dark background, a clearly visible moon, and secure bat shapes arranged with enough open space to read at a glance. Paint and glue are dry, the panel is clean, and the hanging hardware supports it without slipping or tilting. View it from across the room: the Halloween scene should still be recognizable without needing to inspect the details up close.
Next Steps
Keep the art indoors and away from moisture, direct heat, and prolonged strong sunlight. When Halloween is over, remove it according to the hanging-strip directions rather than pulling the panel away abruptly. Store it flat in a dry place with tissue or clean paper between it and other decorations. Before reusing it next year, check for loose bats, warped cardboard, or damaged hanging hardware and repair those points before rehanging.
Frequently Asked Questions
Can I make this Halloween wall art without a canvas?
Yes. Use sturdy, flat cardboard or a thick art board. Apply thin paint coats and keep the board flat while it dries to reduce warping. Choose a hanging method suited to the finished panel’s weight.
How can I make the project suitable for younger children?
Have an adult cut the bat shapes and handle wall hardware. Let children paint the sky and moon with washable, age-appropriate supplies, and use pre-cut shapes if they are not ready to use scissors safely.
How long should the artwork dry before I hang it?
Wait until both paint and glue are fully dry; drying time depends on the products, coat thickness, and room conditions. Follow the labels, and allow extra time if the surface still feels cool, tacky, or damp.
What can I use instead of cardstock bats?
Cut shapes from black construction paper or use lightweight craft foam. Test the adhesive on a scrap first, since heavier foam may need stronger glue and can add enough weight to affect how you hang the panel.
Halloween Picks
halloween
As an affiliate, we earn on qualifying purchases.