
To retrofit your home for wireless charging everywhere, start by identifying flat, non-metallic surfaces at least 1 inch thick, like wood or stone, suitable for embedding chargers. Choose compatible fast-charging pads and tools, then carefully carve cavities for flush mounting. Connect the charger to a proper power source, test its functionality, and conceal cables with clips or conduits. Optimize placement with indicators and keep devices within magnetic range for seamless charging. If you want detailed steps, continue exploring how to transform your space effortlessly.
Key Takeaways
- Identify suitable flat, non-metallic surfaces at least 1 inch thick for embedding wireless chargers.
- Select compatible, fast-charging wireless pads supported by appropriate power adapters with sufficient length.
- Carefully carve or modify surfaces to create flush-fitting housing for the chargers, ensuring proper depth and alignment.
- Connect chargers to power sources, then test with devices to confirm reliable, fast wireless charging functionality.
- Conceal cables within furniture or behind surfaces using clips, conduits, and strategic routing for a clean, integrated look.
Assessing Suitable Surfaces for Embedded Wireless Charging
Before installing embedded wireless charging, you need to evaluate if your surfaces are suitable. Flat, non-metallic surfaces at least 1 inch thick work best for wireless charging. Materials like wood, stone, quartz, or marble are ideal because they don’t interfere with the wireless power transmission. Metal surfaces can block or disrupt the signal, so avoid placing chargers there. Check the internal structure of your furniture—many pieces are made of particle board, which can be modified safely with proper tools. Use precise measuring and marking to determine the best spot for the charger, ensuring your device aligns correctly. Also, confirm you have easy access to power outlets or space to discreetly route cables. Proper surface assessment guarantees reliable and efficient wireless charging integration. Additionally, selecting compatible wireless charging pads designed for embedded installation can enhance performance and ensure safety. Considering material properties can also influence how well your surfaces transmit wireless power, making this an important factor in your planning. Understanding wireless power transfer principles can help you optimize placement for maximum efficiency and device compatibility. Incorporating smart home technology can further streamline your wireless charging setup and improve overall convenience.
Selecting the Right Wireless Charging Components and Tools
Choosing the right wireless charging components and tools is essential for a successful installation. First, pick a wireless charger compatible with fast charging standards, like the Anker QC 3.0, to ensure your devices charge quickly. Make sure the wireless charger can operate through the surface material thickness, ideally up to 1 inch, for proper functionality. Select a power adapter with sufficient wattage—usually 12V or higher—and a long cable to reach outlets easily. Use inexpensive or non-valuable surfaces for modifications to avoid damaging valuable furniture. Prepare your workspace with essential tools such as a chisel, hammer, and optionally a router, to carve out a precise housing for the wireless charger. Understanding Kia Tuning can help you select the best setup for your needs. Additionally, being aware of cookie management best practices can help you optimize your browsing experience while working on your retrofit project. Planning your layout carefully and considering paint sprayers for any surface refinishing can also contribute to a professional-looking result. Incorporating holistic approaches to health can further enhance your home environment by promoting overall wellness. These components and tools guarantee a seamless, efficient retrofit process.
Preparing Your Furniture or Countertop for Installation
To guarantee a smooth installation, start by flipping your furniture or countertop upside down onto a soft surface to prevent scratches. This allows you to access the underside easily and prepare for the wireless charging setup. Measure and mark the exact location where you want the charging pad to sit, ensuring it aligns with your device’s size and power needs. Use a drill with a hole saw or a router to carefully carve out a hole about 2-3 inches in diameter for the wireless charger. Confirm the thickness of your furniture surface—most chargers work well through materials up to 1 inch thick without extra modifications. Keep your workspace clean by vacuuming dust and shavings during carving to maintain a tidy environment and ensure proper installation. Check for material compatibility to ensure your furniture can support the installation without damage. Additionally, wireless charging standards can help you choose a compatible charger that fits your needs and device. As the automation of installation processes improves, you may find it easier to achieve precise cuts and placements with modern tools. Also, understanding market demand can guide you in selecting the most suitable charging solutions for your home environment. Incorporating proper safety precautions during installation can further prevent accidents and ensure a secure setup.
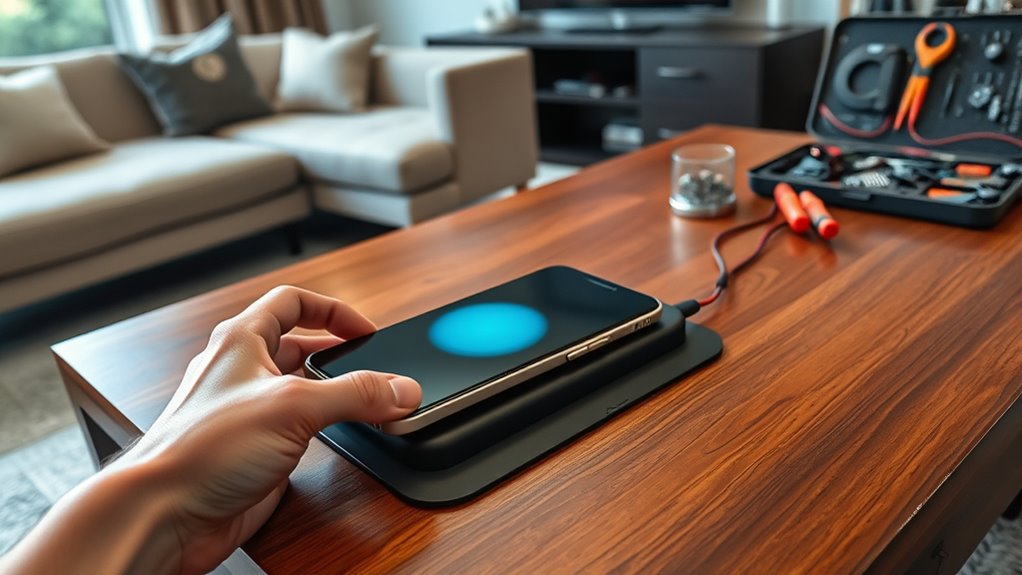
Carving and Installing the Wireless Charging Housing
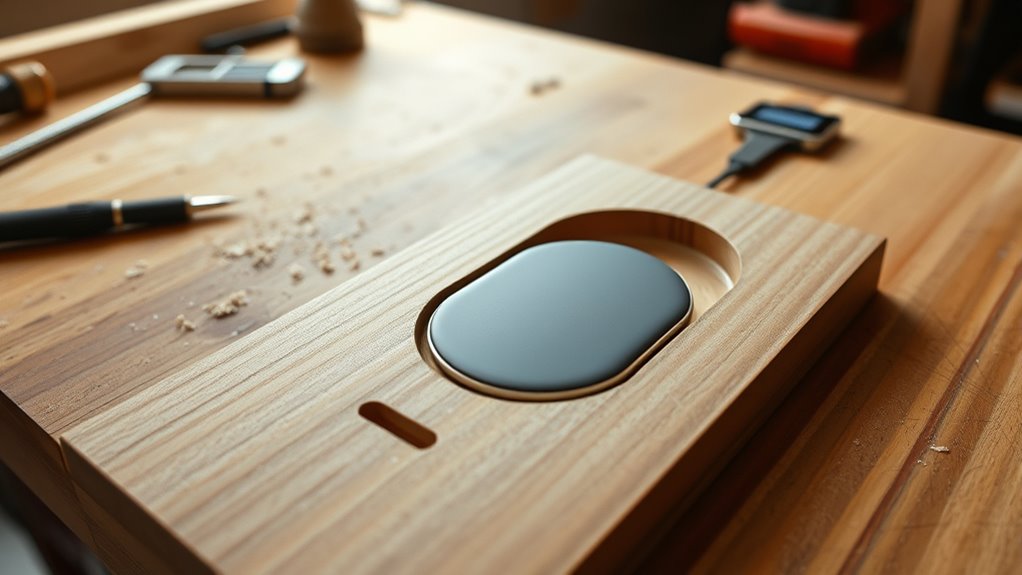
Begin by carefully tracing the outline of your wireless charger on the underside of the surface, including space for the cable, to guarantee precise placement. This step guarantees your wireless charging housing fits perfectly and functions reliably. Use a chisel, router, or suitable carving tool to gradually remove material from beneath the surface, creating a flush-fitting hole for the wireless charging pad. Remove small amounts of material at a time and frequently test-fit the pad to prevent damage and achieve a secure, seamless fit. Keep your workspace clean by vacuuming dust and shavings during carving, maintaining visibility and control. Adjust the depth of the carved hole as needed so the wireless pad sits securely and charges effectively through the surface, ensuring a durable, professional-looking installation. Additionally, understanding the electric power generation capabilities of bike generators can inspire innovative approaches to integrating renewable energy sources into your home setup. Incorporating proper ventilation during installation can also help manage dust and maintain safety throughout the process. For a smoother installation process, consider hybrid bike principles such as adjustable components to customize your setup for optimal performance and safety. Moreover, ensuring your workspace adheres to the store hours of local beauty retailers can help you acquire the necessary tools efficiently. Being aware of retail hours today can help plan your shopping trips for tools and supplies without inconvenience.
Connecting and Testing Your Embedded Wireless Charger
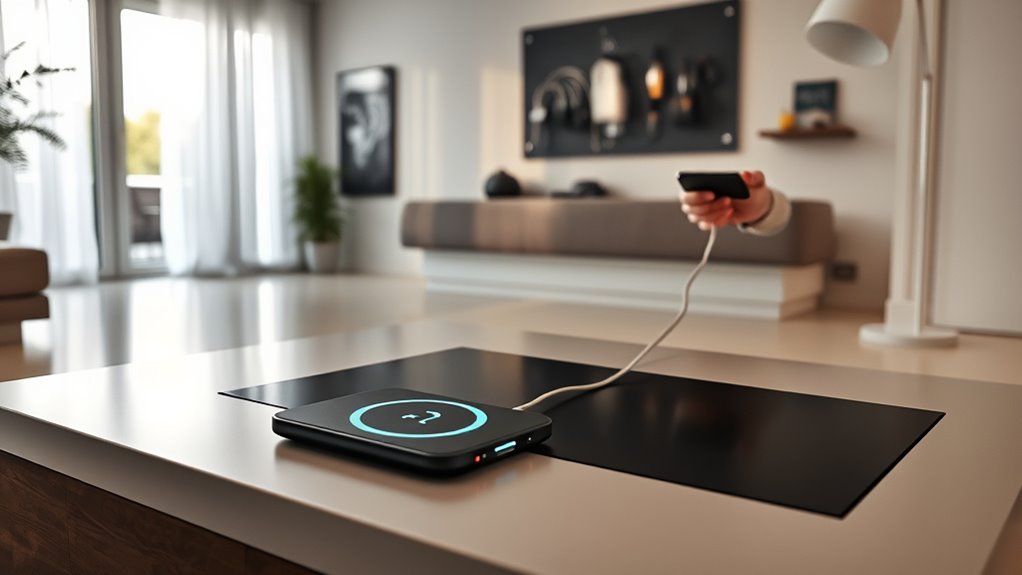
Start by connecting your wireless charger to a compatible power source, making certain it supplies the correct voltage and current. Then, follow the manufacturer’s testing procedures, such as placing a compatible device on the charger to check for proper power transfer. Finally, verify the LED indicators and test with different devices to guarantee consistent, reliable charging performance. Additionally, ensure your setup adheres to wireless charging standards, which can improve compatibility and safety.
Verifying Power Connection
Ensuring your embedded wireless charger is properly connected is essential before testing its functionality. Start by confirming it’s plugged into a compatible power source, like a dedicated outlet with sufficient wattage for wireless charging. Once connected, turn on the power and check the LED indicator or activity lights as specified by your device’s instructions. Use a wireless charging-compatible device to verify the setup. Place the device on or near the charging surface, and it should start charging within a few seconds, indicating a solid power connection and correct alignment. If charging doesn’t begin, double-check all cable connections, ensure the outlet is active, and refer to troubleshooting guides if needed. Proper verification ensures your home is ready for reliable wireless charging everywhere.
Testing Charging Functionality
Once you’ve verified that your wireless charger is properly connected and powered on, it’s time to test its functionality. Place a compatible device, like your smartphone, on the charging pad’s designated zone. You should see the indicator lights turn on or receive an app notification, confirming active charging. To ensure it works well, check if your device begins charging within seconds and compare the speed to standard wireless chargers, aiming for around 15W if using Qi2 devices. Use a phone with a minimal or no case to test for any charging interruptions through different materials. Here’s a quick overview:
| Checkpoints | What to Look For |
|---|---|
| Power Indicator Lights | Lights turn on, confirming connection |
| Device Starts Charging | Begins within seconds |
| Charging Speed | Matches expected rates (up to 15W) |
| Case Compatibility | Works with various cases |
Concealing Cables and Achieving a Clean Look
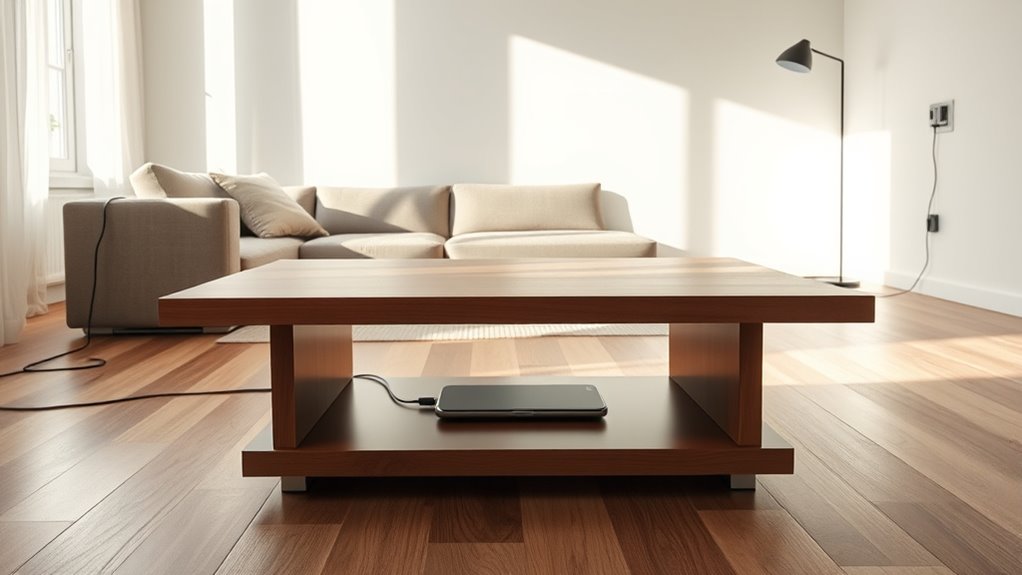
To keep your space looking sleek, consider embedding wireless chargers beneath surfaces or carving holes for a flush fit. You can also route cables through furniture or behind walls to hide wiring entirely. Using cable clips and decorative markers helps secure and visually minimize exposed cords for a clean, uncluttered look.
Hidden Cable Management
Achieving a clean look in your home starts with smart cable management. To keep cords out of sight, consider several effective strategies.
- Use cable clips, adhesive-backed organizers, or zip ties to route wires along furniture edges or behind walls, preventing clutter.
- Conceal cables within furniture cavities, such as hollowed-out legs or removable panels, for a seamless appearance.
- Bundle multiple cords with cable sleeves or conduits, which protect wires and reduce visual noise.
In addition, installing power outlets and USB ports directly into furniture surfaces minimizes visible wiring. For a truly clutter-free look, consider integrating wireless charging pads into tables or countertops, eliminating the need for visible charging cables altogether. These cable management tips will help you achieve a sleek, organized space.
Discreet Power Sources
Concealing power cables is essential for maintaining a sleek, clutter-free look in your home. Achieve this by routing cables behind walls, under baseboards, or through furniture to create discreet power sources. Use cable clips, zip ties, or adhesive organizers to secure wires along edges or under furniture, keeping them out of sight. Installing wireless charging pads or modules beneath desks, tables, or countertops helps eliminate visible cables, resulting in seamless surfaces. Choose furniture with integrated cable management, such as built-in channels or hollow legs, to discreetly hide cords. Additionally, decorative elements like cord covers, furniture panels, or trays can effectively organize and conceal charging cables, ensuring your space remains tidy and visually appealing while supporting wireless charging everywhere.
Minimal Surface Disruption
Installing a wireless charging pad beneath a table surface keeps your devices charged without disrupting the room’s clean look. To achieve minimal surface disruption, consider these tips:
- Use a flush-mounted hole carved precisely for the charging pad, ensuring the surface remains smooth and unobstructed.
- Conceal the power cable under the furniture or along the leg to reduce visual clutter.
- Choose surfaces like glass, wood, or plastic that transmit wireless signals effectively, keeping the setup discreet.
Decorative markers or decals over the charging zone help guide device placement without bulky accessories or cables. This approach maintains a sleek, clutter-free environment, blending technology seamlessly into your space. Emphasizing minimal surface disruption ensures your home remains stylish and functional.
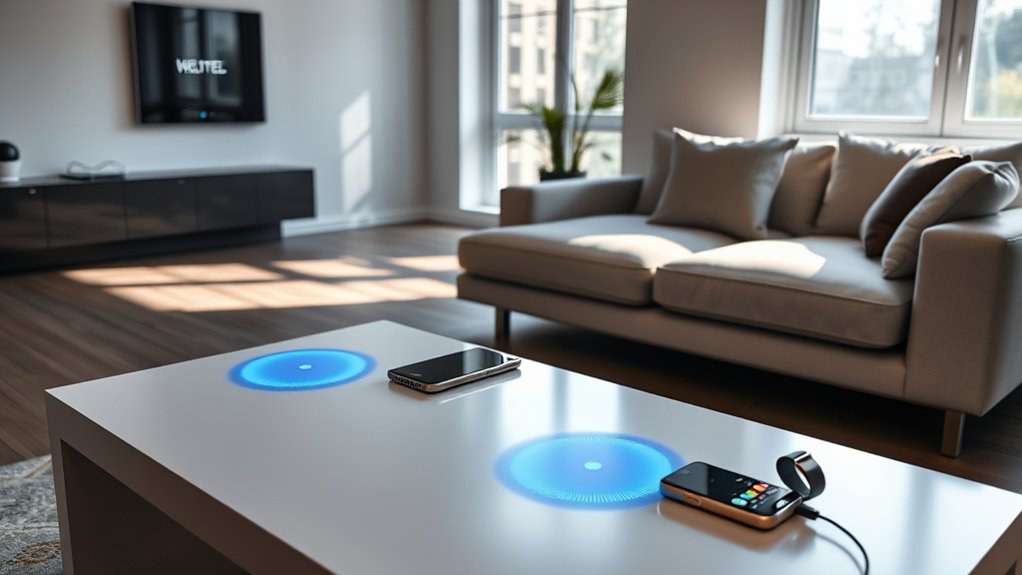
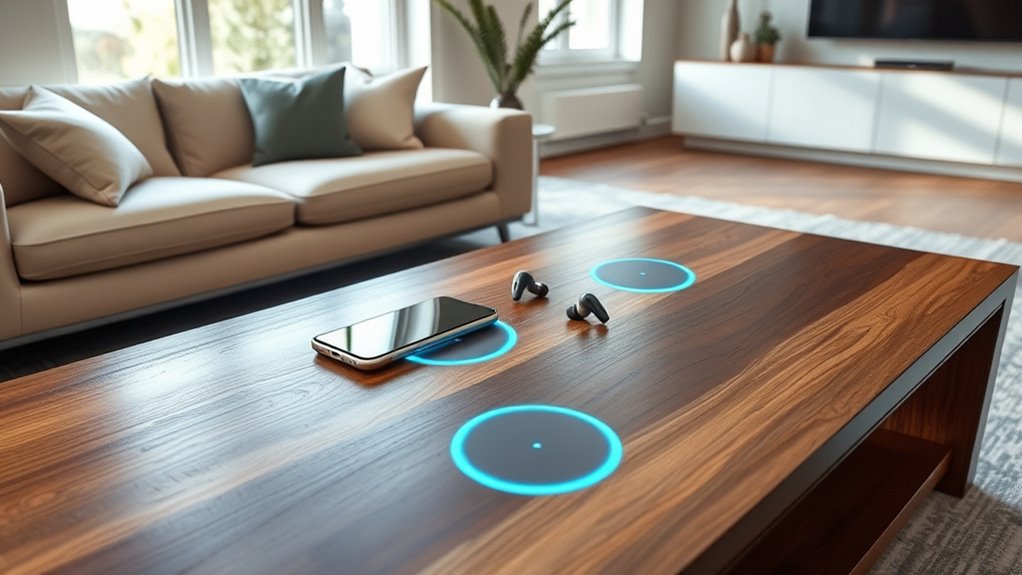
Optimizing Placement and Using Indicators for Easy Device Charging
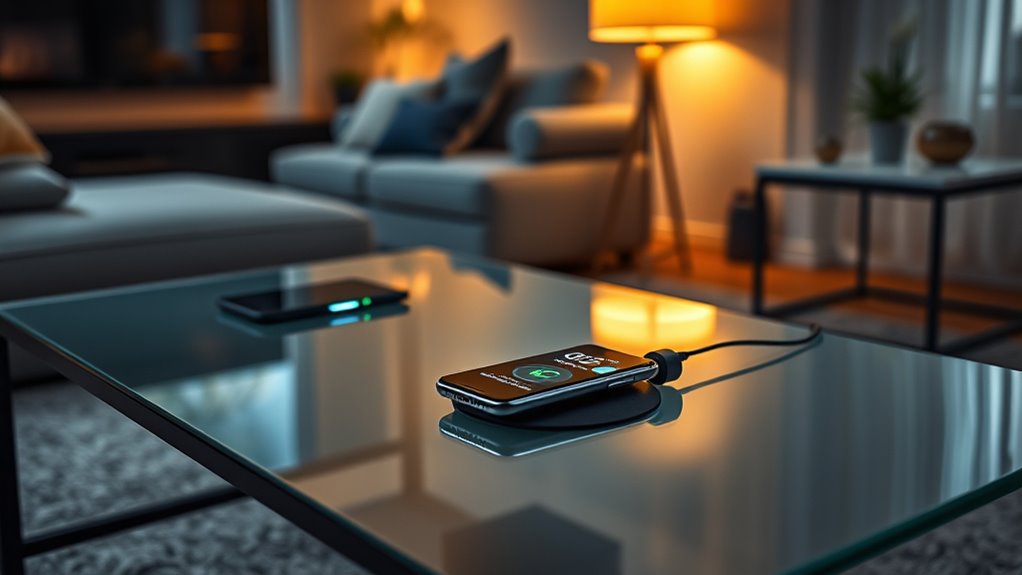
To guarantee your device charges efficiently, it’s important to carefully optimize its placement on your wireless charging surface. Focus on aligning your device within the magnetic fields generated by the charger, as this assures effective power transfer. Use the included decals or tape to mark the ideal charging spot, and consider installing a visual marker or decorative decal for easy identification in low light. LED indicator lights or glow features on your charger can guide you to the best placement, confirming when your device is charging properly. Keep your device within about 1 inch of the surface, avoiding objects that could block the magnetic fields. Regularly test different points within the zone to find the spot that consistently delivers the fastest, most reliable charge.
Frequently Asked Questions
How to Make Wireless Charging at Home?
To make wireless charging at home, start by choosing a compatible, fast-charging pad that fits your furniture. Carve a cavity in your table or countertop to install it flush. Test the fit and secure the pad with adhesive. Route the cable discreetly behind the furniture, and mark the charging zone for easy device placement. This setup guarantees convenient, clutter-free charging everywhere in your home.
Can Wireless Charging Go Through Wood?
Wireless charging can pass through wood, but it’s a bit like a friendly dance—works best with thinner, less dense surfaces. If your wood is under about an inch thick and free of metal reinforcements, you’ll likely see good results. Keep in mind, denser or thicker wood might slow things down or block the signal altogether. To get the most out of your setup, stick to the recommended thickness and avoid embedded metals.
Are Qi Adapters Safe?
You might wonder if Qi adapters are safe. They are generally safe when you follow the manufacturer’s instructions, as they meet international safety standards. These adapters operate at low power, reducing risks like overheating. Plus, safety features such as temperature control and foreign object detection help prevent hazards. Just make sure to use certified devices, avoid damaged adapters, and place them properly for safe, reliable wireless charging every time.
Is Wireless Charging From a Distance Possible?
You wonder if wireless charging from a distance is possible, and the answer is yes, but with limitations. Right now, most wireless charging requires close proximity, like a few inches. Long-distance charging, such as across a room, is still experimental and not widely available. Technologies like resonant magnetic coupling show promise, but safety regulations and technical hurdles mean it’s not yet practical for everyday home use.
Conclusion
By evaluating surfaces, selecting the right components, preparing your space, carving and installing, connecting and testing, concealing cables, and optimizing placement, you transform your home into a seamless charging haven. You create a space where devices rest effortlessly, cables vanish into the background, and charging becomes a natural part of your daily routine. Embrace the process, enjoy the convenience, and let your home become a place where technology and comfort come together effortlessly, everywhere you need it.