
To grout like a pro, start by preparing your tile surface—clean and dry it thoroughly. Choose a grout color that complements your tiles, and test samples first. Mix the grout to a smooth, peanut butter consistency, then practice applying it on a small area. Work in sections, pressing grout into the joints and removing excess with a damp sponge. Wait for it to cure, then clean, seal, and finish for a flawless, professional result—continue for more expert tips.
Key Takeaways
- Prepare the surface thoroughly by cleaning, removing old grout, and ensuring tiles are dry for optimal adhesion.
- Mix grout to a smooth, peanut butter-like consistency, then let it slake before remixing for even application.
- Apply grout diagonally with a rubber float, pressing firmly into joints, and work section by section for control.
- Remove excess grout with a damp sponge after initial set, using circular or straight motions for a smooth finish.
- Cure grout fully before sealing, then clean and buff tiles to achieve a professional, long-lasting result.
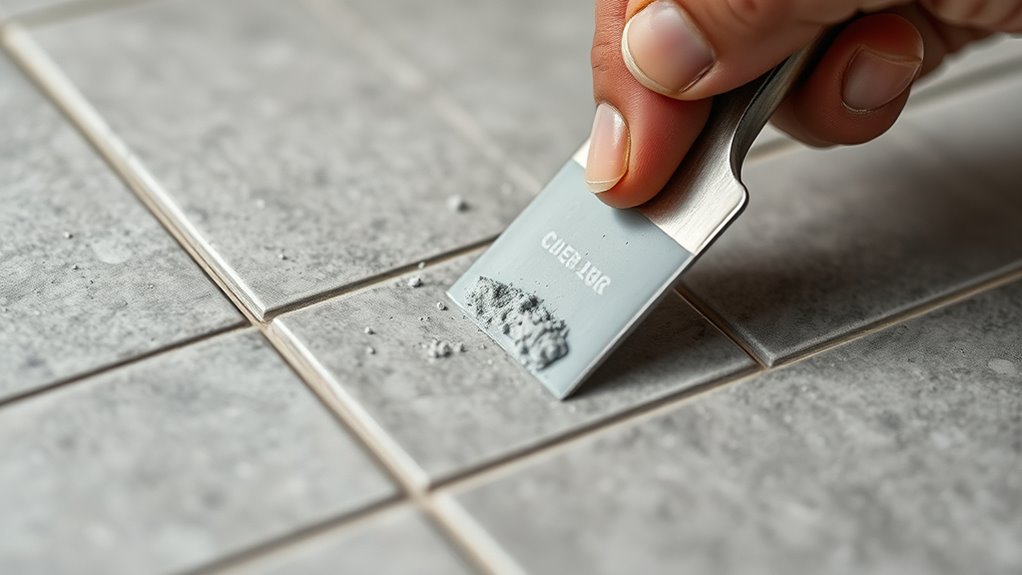
Preparing the Tile Surface and Joints
Before applying grout, you need to prepare the tile surface and joints thoroughly. Start by making certain the tile surface is completely dry and free of dust or debris. Use a stiff scraper or grout removal tool to fully remove any existing grout or debris from the joints, then vacuum to eliminate loose particles. Next, clean the grout joints and surrounding tiles with a damp cloth, which helps prepare the tile surface for better grout adherence. Properly prepared joints will ensure a smooth, even application. When you’re ready to apply grout, moistening grout slightly can ease the process, but avoid over-wetting. Additionally, considering the contrast ratio of your projector can significantly improve the perceived quality of your finished surface. Using a properly prepared surface also minimizes the chance of grout cracking or uneven coloration, leading to a more professional finish. Ensuring the residency requirements are met according to your local regulations can prevent potential legal issues if you need to address disputes later. Proper surface preparation, including control of moisture levels, can also help prevent issues like cracking or staining. Incorporating powerful persuasive words into your instructions or signage can further enhance communication and customer satisfaction. Preparing the surface correctly guarantees that your grout will apply properly, resulting in a clean, professional finish.
Selecting and Testing Your Grout Color
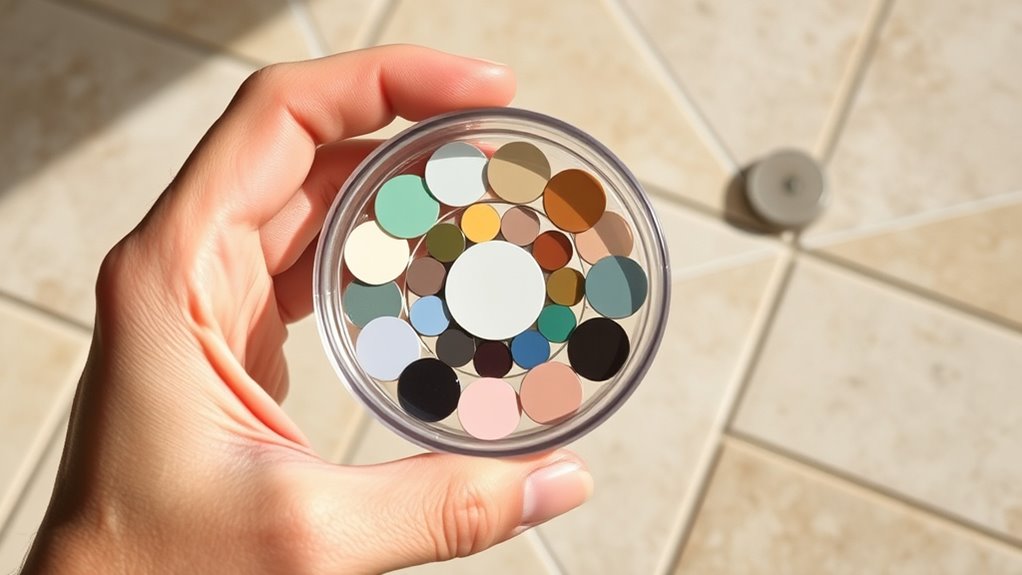
Choosing the right grout color is key to achieving your desired look, so test samples in your actual space to see how they match with your tiles and lighting. Use grout sticks or small batches from reputable brands to preview the color accurately before applying it fully. Keep in mind that contrasting colors create bold designs, while matching shades offer a more seamless, subtle effect. Additionally, consider how the color palette of your farmhouse bedroom influences your grout choice for a cohesive aesthetic. Being aware of relationship dynamics can also help you gauge how your design choices might reflect your personal style and emotional tone. To ensure the best results, familiarize yourself with grouting techniques to understand how different application methods can affect the final appearance.
Color Coordination Tips
Selecting the right grout color is essential for achieving your desired look, whether you want a seamless finish or a striking contrast. To start, test different grout colors on a small, hidden section of your tiles using grout sticks or mixed directly into the tile joints. This helps you see how each shade appears once dried. Consider your design goal: matching the grout color to your tile for a unified look or choosing a contrasting shade for visual interest. Reputable grout brands with real pigments ensure your chosen grout color remains vibrant and durable over time. Keep in mind that lighter grout shades can highlight narrow tile joints, while darker shades help hide dirt and grout haze in wider joints. Testing under your specific lighting conditions guarantees a harmonious final result.
Testing Grout Samples
To guarantee you pick the right grout color, it’s essential to test different options on actual tiles before committing to a full application. Use grout sticks or sample tiles to test various grout colors directly in your joints. Mix small batches of grout with your chosen color to see how it appears once applied, dried, and curing on your specific surface. Remember that lighting conditions and surrounding colors can influence how the grout looks, so check under different lighting. Always allow the tested samples to fully cure over 24-48 hours, as this reveals the true grout color. Choosing reputable grout brands that specify true color options can help avoid inaccuracies. Testing grout samples thoroughly ensures you select a color that complements your space perfectly. Additionally, understanding the water resistance properties of your grout can help ensure long-lasting results, especially considering the importance of automation in modern manufacturing processes that emphasize durability. Incorporating lifestyle considerations, such as how your space is used and maintained, can further guide you in selecting the most suitable grout color for your needs.
Impact on Aesthetics
The right grout color can dramatically influence the overall aesthetic of your space, shaping its style and mood. Whether you choose a grout color that matches or contrasts with your tile, it impacts how the grout lines define your tile installation. Testing grout colors with grout sticks or small samples in actual joints helps you see how the hue appears once the grout dry, preventing surprises. Light-colored grout highlights tile patterns but may show dirt more easily, while darker grout enhances durability and hides stains. Vibrant or metallic options can add a unique touch to your design. Consider how the grout color complements your room’s palette to create a cohesive, visually appealing finished look. Additionally, understanding how to identify spoiled lemon juice can help maintain freshness if you incorporate citrus into your cleaning or cooking routines. Using the proper wicks in candle making can also influence the final appearance and effectiveness of your candles.
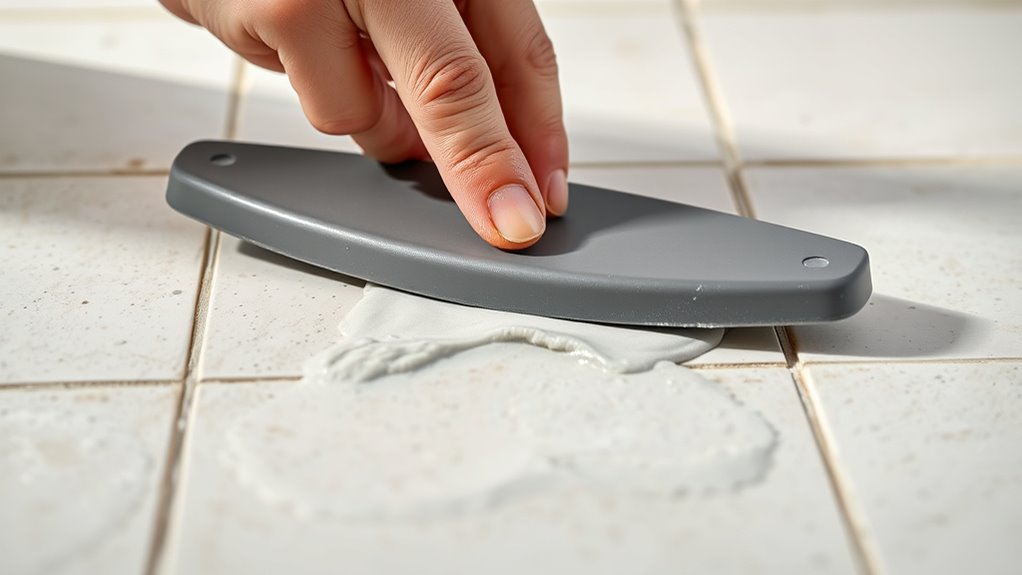
Mixing Grout to the Perfect Consistency
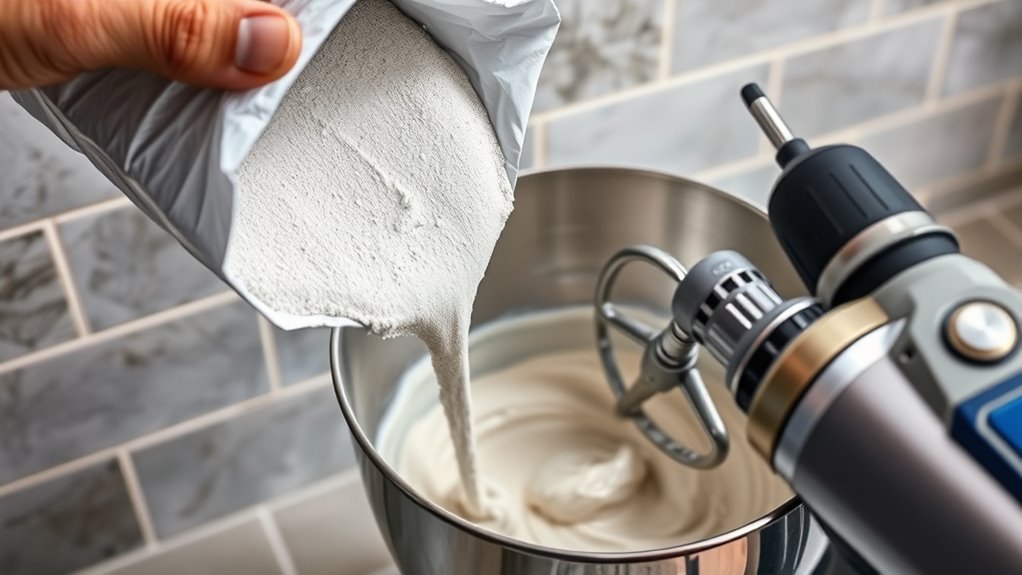
Achieving the right grout consistency is essential for a successful application. To do this, you need to carefully mix grout and water, adding water gradually until it reaches the ideal texture. Here’s how:
- Start by pouring about three-quarters of the total water into a small, clean bucket and then add the grout powder.
- Mix grout thoroughly with a trowel or paddle attachment until the mixture is smooth, peanut butter-like, and free of lumps or dry spots.
- Let the mixture slake for about 10 minutes, then remix briefly to ensure uniformity before applying. Proper mixing and application techniques are crucial for avoiding grout cracking and ensuring durability.
- Using an airless paint sprayer can help achieve a more even application of grout on large surfaces, reducing manual effort and ensuring a smooth finish. Utilizing proper surface preparation enhances adhesion and longevity of the grout. Additionally, choosing the right mixing technique can significantly impact the final result by preventing separation or inconsistent texture. It’s also beneficial to monitor the air quality in the workspace to ensure optimal working conditions during application.
Practicing Your Technique on a Small Area
Start by applying grout to a small test area to practice your technique. Use minimal grout to get comfortable spreading, pressing into joints, and cleaning excess. Experiment with different consistencies and tools to find what gives you the best finish. Additionally, trying out different grout types can help you understand how each behaves during application and cleanup. Remember that fathers’ influence can be seen in your work ethic and attention to detail as you practice, making the process more meaningful. Incorporating proper mixing techniques ensures your grout has the right consistency for easier application and a more professional appearance. Paying attention to application tools can also significantly impact your results, helping you achieve a smooth and even finish. Also, understanding skincare patch application timing can help you develop a steady hand and patience, which are crucial for precision work.
Test Grout Consistency
Have you ever wondered if your grout mixture is just right before applying it to your whole project? To test your grout consistency, practice on a small 18×18 inch mock-up area with installed tiles. Start by mixing grout to a peanut butter-like consistency, ensuring good workability. Then, use a rubber float to apply the grout diagonally into the joints, pressing firmly to develop proper technique. Afterward, wipe the area with a damp sponge to see how easily you can remove excess grout without disturbing the joints.
Here’s what to check:
- Is the grout smooth and easy to spread?
- Does it hold its shape without slumping?
- Can you remove excess with a damp sponge effortlessly?
Adjust your mixing or technique as needed for professional results.
Refine Application Skills
Practicing your grout application on a small, mock-up area allows you to refine your technique before tackling the full project. Use the same grout float and mixture you plan to apply on your actual tiles. Spread damp grout diagonally across the mock-up to fill the grout joints evenly, applying consistent pressure and angle. Focus on creating smooth wiping arcs to remove excess grout without disturbing the joints. Practice your wiping motions, experimenting with circular or straight arcs, to find what works best. Time your application and cleaning steps to match the working time of your grout. This practice helps you develop even pressure, proper wiping techniques, and confidence, ensuring professional-looking results when you move on to the real job.
Applying Grout in Manageable Sections

To guarantee a smooth grout application, dividing your tiled surface into manageable sections is essential. This approach helps you control the application process and ensures even results. Start by breaking the tile into sections of 3×3 feet or smaller. Then, follow these steps:
- Mix only enough grout for each section to prevent it from drying out before you finish.
- Use a float to spread grout evenly across one section, pressing it into the joints.
- Allow the grout to set for a few minutes, then move on to the next section, repeating the process.
Working on one manageable section at a time ensures consistent application and reduces the risk of grout hardening before completion. This method keeps your tile looking professional and flawless.
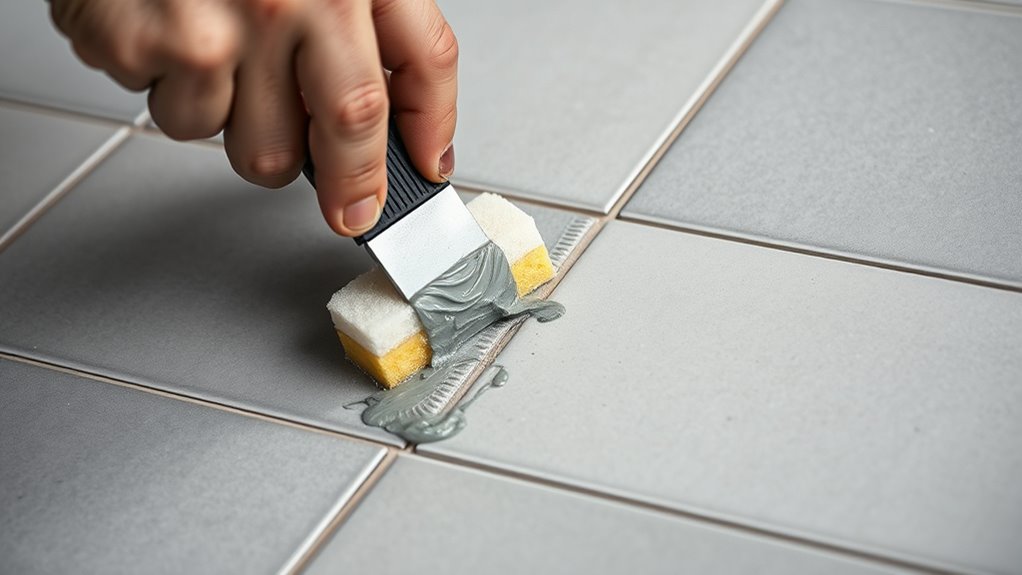
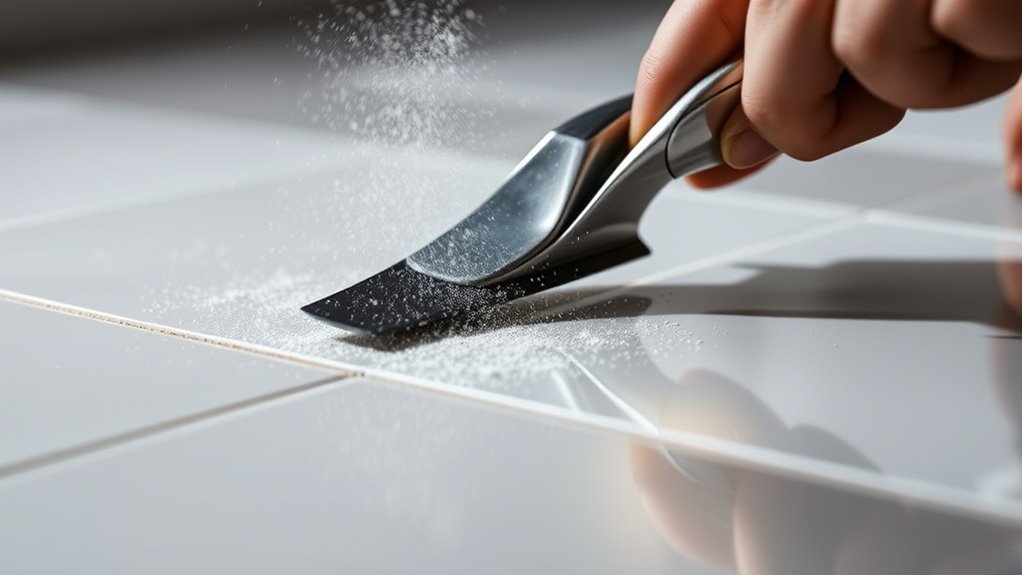
Removing Excess Grout and Smoothing Joints
Once the grout has set for about 20 to 30 minutes, you can begin removing excess and smoothing the joints. Use a damp, well-wrung sponge to gently wipe away excess grout from the surface, working in circular motions. Rinse the sponge frequently to prevent dirt from transferring back onto the tiles. For smoothing joints, lightly tool the lines with a damp finger or a grout finishing tool while the grout is still firm but not fully cured. Be careful not to drag excess grout or press too hard, as this can damage the tile edges or create uneven joints. Take your time, working gradually to achieve clean, uniform joints. Proper cleaning during this phase helps set the foundation for a professional-looking finish.
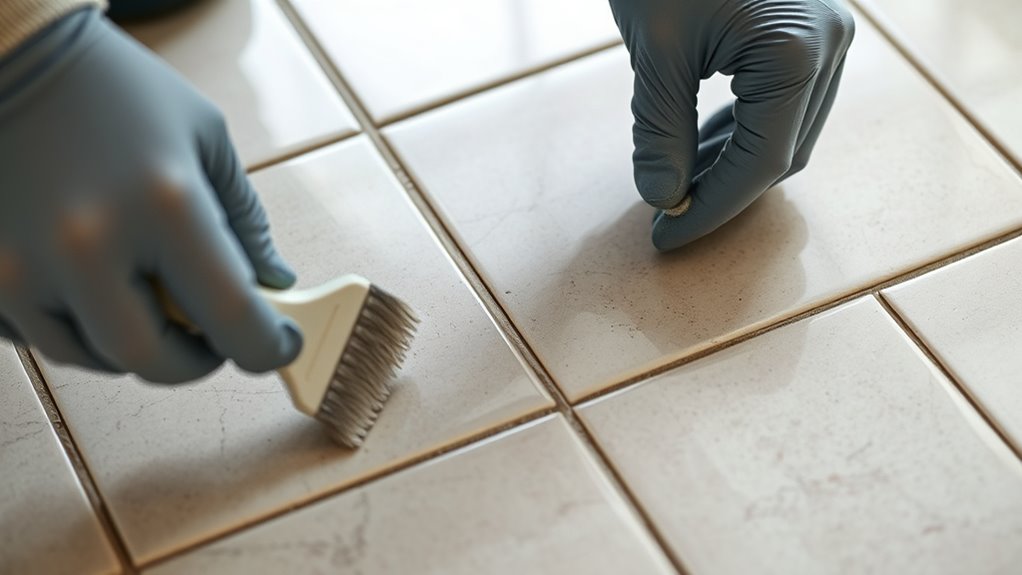
Cleaning the Surface and Removing Haze
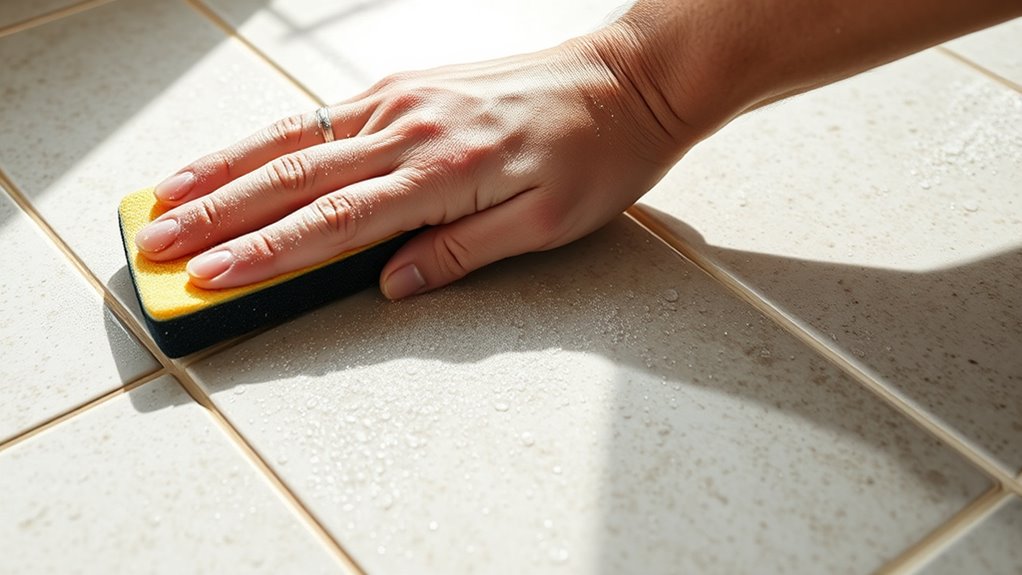
After the grout has fully hardened, usually within 24 to 72 hours, it’s time to clean the surface and remove any haze. Use a damp sponge to gently wipe the tiles in circular motions, working to lift excess grout and reduce grout haze. Remember to rinse the sponge frequently in clean water to prevent spreading haze and to keep the surface clean.
Here’s what to do:
- Wipe the tiles with a damp sponge, focusing on removing grout haze.
- Rinse the sponge often to maintain effectiveness.
- Once the haze is gone and the surface looks clean, buff the tiles with a dry microfiber cloth to eliminate remaining residue and achieve a polished finish.
Allowing the Grout to Cure Properly
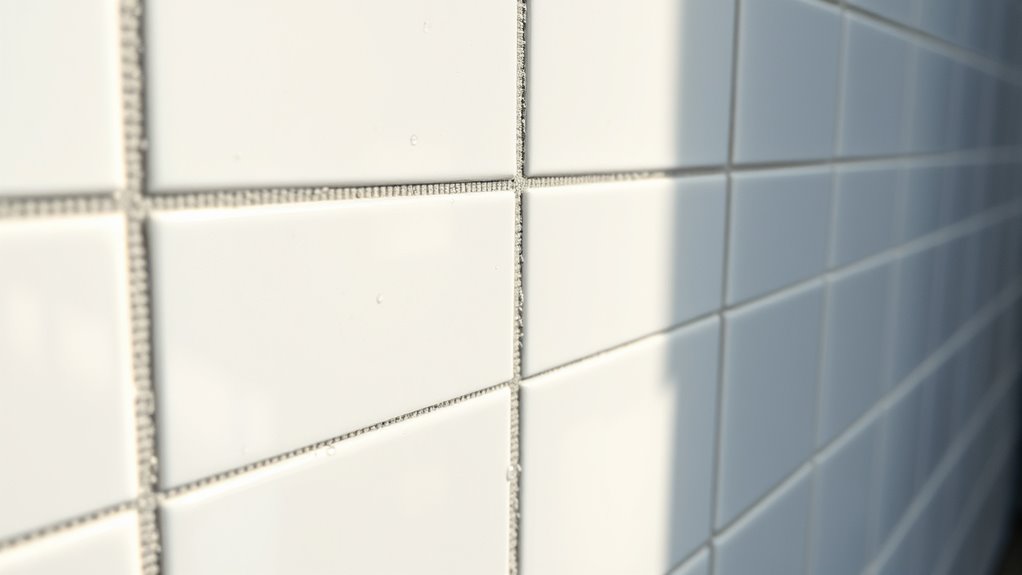
Allowing the grout to cure properly is a crucial step that directly impacts the durability and appearance of your tiled surface. During the curing period, it’s essential to keep foot traffic minimal to prevent disturbing the grout joints. You must guarantee the grout is completely dry before exposing it to water or heavy use, which typically takes 24 to 72 hours depending on the manufacturer’s instructions. Proper curing prevents weaknesses caused by excess moisture or rapid drying, helping the grout resist cracking and deterioration over time. To promote proper curing, control humidity and temperature in the area. Remember, sealing grout should only happen after it has fully cured and dried, ensuring maximum adhesion and longevity. Patience during this phase pays off with a strong, long-lasting finish.
Sealing and Finishing Touches for a Professional Look
Sealing the grout is the final step that enhances both the appearance and durability of your tiled surface. After allowing the grout to cure fully for at least 24 hours, you’re ready to apply the sealer. Use a small brush or applicator to spread the sealer evenly, avoiding over-application. This ensures a consistent finish and prevents excess sealer from smearing onto the tiles. Within five minutes, wipe away any excess with a dry cloth to avoid sticky residues. Once sealed, wait at least 24 hours before exposing the grout to water or heavy use. To finish, buff the grout with a dry cloth, which helps achieve a shiny, professional look and removes remaining haze. This simple step makes a big difference in your tile’s longevity and appearance.
Frequently Asked Questions
How Do You Grout Professionally?
To grout professionally, you should use a rubber float held at a 45-degree angle to press the grout into the joints, sweeping diagonally for even filling. Mix the grout to a peanut butter-like consistency, let it slake, then remix. Apply it in sections, wipe excess with a damp sponge, and allow it to cure for 24-72 hours. Finish by cleaning thoroughly and sealing the grout lines for a durable, polished look.
How to Grout Tiles Step by Step?
To grout tiles step by step, start by preparing your grout mixture until it’s peanut butter consistency, then let it slake. Use a rubber float at a 45-degree angle to press the grout into the joints, working small sections. After 15-30 minutes, wipe excess with a damp sponge, rinse often, and let it cure fully. Finally, seal the grout after curing and wait 24 hours before exposing the surface to water.
What Is the Procedure of Grouting?
Imagine transforming a dull, unfinished surface into something stunning. To grout, you start by cleaning and preparing the tile joints, then mix the grout to a smooth, peanut butter-like consistency. Using a float, press it firmly into the joints diagonally. After waiting, wipe away excess with a damp sponge, and let it cure fully for a durable, polished finish. This process brings your project to life with precision and care.
What Are the Phases of Grouting?
You start by preparing the surface, ensuring it’s clean and dry. Next, you mix the grout to a smooth, peanut butter-like consistency and let it slake. Then, you apply the grout into the joints with a float, pressing firmly to fill gaps completely. Afterward, you clean off excess grout, allow it to cure, and seal the surface to protect against stains and moisture.
Conclusion
By following these steps, you’ll master the art of grouting with the precision of a seasoned professional. Think of it as painting a masterpiece—patience and attention to detail turn a simple task into a work of art. With practice, your tiled surfaces will gleam with a flawless finish, showcasing your craftsmanship. Remember, every perfect grout line is a tribute to your dedication and skill, transforming your space into something truly exceptional.