To patch wall holes like a pro, start with a self-adhesive mesh patch for large holes, ensuring a strong base. Feather the edges with a wide putty knife and joint compound for a smooth shift. Use aerosol wall textures to seamlessly blend repairs with the existing finish. Conceal minor damage with oversized wall plates or covers for quick fixes. Finish with primer and paint to achieve a flawless look. Keep going to discover expert tips that make wall repairs effortless.
Key Takeaways
- Use a self-adhesive mesh patch for large holes up to 3 inches, ensuring a strong, stable base with minimal layering.
- Feather joint compound with a wide putty knife, applying beyond the hole’s edges for a smooth, seamless transition.
- Match wall textures easily with aerosol sprays like Homax, which dry from blue to white, blending repairs without extensive sanding.
- Conceal imperfections with oversized wall plates or self-adhesive covers to quickly hide scratches, dents, or small holes.
- Finish with primer and paint, feathering the edges to blend patched areas seamlessly with the surrounding wall.

Vtopmart 25 PCS Clear Plastic Drawer Organizers Set, 4-Size Versatile Bathroom and Vanity Drawer Organizer Trays, Storage Bins for Makeup, Bedroom, Kitchen Gadgets Utensils and Office
- Versatile Drawer Organizer: Suitable for bathroom, kitchen, office, and more
- Includes 25 Storage Bins: Four sizes for customized organization
- Multiple Sizes Included: 9x6x2, 9x3x2, 6x3x2, 3x3x2 inches
As an affiliate, we earn on qualifying purchases.
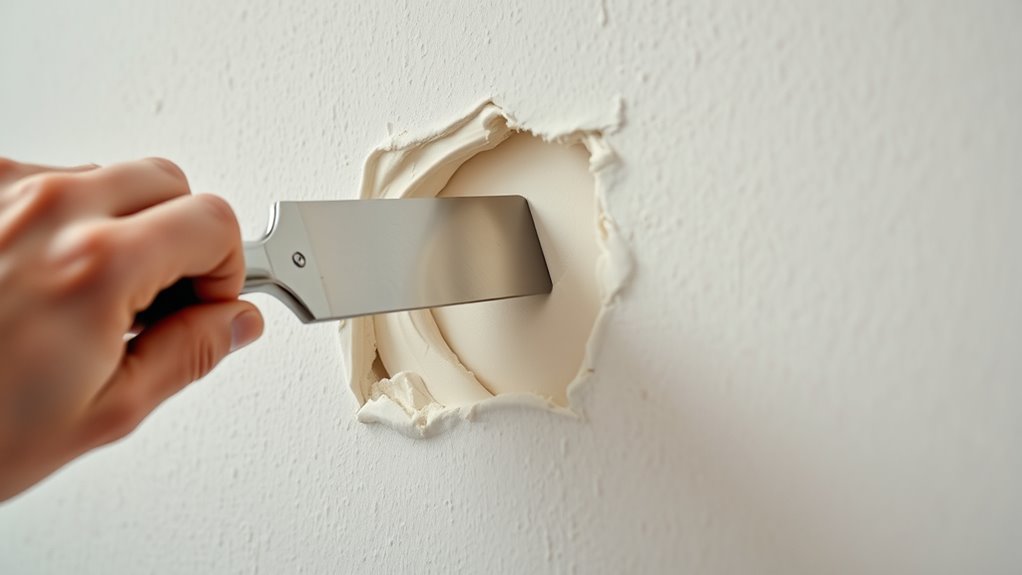
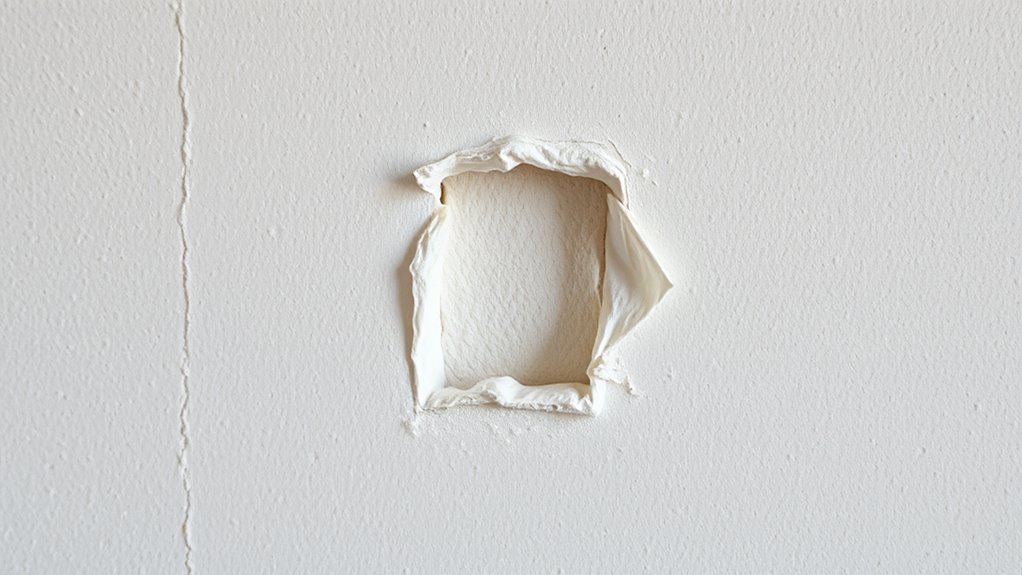
Use a Self-Adhesive Mesh Patch for Large Holes

Ever wondered how to quickly fix a large hole in your wall? Self-adhesive mesh patches make wall repair simple and effective. These patches easily conform to the wall surface, providing a strong base for your repair. They’re perfect for holes up to 3 inches across, saving you time by avoiding multiple layers of joint compound. To guarantee a smooth finish, press the mesh patch firmly into the wall, making sure no air bubbles are trapped. This stable foundation prevents cracking or shrinking of the joint compound as it dries. Additionally, choosing the right surface preparation can significantly improve adhesion and durability of the repair. Once in place, you can apply spackle or joint compound over the patch, reducing the need for extensive layering. Using a self-adhesive mesh patch streamlines your repair process, giving you a professional-looking result with less effort. Additionally, incorporating sound vibrations may help in assessing the integrity of the repair and ensuring proper adhesion. Harnessing vibrational energy can also enhance the bonding process, leading to longer-lasting results. To further improve adhesion, it can be helpful to prepare the surface thoroughly before applying the patch.
Master the Art of Feathering With a Putty Knife and Joint Compound
To achieve a seamless wall repair, mastering the art of feathering with a putty knife and joint compound is essential. Use a wide putty knife, ideally 6-12 inches, to apply the joint compound slightly beyond the hole’s perimeter. As you spread, gradually taper the thickness to create a smooth gradual between the patched area and the existing wall. Use light, overlapping strokes with the putty knife to fade the edges, reducing the need for multiple coats. Waiting until the joint compound changes color and feels firm before sanding ensures a better finish. Keep a damp sponge or cloth nearby to gently smooth out excess compound and refine the feathered edges before it dries. Proper feathering ensures a seamless, professional-looking repair without visible edges. Incorporating techniques like proper drying times and smooth application can further enhance the finish. Additionally, understanding proper surface preparation can help achieve an even better result. Being aware of the right tools can make the feathering process easier and more precise. Using the correct techniques for applying joint compound can also significantly impact the final appearance of your repair.
Blend Texture and Finish With Aerosol Wall Textures and Patches
After feathering the joint compound smoothly into the wall, matching the existing texture can be the final step that makes your repair truly invisible. Aerosol wall textures like Homax Aerosol Wall Texture allow you to create a seamless blend with your current wall or ceiling finish. As the spray dries, it changes from blue to white, so you’ll know exactly when it’s ready for painting. Using these aerosols, you can quickly and evenly cover patches without extensive sanding or manual texturing. Adjusting the nozzle gives you control over the spray pattern and intensity, helping you replicate textures like orange peel or splatter accurately. Whether you’re a seasoned DIY enthusiast or a first-timer, aerosol wall textures make blending repairs effortless, ensuring your wall looks flawless and professional. Texture matching is simplified with these products, making your repairs virtually undetectable. Incorporating AI security skills can help address any frustration that may arise during the repair process, ensuring a smoother experience. Additionally, understanding texture matching techniques can enhance your ability to achieve a more natural finish, especially in remote hackathons where collaboration tools can facilitate sharing innovative solutions for common DIY challenges.
Conceal Damage With Oversized Wall Plates and Protective Covers
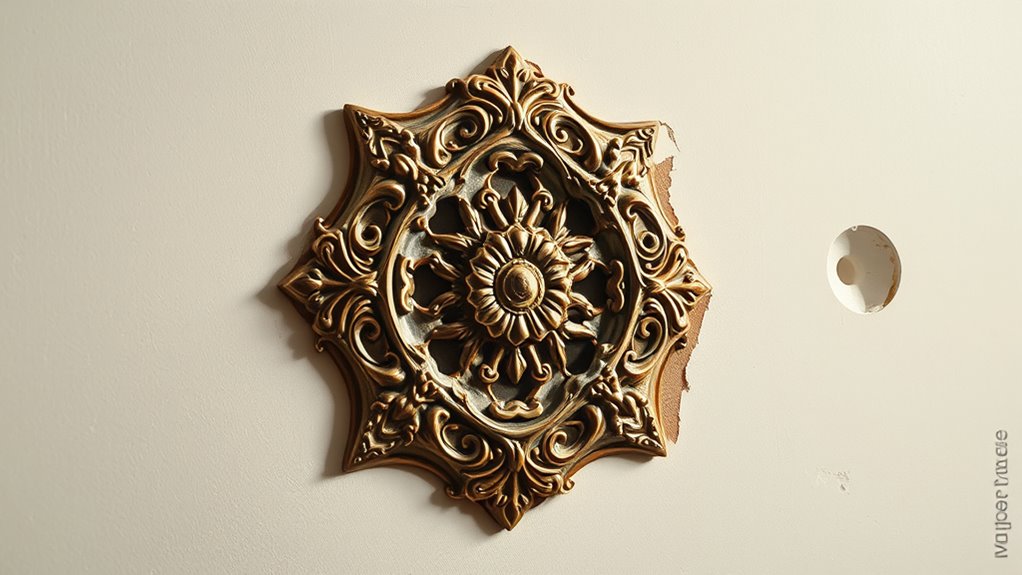
When wall damage or discoloration seems minor, installing oversized wall plates or protective covers offers a quick and effective solution. Oversized wall plates, like the ENERLITES Duplex Receptacle Outlet Wall Plate, provide excellent wall damage concealment by covering imperfections without repairs. Durable protective covers, such as the vinyl PRIME-LINE U 9271, are self-adhesive, paintable, and hide scratches, dents, or small holes while maintaining functionality over outlets and switches. Using these covers reduces the visual impact of wall flaws, saving you time and effort compared to patching small holes or cracks. They are an inexpensive and fast way to conceal surface damage, especially in high-traffic or damage-prone areas, helping your walls look neat without the need for extensive repairs. Creativity can be cultivated by anyone, regardless of skill level, making these quick fixes accessible options for maintaining a polished appearance. Additionally, understanding home repair techniques can empower you to handle minor issues with confidence and efficiency.
Finish With Primer and Paint for Seamless Wall Repairs

Applying primer is an essential step in achieving a seamless wall repair, as it seals the patched area and prevents differences in sheen or texture from showing through your paint. Use a stain-blocking primer to hide any residual stains or discoloration from previous damage, ensuring a uniform finish. Feather the primer beyond the edges of the patching area to create a smooth progression, helping the final paint blend effortlessly with the existing wall. Make sure to select a primer compatible with your wall paint type—latex or oil-based—for better adhesion and durability. Allow the primer to dry completely per the manufacturer’s instructions before applying your topcoat. This step guarantees a professional, seamless look that hides all traces of patching, leaving your wall looking flawless. Incorporating self watering plant pots into your home can also help maintain consistent moisture levels, reducing the risk of future wall damage from overwatering or leaks. Understanding Louisiana alimony laws can be helpful if your wall repairs are related to a divorce settlement that involves property division or support agreements. Additionally, choosing the right primer can help prevent issues caused by essential oils interacting with paint or wall materials, ensuring a lasting repair. Proper color calibration is also important to match the repaired area with the existing wall color, creating an even appearance.
Frequently Asked Questions
What Is the Best Thing to Repair Holes in Walls?
When it comes to repairing holes in your walls, the best choice depends on the size. For small holes, you should use pre-mixed spackle or putty like Erase-A-Hole, which dries quickly and is easy to apply. For larger or deeper holes, opt for drywall patches with joint compound or two-part epoxy. Always clean and sand the area first to guarantee a smooth, nearly invisible repair.
How Do You Fill Holes in Walls Hacks?
When you want to fill holes in walls, start by cleaning out any loose debris. Use a small putty knife to apply spackle or joint compound slightly above the hole, then smooth it flush with the wall. For larger holes, insert a mesh patch or drywall repair clip first. After it dries, sand the area smooth, prime, and then paint for a seamless finish.
How Can I Make a Hole in the Wall Look Better?
To make a hole in the wall look better, first clean the area and apply a lightweight spackle or joint compound, smoothing it out for a seamless look. For larger holes, reinforce with a self-adhesive mesh patch before finishing. Sand the surface smooth, then prime and paint it with a matching color. If needed, add texture to match the wall’s finish, making the repair blend invisibly.
What Is the Best Way to Fill Holes in Drywall?
Imagine you have a small nail hole in your drywall. To fill it effectively, you should use a quick-drying spackling compound like Erase-A-Hole. Apply it with a putty knife, smooth it out, and let it dry. Once dry, sand it lightly for a flush finish. Then, prime and paint over the patch. This method guarantees a seamless repair that blends perfectly with your wall.
Conclusion
Now that you’ve got these expert hacks under your belt, repairing wall holes becomes a manageable task. Will you take the time to perfect each step for a flawless finish? With a little patience and the right tools, you can make your walls look as good as new. So, why settle for less when you can patch like a pro? Confidence is the key—go ahead, give these tricks a try and enjoy your beautifully restored walls.