
Upgrading cabinet hardware without a tape measure is simple by relying on visual cues and standard sizes. Remove your current hardware and compare it directly with new pieces to check fit and style. Use existing holes or hold hardware in place with painter’s tape to test placement before drilling. Focus on common sizes, like 3 inches for pulls or 1.25 inches for knobs, and trust your eye for alignment. Keep learning these easy tricks for a polished look.
Key Takeaways
- Use existing hardware holes or compare new hardware directly to ensure proper fit without measuring.
- Rely on visual cues and common hardware sizes, like 3-inch pulls or 1.25-inch knobs, for easy matching.
- Mark screw spots with pencil or painter’s tape based on current hardware placement before drilling.
- Choose hardware finishes and shapes that complement your cabinets for a cohesive look without precise measurements.
- Hold hardware in position to assess placement visually, adjusting until satisfied before final installation.
Upgrading your cabinet hardware is a simple yet impactful way to refresh your kitchen or bathroom. You don’t need to be a seasoned DIYer to make a noticeable difference—just a pair of fresh knobs or pulls can completely transform the space. If measuring tape isn’t your thing or you’re short on time, don’t worry. There are plenty of clever tips and design ideas that allow you to upgrade with confidence and ease.
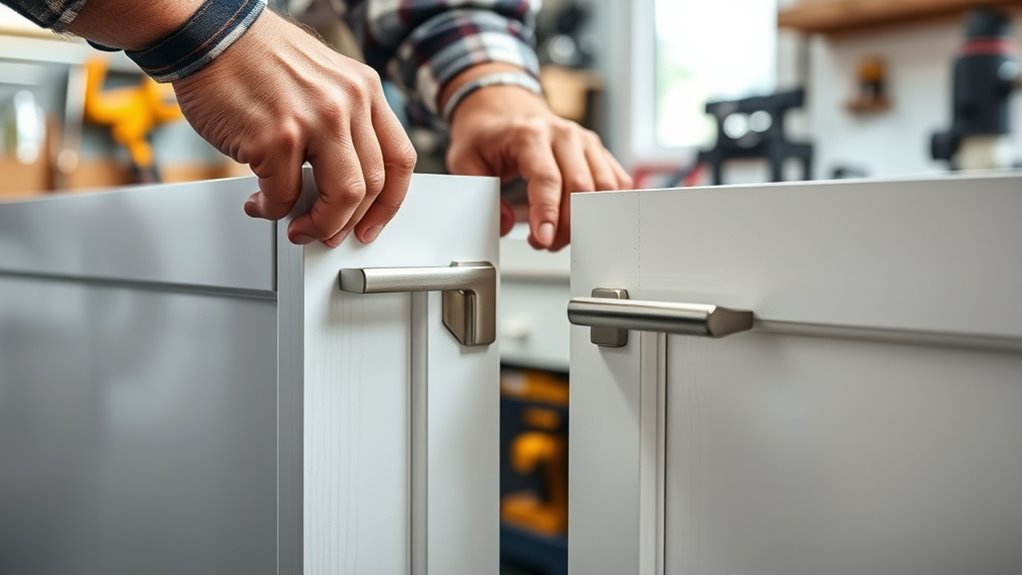
First, focus on visual cues instead of exact measurements. Many hardware pieces are designed with standard sizes, so you can choose new handles that fit your existing holes without much fuss. To do this, start by removing the current hardware and laying it next to your new options. This gives you a clear sense of scale and helps you pick something that looks proportionate and balanced. If you want to keep things consistent across all cabinets, check the distance between the screw holes on your current hardware. Most pulls and knobs are made with common spacing, typically around 3 inches for pulls and 1.25 inches for knobs. Use a ruler or even a piece of paper to gauge these distances quickly without a tape measure.
Choose hardware that fits existing holes by comparing sizes with your current knobs and pulls for a seamless update.
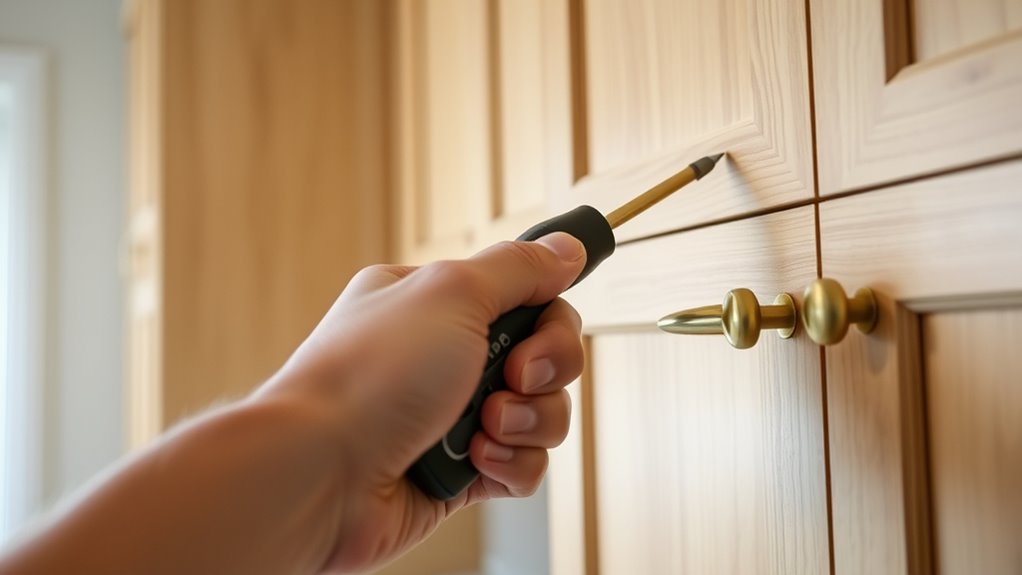
When it comes to installation, many hardware pieces come with mounting templates or screw holes that align perfectly with common cabinet hole patterns. If you’re replacing knobs, just mark the spots where the screws go with a pencil—using the existing holes as your guide or aligning new hardware accordingly. For pulls, you can hold the piece in place to visually check its placement before drilling or screwing in. Remember, aligning hardware at the same height on all cabinets creates a clean, uniform look, so take a moment to step back and assess your placement visually rather than relying solely on precise measurements.
If you’re unsure about exact measurements, consider using painter’s tape to mark where each handle will go. This way, you can slide hardware along the tape to see how it looks before committing to a drill. It’s a quick, non-permanent method to test different alignments and design ideas. For a cohesive style, pick hardware finishes and shapes that complement your overall decor—brushed nickel, matte black, or vintage brass all create distinct vibes. Additionally, understanding common hardware sizes can help you select pieces that will fit seamlessly without detailed measurements.
Ultimately, upgrading your cabinet hardware without measuring tape is about trusting your eye and using simple tools like paper, tape, and existing hardware as guides. With a little planning and some DIY tips, you can achieve a polished, coordinated look that elevates your entire space—no special tools required.
Frequently Asked Questions
Can I Replace Cabinet Hardware Without Removing the Doors?
You can replace cabinet hardware without removing the doors by using DIY tips like measuring existing hardware placement with painter’s tape. This helps you mark new hardware locations precisely. When choosing hardware, consider styles and sizes that match your current setup. By carefully marking placement and selecting the right hardware choices, you can update your cabinets efficiently, saving time and effort while achieving a fresh look without the hassle of removing doors.
What Tools Are Needed Besides the Hardware?
Like a painter chooses brushes carefully, you’ll need specific tools beyond the hardware. A screwdriver or drill with the right screwdriver bits—Phillips or flathead—are essential. Hardware templates help align your new knobs or pulls perfectly, saving time and effort. These tools guarantee your upgrade is seamless, much like a well-conducted symphony. With them, you can replace cabinet hardware confidently, transforming your space without unnecessary fuss.
How Do I Match New Hardware With Existing Styles?
When matching new hardware with existing styles, focus on style coordination to guarantee a seamless look. Start by examining the current hardware’s finish, shape, and size. For hardware selection, consider complementary styles—modern, vintage, or rustic—that match your cabinets’ overall aesthetic. Bring a sample or photo of your current hardware when shopping, and compare finishes and designs closely. This way, you’ll assure your new hardware enhances your cabinets perfectly.
Is It Possible to Upgrade Hardware on Curved or Irregular Cabinets?
Tackling curved cabinet challenges is like bending a tree with the wind; it requires patience and flexibility. You can upgrade hardware on curved or irregular cabinets by choosing versatile, adjustable options like magnetic or clip-on hardware. These solutions embrace irregular surface challenges, ensuring a snug fit without precise measurements. With a little creativity, you turn a tricky surface into a showcase of your resourcefulness.
How Long Does the Installation Process Typically Take?
The installation time varies depending on your cabinet type and hardware style, but generally, it takes about 30 minutes to an hour. Your planning process, including selecting the right hardware and preparing your tools, can streamline this. You can often upgrade hardware quickly without measuring if you’re replacing existing pieces. Just guarantee you have the necessary tools and follow step-by-step instructions to make the process smooth and efficient.
Conclusion
Upgrading your cabinet hardware without a measuring tape is simpler than you think. With just a few quick steps, you can give your cabinets a fresh, new look in no time. Why settle for outdated hardware when you can easily update it yourself? So, next time you want a quick makeover, remember this trick and enjoy the satisfaction of a DIY upgrade. Ready to transform your space effortlessly? Let’s get started!