
To transform a room with a simple coat of paint, start by choosing the right color that sets the mood, and prepare the space by cleaning and repairing walls. Use painter’s tape and quality tools, applying a primer if needed for smooth coverage. Apply multiple thin coats, working systematically from top to bottom, and allow proper drying between layers. With patience and attention to detail, you’ll achieve a professional look—keep going to discover how to perfect your technique.
Key Takeaways
- Select a suitable color that matches your desired mood and complements existing decor.
- Properly prepare walls by cleaning, repairing, and sanding for a smooth, professional finish.
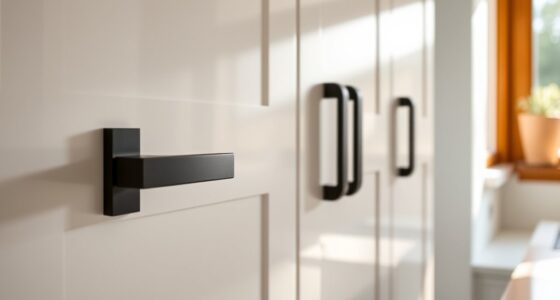
- Use painter’s tape and quality tools to ensure clean edges and even coverage.
- Apply multiple thin coats, allowing proper drying time for a durable, flawless look.
- Finish with touch-ups and proper curing to enhance room appearance and paint longevity.
Ever wondered how to give your space a quick, cost-effective facelift? Updating your room’s look doesn’t have to involve major renovations or expensive contractors. With a little DIY effort, you can transform any space by simply applying a fresh coat of paint. The first step is choosing the right color. Your color selection sets the mood and vibe of your room, so think about what atmosphere you want to create. Bright, bold hues can energize a space, while softer, muted tones offer calmness and relaxation. Consider the existing decor, natural light, and the size of your room to guide your choice. If you’re unsure, testing small swatches on the wall can help you visualize how the color interacts with your space throughout the day. Once you’ve nailed down your color, it’s all about the paint application process.
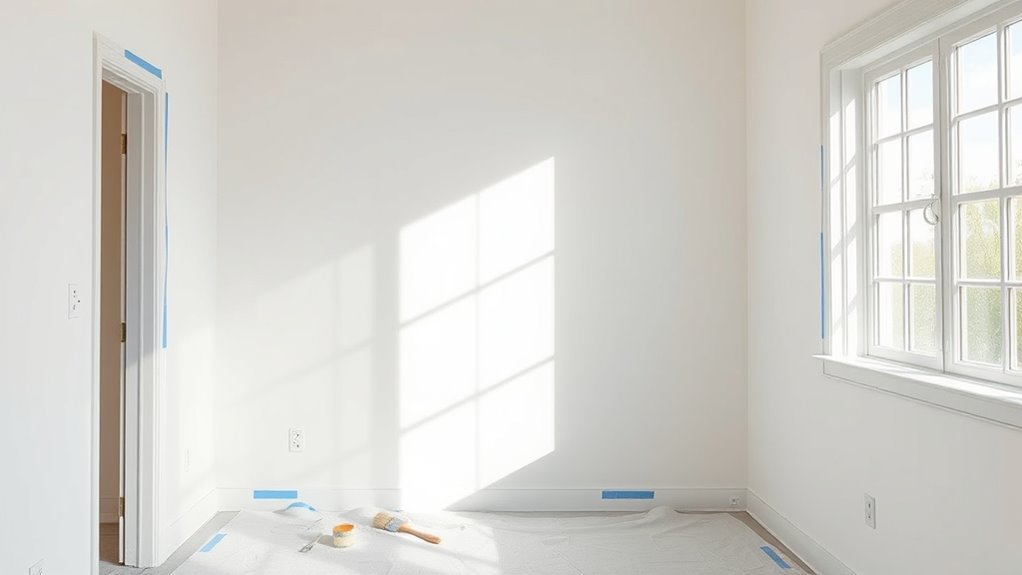
Getting it right starts with proper preparation. Clear out furniture and cover the floors with drop cloths. Clean the walls thoroughly to remove dust and grease, and repair any holes or imperfections with spackle. Sand uneven spots for a smooth finish. The key to a professional-looking result is patience and attention to detail during application. Use painter’s tape to mask off trim, windows, and edges to ensure clean lines. When it’s time to paint, start with a quality primer if needed, especially if you’re covering dark colors or painting over a glossy surface. This step helps the paint adhere better and prevents uneven patches.
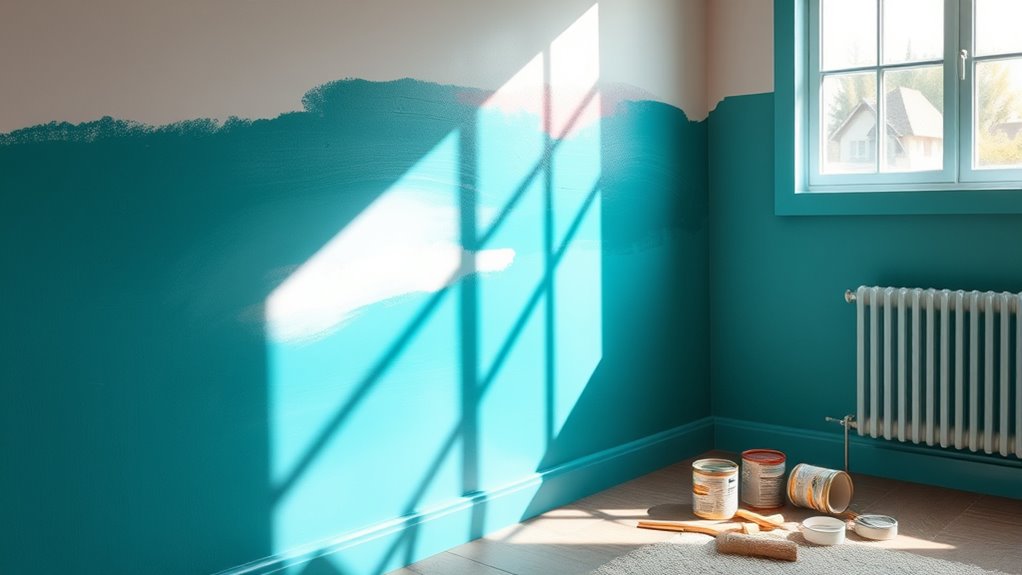
For the actual paint application, use a high-quality brush for edges and corners, and a roller for large, flat surfaces. Dip your roller just enough to avoid drips, and apply the paint in even, overlapping strokes. Work in sections, maintaining a “wet edge” to prevent lap marks. Don’t rush—multiple thin coats often look better than one thick coat, and they dry faster. Keep a steady hand and work systematically from top to bottom. Make sure to allow adequate drying time between coats, following the manufacturer’s instructions. Proper surface preparation is essential for achieving a flawless finish and ensuring the longevity of your paint job.
With patience and the right technique, your paint application will result in a flawless finish. The transformation is remarkable for the effort involved, and it’s incredibly rewarding to see your vision come to life. So, pick your colors wisely and take your time with each stroke. In the end, a simple coat of fresh paint can give your entire room a brand-new look, all achieved through your own skill and effort.

Pro Grade Paint Brushes, 5-Piece Paint Brush Set, Flat & Angle Brushes for Walls, Trim, Cabinets, Interior & Exterior Latex and Oil Paints, Stains
COMPLETE 5-PIECE BRUSH SET FOR EVERY PAINTING TASK — Includes 1 Inch Flat, 1.5 Inch Angle, 2 Inch…
As an affiliate, we earn on qualifying purchases.
As an affiliate, we earn on qualifying purchases.
Frequently Asked Questions
How Long Should I Wait Before Moving Furniture Back?
You should wait at least 24 to 48 hours before moving furniture back to allow proper drying time. This prevents smudges and damage to your fresh paint. When placing furniture, use protective pads or plastic sheets to avoid scratches. Rushing the furniture placement can ruin your work, so give the paint ample time to dry and cure. Patience guarantees your new room looks flawless and lasts longer.
Can I Paint Over Wallpaper Easily?
You can paint over wallpaper, but it’s tricky. First, you’ll need to carefully remove any loose or textured wallpaper, as this affects your finish. Then, apply a high-quality primer designed for wallpaper, which helps the new paint adhere properly. Skipping this step risks peeling or bubbling later. Be patient, and don’t rush—proper preparation guarantees a smooth, lasting transformation, revealing a fresh, flawless look beneath your new coat.
What’s the Best Time of Year to Paint Indoors?
The best time of year to paint indoors is during spring or fall when seasonal considerations like temperature and humidity levels are ideal. Avoid painting in summer or winter, as high humidity can cause paint to dry slowly or unevenly, and extreme cold or heat can affect adhesion. Choose a period with stable indoor temperatures and low humidity to make certain a smooth, lasting finish.
How Do I Prevent Streaks During Painting?
To prevent streaks during painting, use proper brush techniques and make certain your paint has the right consistency. Always load your brush lightly, and apply paint in smooth, even strokes, working in the same direction. Keep your paint mix consistent by stirring regularly, and avoid overloading your brush or roller. This approach helps you achieve a flawless finish without streaks, giving your room a professional look with minimal effort.
Are There Eco-Friendly Paint Options Available?
Like a gust of fresh air, eco-friendly paints are widely available today. You can choose from natural paint alternatives made from ingredients like clay, milk protein, or plant-based resins, which reduce harmful chemicals. Eco-friendly paints offer vibrant colors and durability without compromising your health or the environment. Look for labels such as low-VOC or zero-VOC, and explore brands committed to sustainability. Making this choice keeps your space beautiful and eco-conscious.

ScotchBlue™ Painter's Tape, 3" Core, 1" x 60 Yd.
READY. SET. TAPE!: 1 roll of 1.41 inches x 60 yards tan Scotch General Purpose Masking Tape, a…
As an affiliate, we earn on qualifying purchases.
As an affiliate, we earn on qualifying purchases.
Conclusion
So, there’s no need to fear the DIY painting process. With a little preparation and patience, you can easily transform your space with just a fresh coat of paint. Think of it as giving your room a new heartbeat—each stroke bringing new life and energy. Trust in your ability, follow the steps, and enjoy the satisfying feeling of creating a beautiful, personalized space. After all, a fresh coat isn’t just paint; it’s a fresh start.

1 Quart Bulls Eye 1-2-3 Primer Sealer Stain Killer
Designed for interior and exterior surfaces
As an affiliate, we earn on qualifying purchases.
As an affiliate, we earn on qualifying purchases.

12 x 9 Ft Plastic Drop Cloths (6-Pack) – Disposable Painter's Sheeting & Tarps for Painting, Waterproof Furniture/Couch/Floor Protection
1. Versatile Floor and Furniture Protection: More than just for painting, these durable plastic sheet protect floors, furniture,…
As an affiliate, we earn on qualifying purchases.
As an affiliate, we earn on qualifying purchases.