
To fix a squeaky floor using household items, locate the noisy spot and gently fill the gap between the subfloor and joist with a sturdy material like a small piece of cardboard or a wood shim. Slide it into the gap and tap it in until snug, reducing movement that causes squeaks. Tighten loose nails or screws nearby, or replace them with longer screws for a more secure hold. Keep exploring to discover more handy tips for a quieter, more stable floor.
Key Takeaways
- Identify the exact squeaky spot by walking across the floor and listening carefully.
- Use household items like a thick cardboard or wood shim to fill gaps beneath the subfloor.
- Insert the shim or cardboard into the gap and gently tap it in until snug to reduce movement.
- Tighten loose nails or screws in the affected area with a screwdriver or hammer for a secure fix.
- Reinforce weak spots by inserting shims between the subfloor and joist to stabilize and eliminate squeaks.
A squeaky floor can be both annoying and distracting, but luckily, fixing it is often a straightforward task. The cause usually lies beneath the surface, often involving the floor joist or the subfloor. When these components shift or rub against each other, they create that telltale squeak every time you step on the floor. The good news is that you don’t need fancy tools or expensive materials to silence the noise—sometimes, a household item you already own can do the trick.
Start by locating the exact spot where the squeak originates. Walk across the floor and listen carefully or have someone else help identify the noisy area. Once you’ve pinpointed the trouble spot, you can take action. Many squeaks happen because the subfloor has shifted or become loose, causing movement against the joist below. To fix this, you’ll need to tighten or secure the subfloor to the floor joist, preventing that unwanted movement.
Identify the squeak source and secure the loose subfloor to stop unwanted movement.
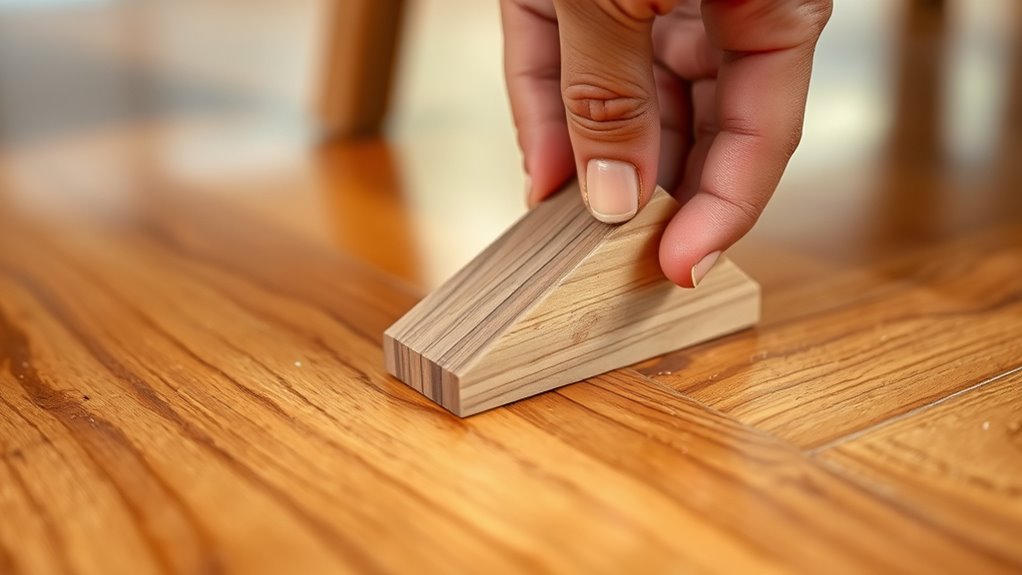
One simple household item that can help is a thick, sturdy wood shim or even a small piece of cardboard. Slide it into the gap between the subfloor and the floor joist at the squeaky spot. If you have a small hammer or mallet, gently tap the shim into place until it fills the space snugly. This will create a tighter bond, reducing movement and eliminating the squeak. If you don’t have shims, a folded piece of cardboard can work just as well. Just make sure it’s thick enough to fill the gap without forcing it in so tight that it damages the subfloor.
In some cases, the squeak may be caused by loose nails or screws in the subfloor or the joist. If you have a screwdriver or a hammer, tighten any loose fasteners. If nails are popping up, carefully tap them back in or replace them with longer screws, which provide a more secure hold. This process often addresses the root cause of squeaks caused by loose connections.
In situations where the squeak persists, you might consider a bit of subfloor repair. Using the household item—like a shim or cardboard—you can reinforce weak spots. For example, if a section of the subfloor has shifted or is sagging, inserting shims between the subfloor and the joist can restore stability. The result is a quieter, more stable floor that no longer distracts you during daily activities.
Frequently Asked Questions
Can I Fix Squeaky Floors Without Removing the Flooring?
Yes, you can fix squeaky floors without removing the flooring. First, identify the squeak and access the space between the floorboards and joists. You can try floor joist tightening by inserting shims or using screws to stabilize the structure. Additionally, adhesive injection between the subfloor and joist can reduce movement and noise. These methods often eliminate squeaks without needing to remove or replace the flooring.
How Long Does the Repair Last Before Squeaks Reappear?
This repair can last as long as a lifetime if done correctly, but it all depends on your floor’s lifespan and how much it moves. Typically, the squeak recurrence might happen within a few years if the underlying issues aren’t fully addressed. Keep in mind, regular wear and tear could shorten the fix’s effectiveness, so stay vigilant and reapply if squeaks reappear over time.
Is It Safe to Use Household Oil on Wood Floors?
Using household oils on wood floors can be safe if you choose the right type and apply sparingly. Avoid excessive use, as too much oil might damage the finish or make the surface slippery. Always verify good ventilation and test a small area first. When considering wood floor safety, opt for natural, non-toxic oils like mineral or baby oil, and avoid harsh chemicals to protect your floor’s integrity.
Will Fixing a Squeaky Floor Damage the Subfloor?
When fixing a squeaky floor, you’re unlikely to damage the subfloor if you follow proper methods. However, if you use excessive force or incorrect techniques, you might compromise the subfloor integrity or worsen underlying damage. To avoid this, identify the source of the squeak carefully and use gentle, targeted repairs. This approach helps preserve your subfloor and prevents additional issues from developing.
Are There DIY Methods for Squeaky Tile Floors?
For squeaky tile floors, DIY methods focus on tile maintenance and grout repair. You can try injecting epoxy or a grout repair caulk into the seams to reduce movement and noise. Applying a sealant to the grout lines helps stabilize the tiles. Additionally, if tiles are loose, re-adhering them with a suitable adhesive can prevent squeaks. Always confirm the area is clean before starting to get the best results.
Conclusion
By using a common household item, you can easily silence that annoying squeak without professional help. It’s a simple fix that saves time and money—over 60% of homeowners have successfully tackled squeaky floors themselves. Just a little bit of effort can make your living space quieter and more comfortable. So next time you hear that squeak, remember you already have what you need to fix it, no special tools required.