
TL;DR
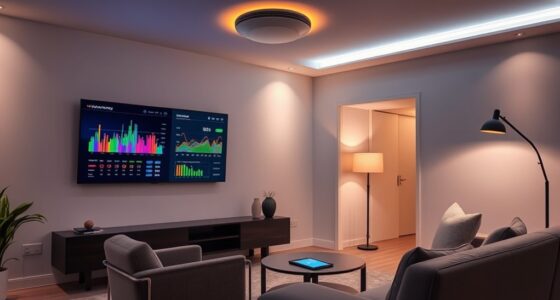
Moving your rig into a closet can dramatically cut noise and reflections. Focus on placement, acoustic treatment at reflection points, and proper ventilation. It’s not just about foam—smart positioning makes all the difference.
If you’ve ever tried recording vocals in a tiny closet, you already know the challenge. Echo, unwanted noise, and heat make it feel like wrestling a ghost. But what if the secret isn’t just adding foam or blankets? What if the real game-changer is where you put your rig—and how you treat that space?
This isn’t about creating a perfect soundproof studio. It’s about making a small closet work smarter. You’ll learn how to position your gear, dampen reflections, and keep your equipment cool—without turning your workspace into a sauna or a maze.
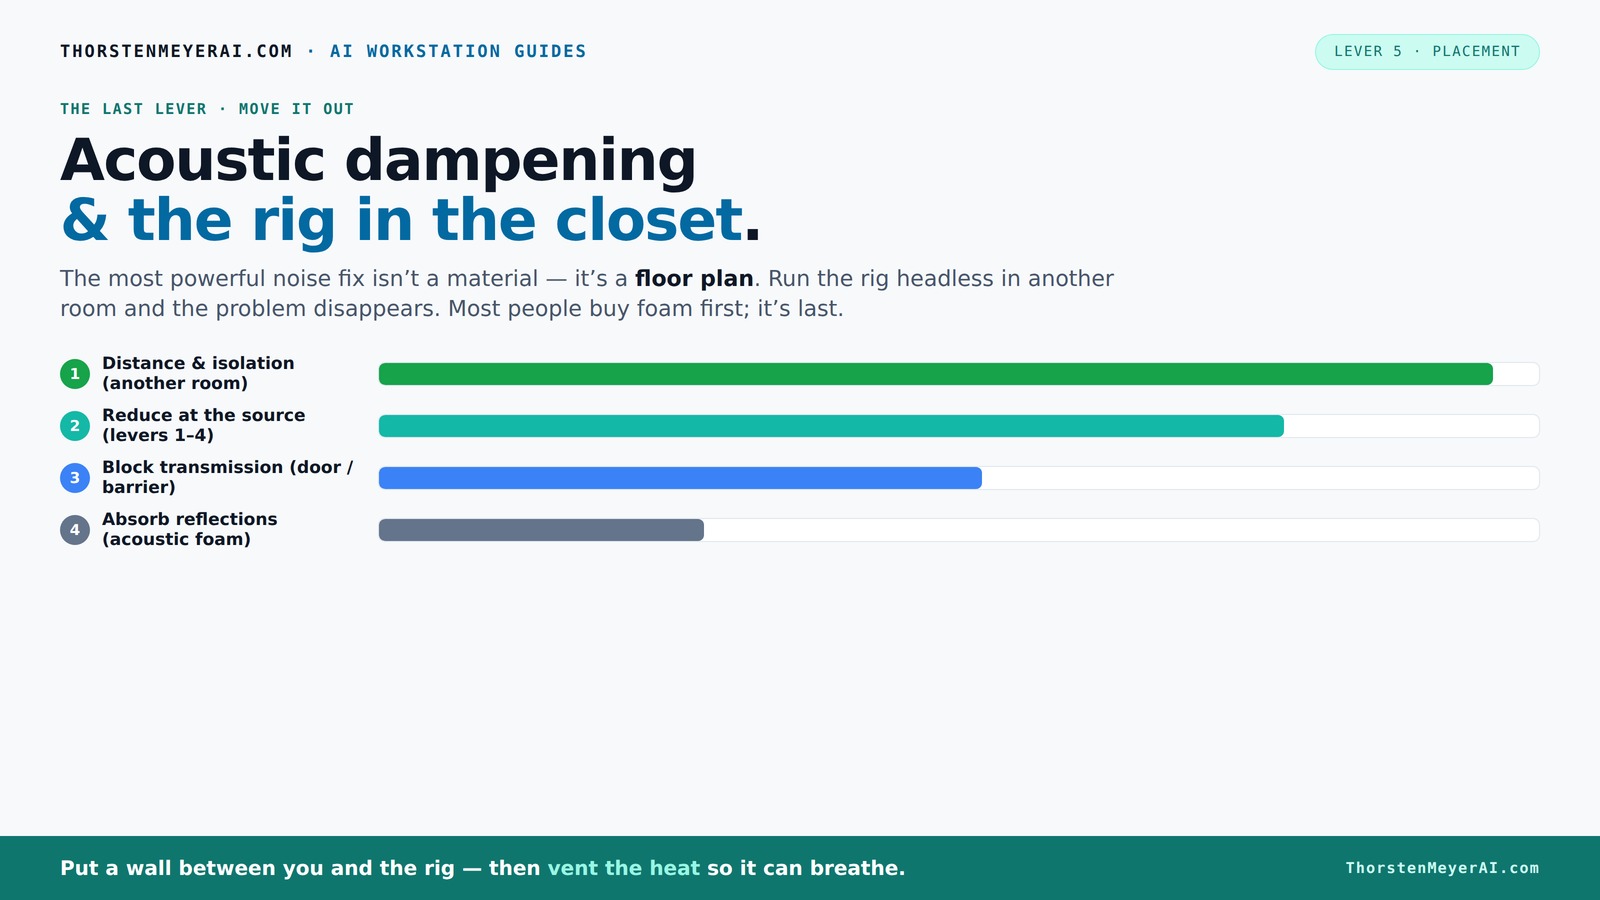
Acoustic dampening
& the rig in the closet.
The most powerful noise fix isn’t a material — it’s a floor plan. A rig you can’t hear because it’s in another room beats any amount of foam. Tap the approaches in Part 1 to see what actually works.
(another room)
(levers 1–4)
(door / barrier)
(acoustic foam)
Contain the noise, not the heat
Key Takeaways
- Relocating your rig to another room or closet is the most effective noise reduction strategy.
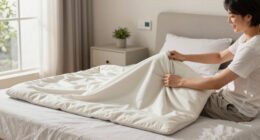
- Target reflection points with thick, soft materials like blankets or foam for best sound absorption.
- Proper ventilation in closet setups is critical—don’t trap heat, or your hardware will throttle loudly.
- Seal gaps around doors and vents to prevent sound leaks from undermining your efforts.
- Focus on placement and reflection control over simply piling on foam; geometry and positioning matter more.

Focusound 52 Pack Acoustic Foam Panels 1" x 12" x 12" Sound Proof Foam Panles Soundproofing Noise Cancelling Wedge Panels for Home Office Recoding Studio with 300PCS Double-Side Adhesive
- Soundproofing Design: Triangular grooves for noise absorption
- Includes Adhesive Tape: 300pcs double-sided adhesive for easy installation
- Easy Shape Recovery: Reforms after soaking in water
As an affiliate, we earn on qualifying purchases.
As an affiliate, we earn on qualifying purchases.
Why Moving Your Rig Matters More Than Foam
Moving your setup into a different room or even a closet is the simplest, most effective way to cut noise. Think of it as an instant sound barrier. When your rig is in another room, it’s like having a wall between you and the noise. No amount of foam on your walls will beat that.
For example, a friend of mine put his GPU rig in a spare basement room. He uses SSH and remote access. His voice recordings are now crystal clear, with no echo or fan noise. The rig’s location did more than all the foam he bought combined.
All you need is a wired connection and some ventilation. The trick is making sure your rig can breathe—otherwise, heat will cook your hardware and cause loud throttling.
Why does this matter? Because physical distance and proper placement can drastically reduce direct noise and vibrations that can bleed into your recordings. The tradeoff is that relocating hardware might mean rerouting cables or adjusting your workflow, but the improvement in sound clarity often outweighs these inconveniences.
The 'Rig in the Closet' Setup: How to Do It Right
Placing your high-power rig inside a closet or cabinet can eliminate most noise—if you do it properly. The key is ensuring good airflow. A sealed closet traps heat, causing temperatures to soar. Your GPU might hit 85°C or higher, prompting fans to scream even louder.
To prevent this, add active ventilation—like a quiet exhaust fan drawing hot air out and cooler air in. Use ducting if possible. Consider a purpose-built soundproof cabinet that combines acoustic dampening with temperature control. These units often include adjustable vents and fans, keeping your hardware cool without amplifying noise.
For instance, I built a small soundproof box for my PC using thick acoustic blankets and a quiet exhaust fan. My temps stayed below 75°C, and noise dropped to near silence. Check out this guide for detailed cooling tricks.
Understanding the tradeoffs: while sealing your rig in a closet improves soundproofing, neglecting heat dissipation can lead to overheating and hardware throttling. The key is balancing acoustic dampening with effective ventilation. An enclosure that is too airtight without proper airflow can do more harm than good, causing thermal issues that might damage your hardware or reduce its lifespan.
Where to Place Absorption Materials for Maximum Effect
Acoustic dampening in a small closet isn’t about covering every surface. It’s about targeting the right spots—reflection points. The first reflection points are typically the wall behind your mic, the side walls near the mic, and the ceiling.
If you place foam or blankets directly in front of your mic, you'll notice a huge difference. For example, hanging a thick blanket behind the mic reduces slap echo and comb filtering. Thicker panels — around 2 inches for small closets, 4 inches if space allows — absorb lower frequencies more effectively.
Pro tip: use a mirror to find reflection points. If you see your mic in the mirror when facing the wall, that’s a reflection point. Cover it with soft, broad materials like moving blankets, foam panels, or even carpet squares. Why is this effective? Because reflections at these points bounce sound directly into your mic, creating comb filtering and muddiness. Proper placement of dampening materials at these spots minimizes these issues, leading to clearer, more professional recordings. The tradeoff is that improper placement or neglecting reflection points can leave you with persistent echo or muddiness, no matter how much foam you add elsewhere. You can learn more about acoustic treatment here.
Fixing Low-End Buildup and Standing Waves in Small Spaces
Bass and low frequencies can be a nightmare in tiny closets. Parallel walls create standing waves, making bass sound boomy or uneven. This is why treating corners with bass traps or foam is crucial.
If you notice your voice sounds muddy or your recordings have a booming quality, it’s time for bass treatment. Placing foam or specialized bass traps in the corners can absorb those low frequencies. Even a simple DIY bass trap using rigid fiberglass and fabric can make a big difference.
In one case, a YouTuber added DIY bass traps at the closet corners, and his low-end issues vanished. The room sounded clearer, and his recordings became more professional. You can find more about acoustic treatment for bass here.
Sealing Gaps and Doors—Stop the Sound Leaks
Gaps around the door, cracks, and vents are the weak points in your soundproofing. Sound escapes through these openings, defeating all your efforts. For tips on sealing gaps effectively, visit this resource.
For example, sealing the door with weatherstripping reduced noise leaks by over 80%. A simple door sweep and foam strips around the frame can make a huge difference. Remember, even tiny gaps can let in or out a surprising amount of sound.
Why does sealing matter so much? Because sound leaks undermine your entire setup—no matter how much foam or dampening you add inside, if sound escapes through gaps, your efforts are compromised. Learn more about effective sealing techniques here.
Using Soft, Broad Coverage Materials Effectively
In tight spaces, layering soft materials like moving blankets, acoustic blankets, and rugs can drastically cut reflections. These are DIY heroes that don’t take up much room but make a big impact.
For instance, hanging a thick blanket over the ceiling and walls transforms the space into a much quieter environment. When full panels aren’t possible, broad coverage with soft materials is your best bet.
Why does broad coverage work? Because it reduces the amount of sound bouncing around, especially in areas where you can’t fit large panels. Covering surfaces like the ceiling, desk, or even the door with soft materials creates multiple layers of sound absorption, which cumulatively improve sound quality. The tradeoff is that insufficient coverage or uneven placement can leave residual reflections or echoes. The goal is to maximize coverage with minimal effort, making soft, inexpensive materials versatile and effective.
Avoid Hard Surfaces Near the Mic – Keep the Sound Warm
Hard, reflective surfaces near the mic cause harsh echoes and comb filtering. Placing a blanket or foam on the desk surface near your microphone can soften these reflections instantly.
For example, a streamer I know draped a fleece blanket over his desk and noticed his vocals became much warmer and clearer. It’s a simple fix that costs almost nothing but pays huge dividends.
Why does this matter? Because hard surfaces reflect high-frequency sound waves directly into the mic, causing harshness and comb filtering that distort the natural tone of your voice. Using soft materials on nearby surfaces diffuses these reflections, resulting in warmer, more natural recordings. The tradeoff is that neglecting these surfaces can lead to a sterile or harsh sound, which is hard to fix in post-production. Simple placement of blankets or foam on reflective surfaces is an inexpensive way to improve sound quality instantly.
Workflow Considerations: Keep It Practical and Functional
Soundproofing and dampening shouldn’t turn your closet into a dungeon. Leave enough room for access, cables, and airflow. A cramped, hot closet will kill your workflow and hardware lifespan.
Strategically place panels so they don’t block your door or access points. Use lightweight, layered blankets that can be moved or adjusted easily. Remember, comfort and usability matter as much as sound.
For example, I use a foldable blanket setup that I can rearrange when needed, keeping my workflow smooth and my closet quiet.
Why is this important? Because overly restrictive setups can hinder your workflow, making it frustrating to access gear or troubleshoot. Also, poor airflow leads to overheating, which can damage hardware or cause throttling. Balancing effective treatment with accessibility and ventilation ensures you maintain a productive, safe workspace. The tradeoff is that sacrificing convenience for maximum absorption can lead to a cluttered or hot environment, so plan your layout carefully.
Frequently Asked Questions
Is a closet good enough for recording vocals?
Yes. With proper reflection control, sealing gaps, and ventilation, a closet can become a high-quality vocal booth. Focus on reflection points and soft materials to get studio-quality sound.What is the difference between acoustic treatment and soundproofing?
Acoustic treatment reduces reflections and echo within a space, making the sound clearer. Soundproofing stops sound from leaving or entering the space, preventing leaks and external noise.Where should I place foam or panels in a closet booth?
Place foam at reflection points—behind the mic, side walls, and ceiling—using a mirror test. Focus on areas that bounce sound directly into your mic for maximum effect.How thick should acoustic panels be for a small closet?
Two-inch panels are effective for most small spaces; four-inch panels are better if low-frequency absorption is needed. Thicker panels absorb lower bass more efficiently.Do I need bass traps in a closet studio?
Yes, especially if you notice muddiness or booming in recordings. Corner bass traps help control low-end buildup caused by parallel walls and small room dimensions.Conclusion
Moving your rig into a closet isn’t just a neat trick — it’s often the best move you can make. But a closet isn’t a magic box; it needs thoughtful placement, proper ventilation, and strategic treatment. When these pieces come together, your recordings will sound clearer, cleaner, and more professional.
Remember, it’s about smart choices, not just more foam. Your workflow, hardware health, and sound quality will thank you. Now, go build that quiet, effective closet studio — because good sound starts with good placement.