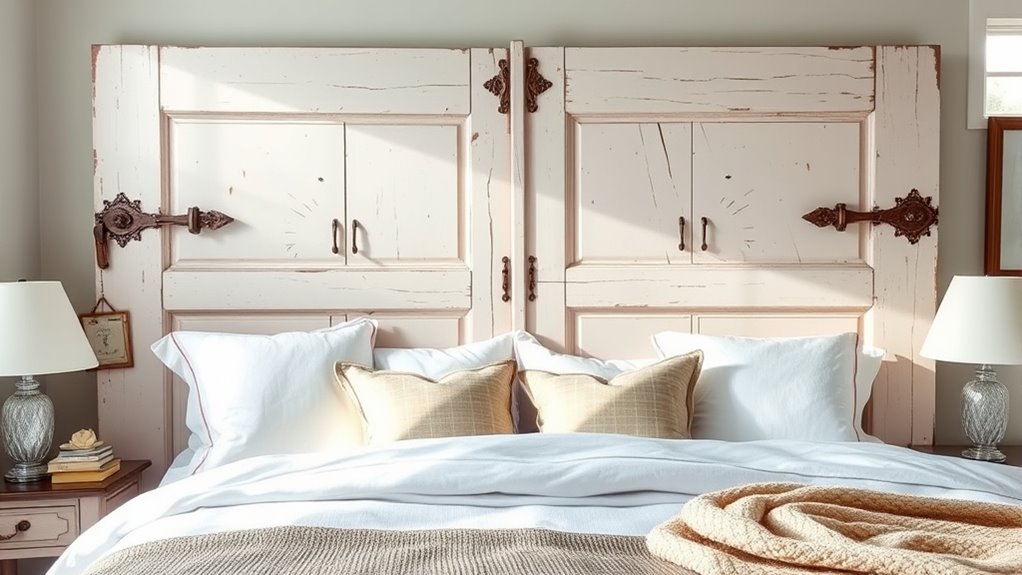
transform old doors into stunning headboards by selecting vintage or distressed doors with character, then remove hardware and sand them smooth. Customize with paint, stain, or distressing techniques to achieve a rustic look, adding decorative trim if desired. Secure support boards to the door and attach them to your bed frame or wall using appropriate mounting hardware. For a polished finish, incorporate personal touches like molding or lighting; if you keep going, you’ll discover more tips to create a unique focal point.
Key Takeaways
- Select vintage or distressed doors with character and appropriate size for your bed, then remove hardware and sand surfaces.
- Customize with painting, staining, or distressing techniques to achieve a rustic, vintage, or personalized look.
- Add decorative trim, molding, or reclaimed accents for enhanced visual appeal and texture.
- Attach support boards to the door and secure to the bed frame or wall using appropriate mounting hardware.
- Ensure stability and safety with proper fastening, leveling, and consider adding decorative elements like lighting or ornate details.
Selecting the Perfect Old Door for Your Headboard

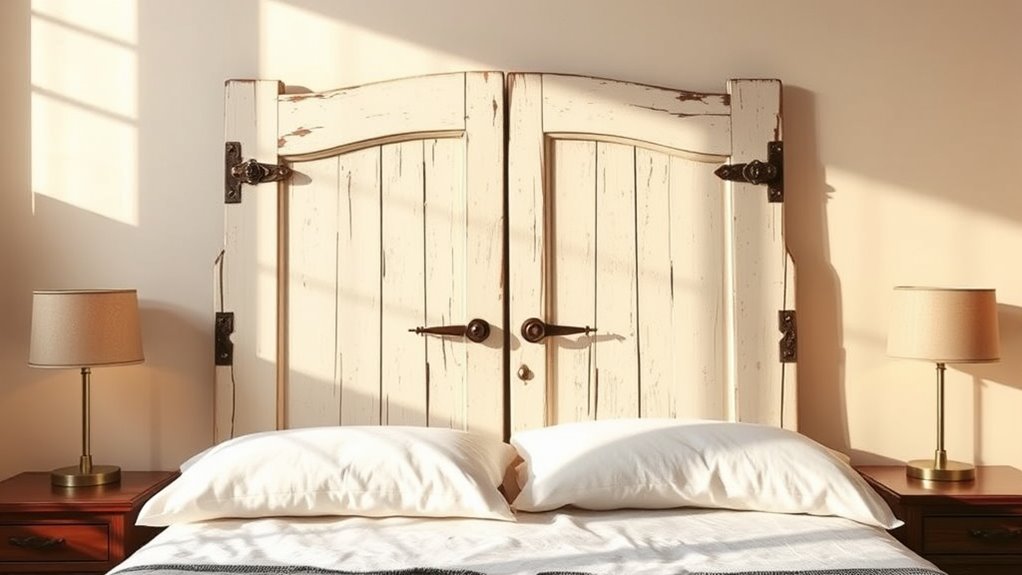
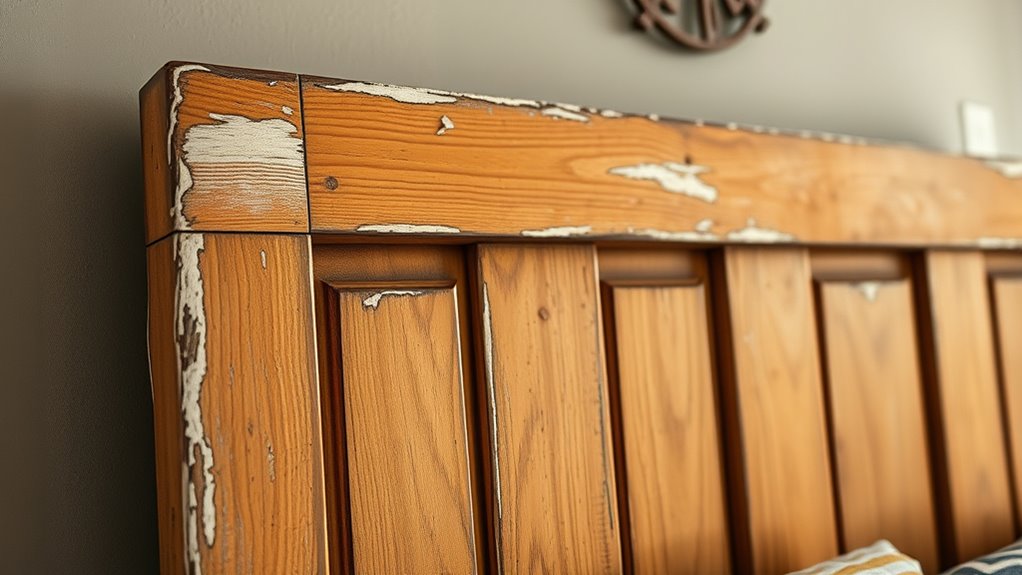
Choosing the right old door for your headboard starts with considering its size and style. Old doors suitable for headboards typically measure around 80 inches in height, giving you plenty of coverage for most bed sizes. The width varies: about 76 inches for king beds, 72 inches for California king, and 60 inches for queen beds. Vintage or reclaimed doors often feature multiple panels and rustic details, adding character to your space. When selecting, think about whether you want to showcase the panel side or the distressed, rustic surface to match your bedroom decor. Reclaimed wood can give your headboard an authentic, vintage look. Repurposing old doors is a sustainable, affordable way to create a unique headboard. Whether you find your vintage gem at salvage stores, antique shops, or online, choose one that fits your bed size and aesthetic vision. Incorporating rustic design elements can enhance the overall farmhouse charm of your bedroom space. Additionally, understanding IRA investment strategies can help you plan your finances better to support your decorating projects or other retirement goals. For example, selecting a door with a distinctive patina or weathered surface can add to the vintage appeal of your headboard. Exploring proper preservation techniques can also ensure that your repurposed door maintains its charm for years to come.
Preparing and Customizing Your Reclaimed Door
Once you’ve selected the perfect old door for your headboard, the next step is to prepare and customize it for your space. Start by lightly sanding both sides to remove loose paint and create a smooth surface. Use a paint scraper to add a distressed, vintage look if desired. Fill any holes or doorknob holes with Bondo wood filler, then sand smooth once dried for a seamless finish. To fit your bed size, trim the door if necessary—perhaps cutting off panels for a more proportionate headboard. Consider whether to paint or stain the door to highlight its character. Additionally, the lightweight design of some electric dirt bikes makes them easier to move or reposition during customization. Being aware of AI in education innovations can inspire creative approaches to DIY projects, such as integrating technology or design ideas.
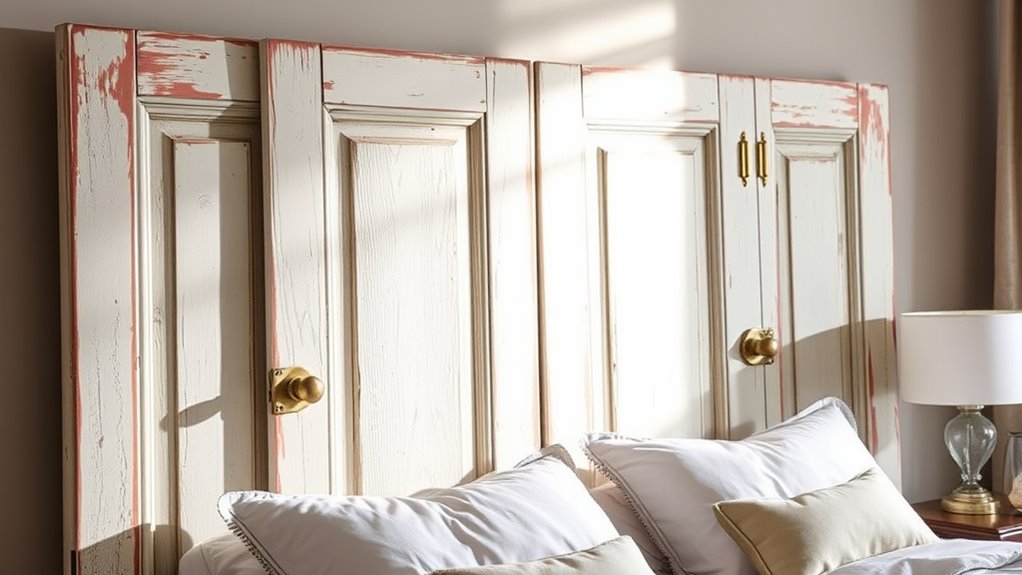
Painting and Finishing Techniques for a Rustic Look
To achieve a rustic look, start by lightly sanding the door to remove loose paint and improve adhesion. Then, apply a single coat of milk paint and use a paint scraper to create natural chipping, revealing the vintage character. To enhance the texture, consider adding a textured finish with specialized tools or techniques that complement the distressed appearance. Incorporating AI-driven design insights can help you visualize the final look and plan your finishing approach more effectively. Additionally, selecting the right sealer or protective coating can preserve the distressed, reclaimed appearance and prevent further damage. Using appropriate sealing techniques ensures the finish remains durable and enhances the rustic charm. Finish by sealing the surface with a protective sealer to maintain the distressed, reclaimed appearance. Embracing inspirational quotes about fatherhood can remind you of the importance of patience and support during this creative process.
Achieving Distressed Finish
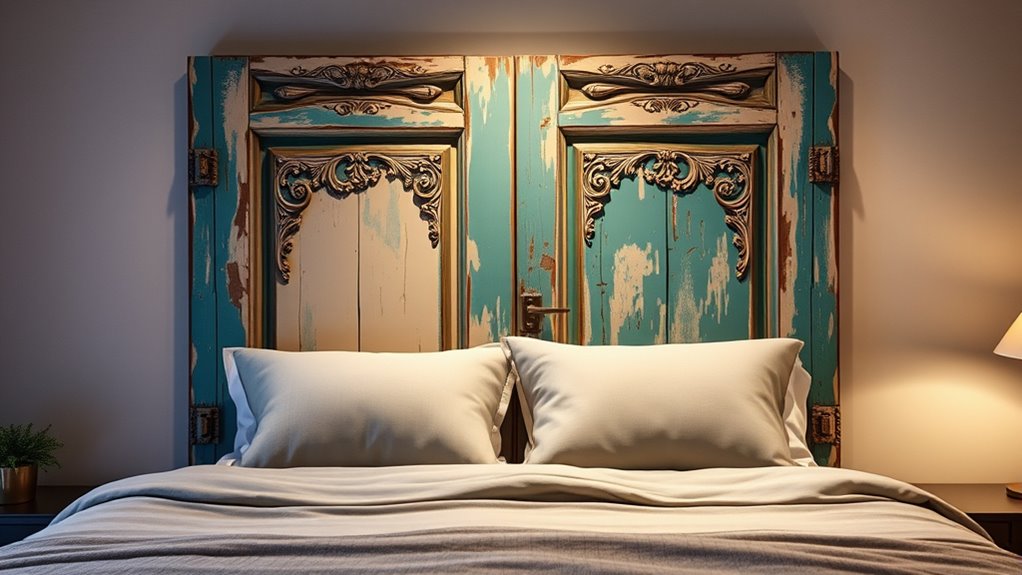
Achieving a distressed finish on your door headboard involves strategic painting and finishing techniques that emphasize a rustic, vintage look. Start by applying a single coat of milk paint, then use a scraper to remove sections, creating a chipped, distressed appearance. Lightly sand over the painted surface to reveal underlying colors or wood grain, enhancing the aged effect. Once satisfied, protect your work with a sealant like Minwax Polycrylic, which prevents further chipping and preserves the distressed look. To add depth and texture, consider dry brushing or applying wax. For a striking vintage contrast, use different paint colors on trim and the main surface. These techniques combine to give your headboard an authentic, rustic charm that’s both stylish and durable. Additionally, incorporating weathered effects and AI-driven techniques can help simulate weathered effects or customize finishes for a more personalized, creative approach. Employing topical treatments can further enhance the authenticity and uniqueness of your distressed finish. Using layered paint applications can also add complexity and richness to your design, creating a more convincing vintage appearance. Exploring celebrity lifestyle trends may inspire unique finishing ideas that reflect current interior design fads.
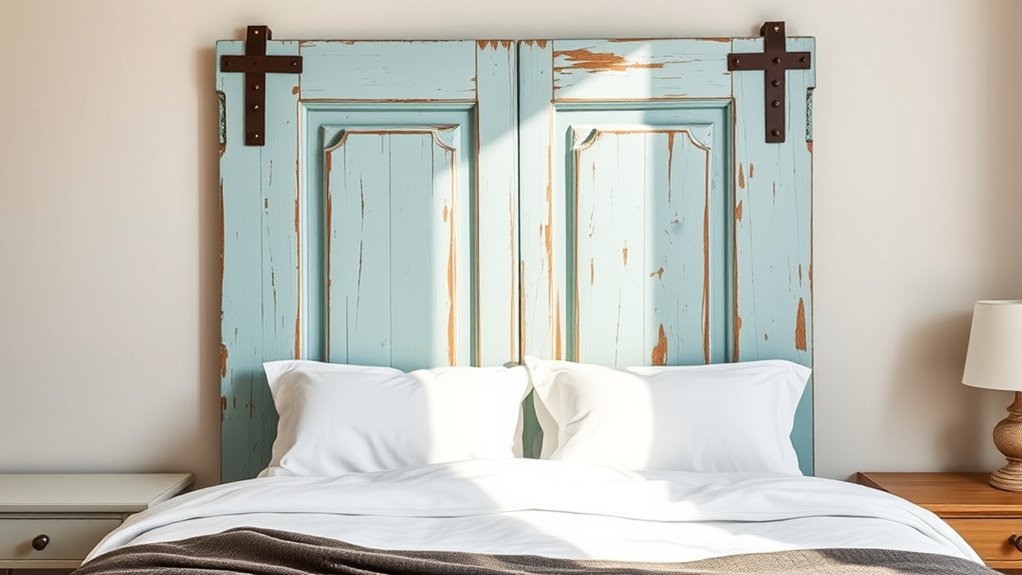
Choosing Appropriate Paints
Choosing the right paints sets the foundation for a convincingly rustic headboard. For a vintage, distressed finish, opt for milk paint or chalk paint. These types create an authentic, worn-in look that enhances reclaimed doors. Lightly sanding the paint after application reveals underlying layers and adds charm. To protect your work, seal the painted surface with a clear matte or semi-gloss sealer, like Minwax Polycrylic, ensuring durability and preserving the rustic appeal. Applying just one coat before distressing with a scraper or sandpaper helps achieve an aged, vintage appearance. Select muted, earthy tones—whites, creams, or blues—to complement your farmhouse or shabby chic style. Using these paint choices and techniques guarantees a charming, rustic headboard that exudes character. Additionally, incorporating eco-friendly materials can enhance the sustainability of your project while maintaining a charming aesthetic. For best results, consider paint application techniques that add texture and depth to your finish.
Adding Decorative Trim and Molding Details
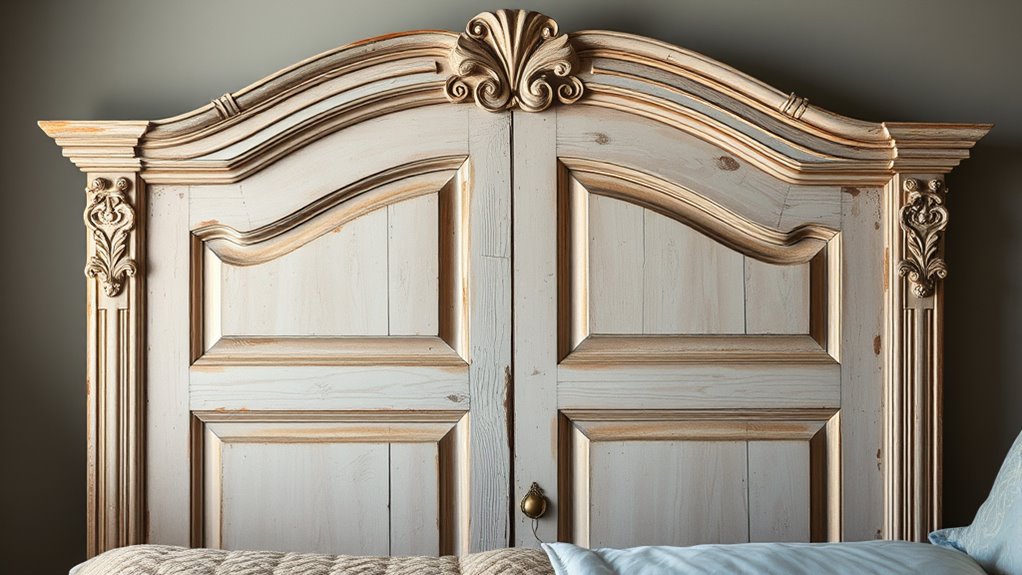
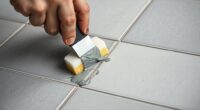
Adding decorative trim and molding details can instantly elevate the look of your old door turned headboard. You can choose materials like wood molding or decorative strips to add dimension and style. Use mitered corner cuts at 45 degrees to create seamless joints when attaching crown molding or picture frame trim, giving a polished appearance. Secure the trim with finish nails for a clean, professional finish. After attaching, caulk any gaps between the trim and the door surface to guarantee smooth transitions. Incorporating farmhouse-inspired details such as beadboard panels or reclaimed wood accents can further enhance its visual appeal and ensure your headboard remains stylish and unique. Additionally, understanding cryptocurrency market trends can inspire creative ways to incorporate modern elements or themes into your design. Knowing about environmental considerations helps you choose sustainable materials and practices during your project. Finish with sanding and paint or stain to match or contrast with your headboard, depending on your style. These decorative details add sophistication and character, transforming a simple repurposed door into a stunning focal point for your bedroom.
Attaching Support Boards and Mounting Methods
To guarantee your headboard stays secure and stable, you’ll want to attach support boards properly and choose the right mounting method. Using long screws for support boards and installing heavy-duty brackets or French cleats helps distribute weight and keeps everything secure. Pay attention to safety by making sure all components are firmly anchored, providing a safe and lasting headboard setup.
Securing With Support Boards
Attaching support boards securely is essential for ensuring your door headboard is stable and safe. Proper support creates a firm foundation, preventing wobbling or shifting.
- First, attach 2×4 support boards to the back of the door with long screws, making sure they extend below the headboard for added stability.
- Next, secure the support boards to the bed frame with screws or bolts, creating a secure connection that keeps everything in place.
- Finally, for wall-mounted headboards, install French cleats or tracking systems to hang the headboard securely, ensuring it stays level and stable.
Using support boards effectively guarantees your headboard remains sturdy, providing both safety and aesthetic appeal. Incorporate felt pads or bumpers to prevent scratches and maximize stability.
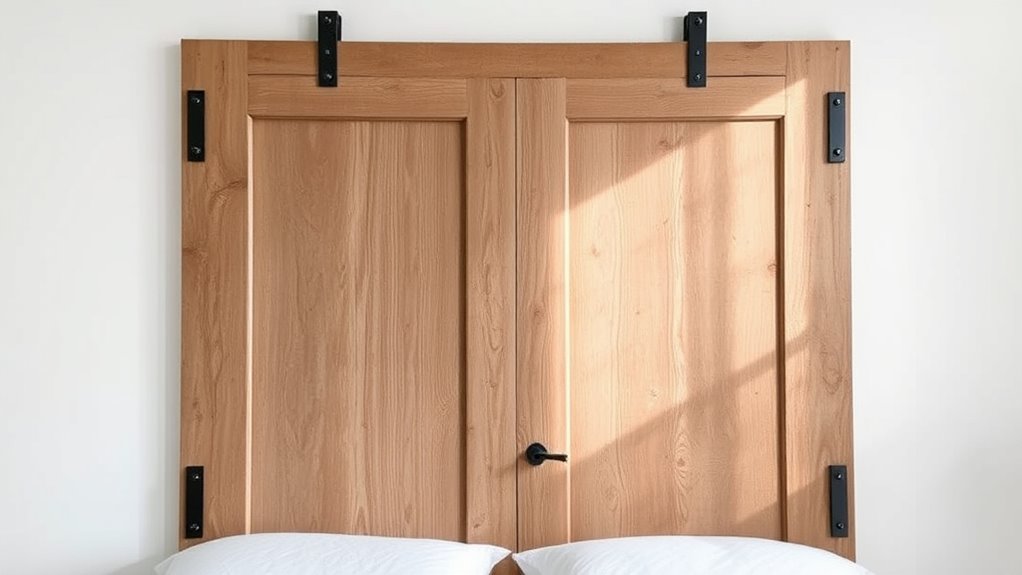
Wall Mounting Techniques
Wall mounting your door headboard offers a sleek, space-saving option that requires careful support and secure attachment. Start by attaching sturdy support boards, like 2x4s, to the back of the door with long screws or lag bolts, making sure they’re level and centered for stability. Pre-drill holes in the support boards and wall to prevent splitting and ensure precise alignment. Use wall-mounted tracking systems, French cleats, or heavy-duty brackets secured with anchors to hang the headboard securely on the wall. Consider attaching D-rings or picture wire to the support boards for adjustable hanging and easy leveling. To achieve a clean, seamless look, conceal the mounting hardware with decorative trim or a painted border around the headboard, creating a polished finish.
Stability and Safety
Ensuring your door headboard is both stable and safe begins with securely attaching support boards, like 2x4s, to the back of the door using long screws. Always pre-drill gaps to prevent splitting, especially with old, brittle wood.
- Use sturdy support boards and proper mounting hardware like French cleats or brackets to prevent shifting.
- Mount the headboard to the wall securely, ensuring it’s level, to avoid tipping.
- For free-standing setups, anchor support boards to the bed frame with bolts or brackets for added stability.
Remember safety precautions: add felt pads or rubber bumpers at contact points to protect your walls and floors, enhancing safety and preventing damage.
Securing the Headboard to Your Bed Frame or Wall
To securely attach your old door headboard, start by choosing the appropriate method based on your space and the weight of the door. For a sturdy, stable setup, you can attach the headboard directly to your bed frame or wall. Use long screws through pre-drilled holes in the support boards for mounting to the bed frame, ensuring a tight fit for stability. Alternatively, for wall mounting, hang the headboard with a French cleat or heavy-duty picture hanging system, anchoring into wall studs for maximum support. The table below visualizes your options:
| Method | Hardware Needed | Best For |
|---|---|---|
| Mounting to bed | Long screws, support boards | Smaller, lighter headboards |
| Wall mounting | French cleat, anchors, studs | Larger, heavier doors |
| Combination | Both methods | Extra stability |
| Contact pads | Felt pads, rubber stoppers | Prevent damage, reduce movement |
| Level tools | Bubble level | Proper alignment |
Creative Enhancements and Personal Touches
Once your old door headboard is securely attached, you can elevate its style and personality with creative enhancements. These personal touches turn a simple vintage headboard into a standout piece in your home decor.
Enhance your vintage headboard with creative touches for a personalized, stylish statement in your home.
- Add decorative embellishments like crown molding or ornate trim at the top to give it a more polished, elegant look.
- Incorporate vintage light sconces or wire baskets with curtains to blend functionality with charm.
- Paint the door in unique colors or distress it with sandpaper for a rustic or shabby chic vibe.
These creative touches customize your headboard, making it a focal point that reflects your style. Whether through color, embellishments, or lighting, your personal touches will give your vintage headboard a distinctive, charming personality.
Maintaining and Caring for Your Vintage Headboard
Maintaining your vintage headboard is essential to preserve its charm and durability over time. Regularly dust it with a soft cloth to prevent dirt buildup and keep its rustic appeal. For cleaning painted or sealed surfaces, use a gentle cleaner or mild soap solution—avoid harsh chemicals that can damage the finish. Reapplying a protective sealant like Minwax Polycrylic every few years helps preserve the paint and prevents moisture damage, extending the headboard’s lifespan. Periodically inspect it for loose nails, screws, or joints, and tighten or repair as needed to ensure stability. Also, keep your vintage headboard away from direct sunlight and high humidity areas, as these conditions can cause fading, warping, or deterioration of the wood, compromising its overall integrity.
Frequently Asked Questions
How Can I Make My Bed Look Pretty Without a Headboard?
If you want your bed to look pretty without a headboard, you can get creative. Hang a large, decorative mirror or artwork above your bed to serve as a focal point. Add string lights or wall sconces on either side for warmth. Use textured bedding, layered throws, or place a vintage trunk or bench at the foot of the bed. Finish with stylish bedside tables, lamps, and some greenery for a cozy, inviting look.
How Do You Make It Look Like You Have a Headboard?
You want your bed to look like you’ve got a headboard, so start by making it a standout feature. Paint or stain a door in a color that matches your decor, then add trim or decorative accents to elevate its look. Mount it directly on the wall or attach it to your bed frame for an integrated feel. Accent with lighting or fabric to give it that polished, headboard-like charm.
What Is a Floating Headboard?
A floating headboard is mounted directly to your wall without touching the floor, creating a sleek, modern look. You attach it with wall brackets or cleats, which makes it seem like it’s “floating” above your bed. You can make a floating headboard from various materials like wood, fabric, or repurposed doors. Just guarantee you securely anchor it to wall studs or strong anchors for stability and safety.
How to Attach Headboard to Wood Frame Without Holes?
They say “a stitch in time saves nine,” and when attaching a headboard to a wood frame without holes, you can use that wisdom. Try using a French cleat system or heavy-duty velcro strips, which hold securely without damaging the wood. Attach plywood strips to the headboard and frame, then hang or mount them on the wall. These methods keep your space tidy and damage-free while ensuring stability.
Conclusion
Now, picture your bedroom transformed by a timeless, rustic headboard that tells a story. The warm glow of a lamp highlights the rich textures and weathered charm of your reclaimed door, creating an inviting sanctuary. With your personal touch, this vintage piece becomes the heart of your space—an artistic centerpiece that combines history with your style. Every glance at your crafted headboard reminds you of the beauty in repurposing and the cozy comfort of a space uniquely yours.