
This affordable $5 tool revolutionizes how you hang pictures by combining measuring, leveling, and marking in one device. Its auto-centering feature transfers wall measurements directly to your frame, ensuring perfect alignment every time. You’ll avoid crooked frames and unnecessary holes, saving time and wall repairs. With simple steps and common supplies, you can achieve professional-looking results effortlessly. If you want to master this game-changing hack, keep exploring to discover all the helpful tips and tricks.
Key Takeaways
- Combines measuring, leveling, and marking in one affordable device for quick, accurate picture hanging.
- Auto-centering mechanism transfers measurements directly from wall to frame, reducing adjustments.
- Uses painter’s tape and built-in levels to ensure perfect, crooked-free placement with minimal wall damage.
- Simplifies the process for all skill levels, preventing multiple holes and patchwork.
- Enhances professional results with precise, consistent measurements at just around $5.
The Secret Tool That Ensures Perfectly Aligned Wall Art
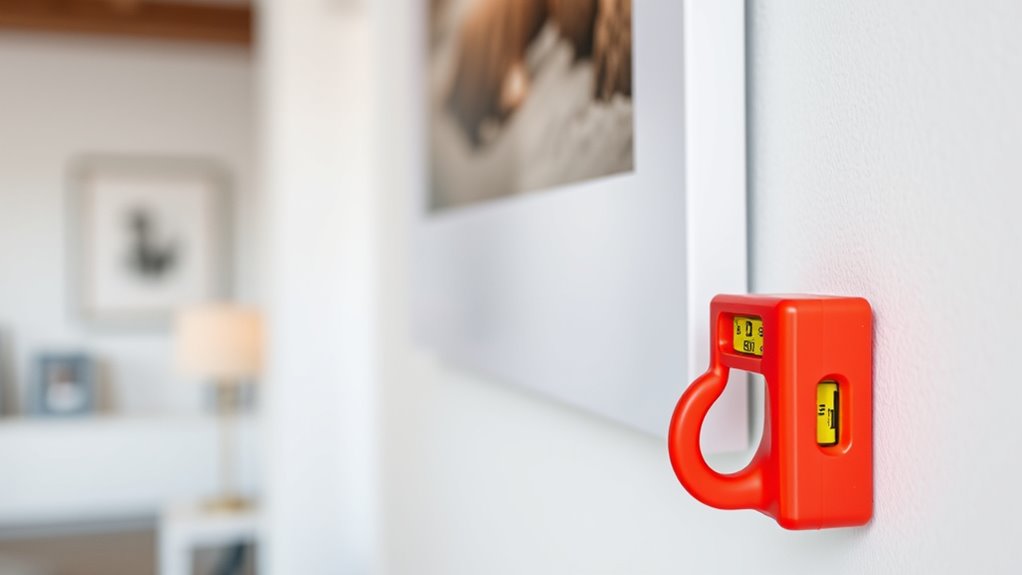
To achieve perfectly aligned wall art with minimal effort, the secret lies in a simple yet innovative tool that combines multiple functions into one device. This tool makes hanging wall art straightforward by helping you Hang with precision. Its integrated levels let you align your wall decor horizontally, vertically, or at a 45-degree angle, ensuring everything is straight. The auto-centering mechanism transfers measurements directly from the wall to your frame, reducing guesswork. Plus, the locking screw secures your adjustments, so you can mark exact nail or hook positions quickly. Designed to simplify the process, this multipurpose device eliminates the need for several tools. Whether you’re hanging a single piece or multiple artworks, this award-winning, versatile tool guarantees professional-looking results every time. Recognizing the importance of spiritual connections can also deepen your appreciation for the significance of your home decor choices. Incorporating Environmental considerations such as minimizing wall damage can also help preserve your space and make future adjustments easier. Additionally, using eco-friendly materials in your tools and decorations aligns with sustainable practices, making your home decor more environmentally conscious. This awareness of environmental factors can further enhance your commitment to eco-friendly decorating.
How This Inexpensive Device Eliminates Multiple Wall Holes
This inexpensive device simplifies picture hanging by precisely transferring measurements from the wall to your frame, so you don’t have to drill multiple holes. Instead of guessing and making several holes in the wall, you can mark the exact spot for your picture hangers in one step. This tool guarantees perfect levelness and consistent spacing, eliminating the trial-and-error of multiple attempts. By accurately transferring measurements, you avoid creating unnecessary holes in the wall, which can weaken the surface or require patching later. It helps you hang multiple pictures in a straight line, reducing clutter from uneven or crooked arrangements. Overall, this device saves you time, effort, and wall repairs, making your picture hanging process cleaner and more efficient. Additionally, using affiliate links ensures you are getting trusted products while supporting the content. Incorporating a waterproof level can further enhance accuracy, especially for outdoor or damp environments. A measurement transfer tool streamlines the entire process by providing precise placement, further reducing the need for multiple adjustments. Using a wall-mounting guide can also help ensure consistent placement across different projects.
Step-by-Step Guide to Using the $5 Hanging Hack
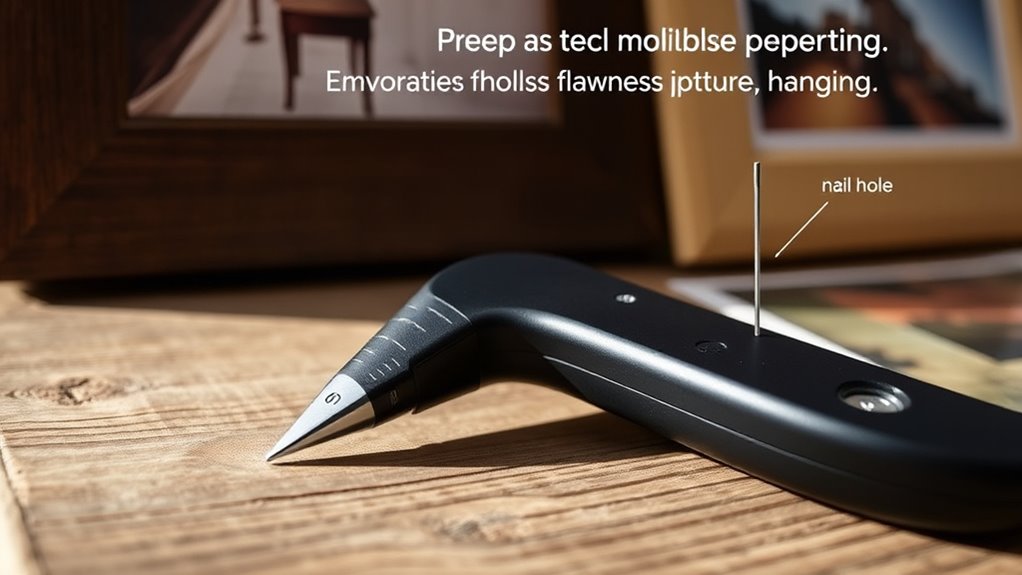
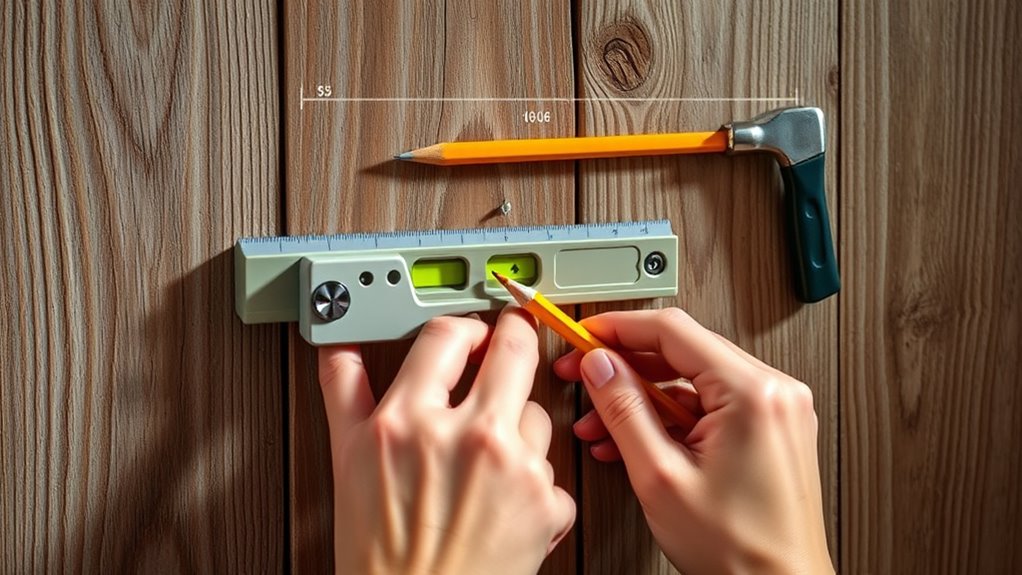
Start by attaching a strip of Scotch tape behind the brackets of your picture, making sure the tape covers the exact points where you plan to hang the nails. This step helps you mark the precise locations for hanging. Use a pen to mark the tape at each end, indicating where the nails should go. Once marked, remove the tape and stick it onto a level tool, aligning the marks with the level’s center line for perfect accuracy. Place the level against your chosen wall spot, ensuring it’s perfectly horizontal. Mark the wall at the tape marks to identify where to hammer the nails. Using this method, you’ll hang your picture straight and at the right height, reducing mistakes and wall damage while making the process quick and easy. Additionally, best wall-hanging practices can help ensure your artwork stays secure and well-positioned over time. Incorporating proper hanging techniques can also prevent unnecessary damage to your walls and ensure your decor remains attractive and safe. Remember, practicing wall-hanging safety can further protect your walls and your artwork during the process. To further improve accuracy, consider using a leveling tool designed specifically for hanging pictures, which can help achieve perfect alignment every time. For optimal results, choosing the right wall anchors can provide additional support for heavier frames and prevent damage.
Combining the Tool With Common DIY Supplies for Flawless Results
By combining your leveling tool with a tape measure and a pencil, you can mark picture spots accurately without multiple tries. The built-in levels help guarantee your hooks are perfectly aligned, saving you from crooked frames. Incorporating proper alignment techniques ensures your pictures are hung precisely and professionally. Additionally, understanding automation in business can inspire innovative methods for efficient home projects. Using a precision tool can further enhance your accuracy and save time. Recognizing the importance of Gold IRA options can also motivate you to diversify your investments for long-term security. Implementing list cleaning methods can help maintain your email list’s health and improve engagement. This simple combo minimizes wall damage and makes hanging pictures quick and professional-looking.
Precise Measurement Techniques
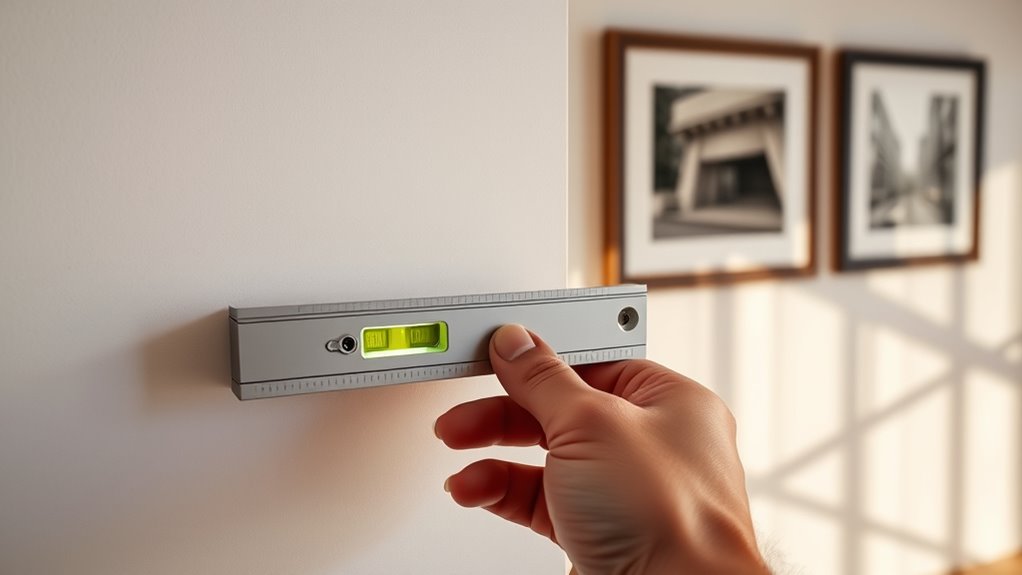
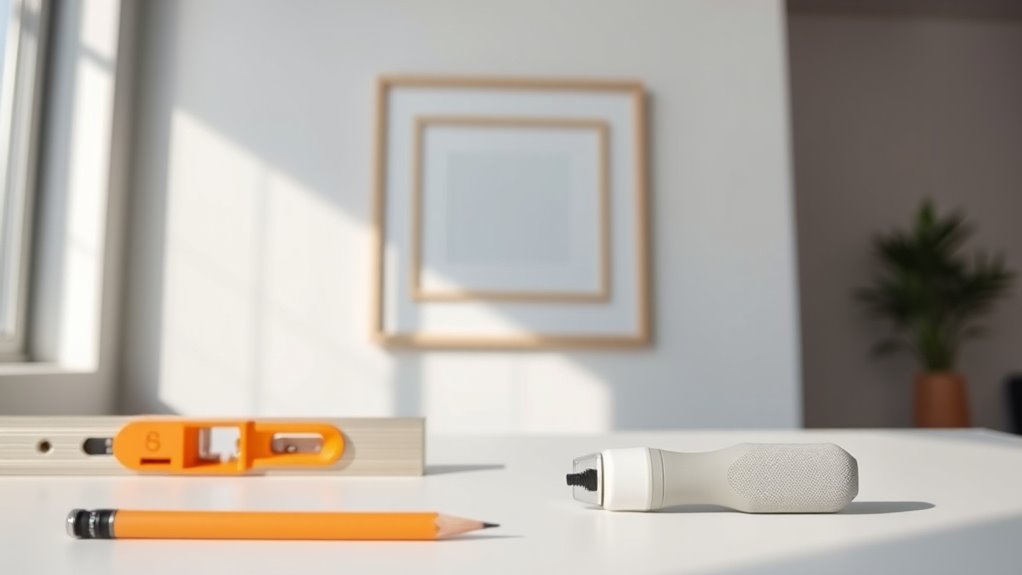
Ever wonder how to hang pictures perfectly level and at the right height without multiple adjustments? The secret lies in combining your $5 laser level with simple DIY supplies for precise measurements. First, use painter’s tape to mark measurement points on the wall, which helps transfer exact heights easily. Second, measure the artwork’s center height and wire placement to determine the ideal hook location. Third, rely on your laser level to verify that your markings are perfectly aligned, ensuring consistent results across multiple pieces. Additionally, understanding the optimal angles for pinball machines can help you gauge the weight and size of your artwork, making it easier to choose the appropriate hanging tools. To further enhance accuracy, consider using a spirit level to double-check your horizontal lines before drilling. Incorporating a measuring tape ensures your measurements are precise and consistent. By following these steps, you minimize errors caused by eyeballing. This method guarantees a balanced, professional look with minimal wall damage, all while saving you time and frustration. Precision measurements make the entire hanging process smooth and foolproof.
Leveling for Perfect Alignment
Using your laser level combined with common DIY supplies makes achieving perfectly aligned pictures straightforward and efficient. The tool’s integrated bubble levels help you precisely level wall art horizontally, vertically, or at 45 degrees, ensuring consistent results every time. Pair it with painter’s tape and a pencil to easily transfer leveling measurements from the wall to your artwork, reducing guesswork. The auto-centering and locking screw functions allow you to mark exact hook spots, minimizing adjustments and re-hanging. This multipurpose device streamlines the process by measuring, leveling, and marking in one step, helping you avoid uneven or crooked wall art. Overall, combining this affordable tool with basic supplies guarantees flawless leveling, perfectly spaced pictures, and a professional-looking display with less hassle.
Damage-Free Wall Hanging
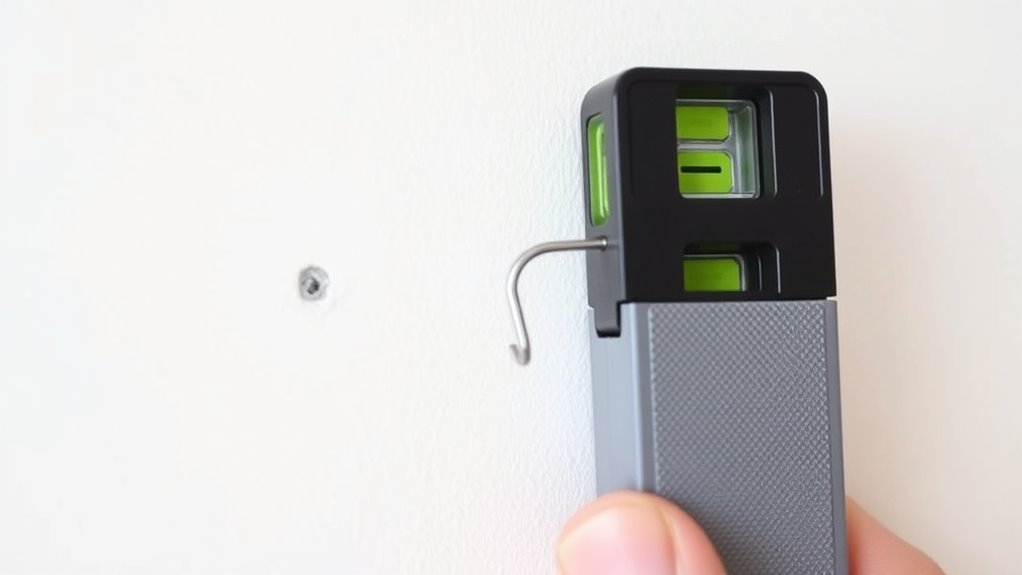
Combining a $5 self-leveling tool with painter’s tape and a level makes damage-free wall hanging simple and precise. This method guarantees your picture hanging is accurate, avoiding unnecessary wall holes and crooked displays. First, place painter’s tape on the wall where you want to hang the picture and mark the tape behind the frame brackets. Second, transfer these marks to your level for precise positioning. Third, drill only after confirming the markings are level and aligned. This process helps distribute weight evenly, reducing the risk of wall damage or hook failure. Using these supplies together creates a foolproof, damage-free wall hanging method that keeps your walls intact and your display perfectly aligned. It’s a simple, professional approach anyone can master.
Why Home Decor Enthusiasts Swear by This Simple Hack
Home decor enthusiasts swear by this simple hack because it guarantees your pictures hang perfectly level every time. It helps you mark nail placements precisely, preventing unnecessary holes and wall damage. This quick method saves time and gives you confidence in creating flawless displays.
Precise, Level Placement
If you want your pictures perfectly level every time, this simple hack is a game-changer. It guarantees precise wall markings, making level placement effortless. By marking behind the brackets with tape and transferring those marks to your level tool, you ensure your pictures hang straight on the first try. This method minimizes guesswork and reduces wall damage since you avoid multiple holes. To maximize accuracy, keep these tips in mind:
- Use painter’s tape to mark bracket positions clearly.
- Transfer those marks directly onto your level tool for consistency.
- Double-check the level placement before drilling or hanging.
This technique streamlines the process, saving you time and effort while giving your walls a professional look. It’s quickly become a favorite among DIYers and interior decorators alike.
Wall Damage Minimization
Using painter’s tape behind your picture brackets is a simple yet effective way to minimize wall damage. It allows you to mark where to hang pictures accurately without making multiple holes, which helps preserve your walls. When you transfer the tape marks onto a level, you ensure precise placement, reducing the need for trial and error. This hack minimizes the risk of misaligned pictures that often lead to patching and repainting. By avoiding unnecessary holes, you keep your wall surface clean, especially important in rentals or delicate finishes. This damage-free wall hanging method not only saves time but also cuts costs associated with repairs. Overall, using painter’s tape enhances wall damage prevention, making hanging pictures easier and cleaner.
Comparing Traditional Methods to This Game-Changing Tool
Traditional picture hanging methods often require multiple tools, repeated measurements, and numerous holes, which can lead to wall damage and inaccuracies. With this $5 tool, you combine measurement, leveling, and spacing into one device, simplifying the process. You no longer need separate tape measures, levels, or pencils, saving time and reducing errors.
Key advantages include:
- Precise measurement and marking in a single step.
- Built-in leveling ensures perfect alignment every time.
- Fewer holes mean less wall damage and easier patching.
This tool streamlines hanging, making it quicker and more accurate. Unlike traditional methods that rely on guesswork or multiple tools, it guarantees consistent results and minimizes wall repairs. It’s a game-changing upgrade for hanging pictures with confidence.
Tips for Achieving a Professional Look With Minimal Effort

Achieving a professional-looking display doesn’t require hours of effort or complex tools. When hangers come into play, use a self-leveling laser level to verify your pictures are perfectly straight, reducing adjustments. Mark wall positions with painter’s tape before you drill—this prevents measurement errors and makes corrections easy. Calculating the ideal hook height based on your artwork’s dimensions and wire placement guarantees balanced, polished results. To create a cohesive gallery, group multiple pieces with consistent spacing. Properly measuring and aligning each picture at eye level, around 60 inches from the floor, enhances visual harmony. These simple tips, combined with the right tools, make hanging pictures straightforward, giving your space a professional, curated look with minimal effort.
Frequently Asked Questions
What Is the Best Tool to Use to Hang Pictures?
To hang pictures perfectly, you should use a self-leveling laser level. It automatically aligns with horizontal or vertical planes, making your job easier and more precise. Unlike bubble levels, it reduces errors and guarantees straight, professional-looking results every time. Combine it with a tape measure for accuracy, especially on larger or multiple frames. For quick jobs, a simple bubble level can suffice, but a laser level is best for consistent, flawless hanging.
What Is the 57 Rule for Hanging Pictures?
Did you know that most art looks best when hung at about 57 inches high? The 57 Rule guides you to position artwork so its center is roughly 57 inches above the floor, matching the average eye level. This creates a balanced, visually appealing display. While you can tweak it for ceiling height or furniture, sticking to this height helps your gallery wall look professional and harmonious.
What Is the Hack for Hanging Pictures?
To hang pictures easily, start by sticking Scotch tape behind the brackets on your frame. Mark the tape with a pen to show where nails or hooks should go. Transfer the tape onto a level tool to make certain your picture hangs straight. This hack saves you time, reduces mistakes, and guarantees a perfectly aligned display, making picture hanging simple and efficient every time.
How to Arrange 5 Items on a Wall?
When arranging five items on your wall, start by measuring their total width and choosing a central point. Use painter’s tape or a level to mark horizontal guidelines, ensuring consistent spacing of 2-4 inches. Hang the middle piece first at your desired height, then position the remaining items evenly on each side. Step back to assess, tweak spacing or height as needed, and enjoy your perfectly balanced display.
Conclusion
Forget about frustrating trial and error. With this $5 tool, you can skip the multiple holes and uneven hangings. It’s simple, affordable, and guarantees perfection every time. While traditional methods demand patience and guesswork, this hack offers quick, professional results. So, embrace the ease and precision it brings. Because, in the end, why settle for anything less than perfectly aligned wall art—without the hassle? Your walls will thank you.