
To refinish furniture with household items, start by cleaning your piece thoroughly with dish soap and warm water. Assess the current finish and try removing it with a damp cloth or by applying household items like vinegar or baking soda. Use household oils such as mineral or olive oil to nourish the wood, and protect surfaces with wax or furniture polish. Repair cracks with household fillers, and if needed, create a tinted stain with coffee or tea. Keep reading to discover simple tips for a smooth finish.
Key Takeaways
- Clean and prepare furniture using dish soap, household rags, and gentle sanding with common items.
- Safely set up your workspace outdoors with protective coverings and proper lighting.
- Remove old finishes by testing with mineral spirits and gently scraping with household tools wrapped in tape.
- Fill cracks and chips using household fillers like epoxy putty or wax repair sticks for a smooth surface.
- Apply a new finish with household oils, waxes, or tinted stains made from coffee or tea, then buff for shine.

GDLF Large Coffee Bar Cabinet with Fridge Space, Mini Fridge Cabinet with Wine Storage, Buffet Sideboard Table for Home, Fluted Modern Design,53.2" L
【Fits Most Mini Fridges】Designed with a built-in fridge space (19.7”W x 19.9”D x 34.7”H), this bar cabinet fits...
As an affiliate, we earn on qualifying purchases.
Gathering Basic Supplies From Around the House
You can easily gather essential supplies for furniture refinishing from items already in your home. Start by using household items like dish soap to clean the surface, removing dirt and grime to achieve an old furniture look. Worn-out towels or old rags work well for wiping down furniture pieces after cleaning and during applying finish. To protect hardware or delicate areas, aluminum foil or plastic wrap are handy. For prepping your wood, light sanding with household items can smooth rough spots. Household wax or furniture polish can be used to add a protective layer and restore shine to refinish wood surfaces. These simple household items make the refinishing process accessible and budget-friendly. Additionally, understanding industry trends can help you choose the best techniques and finishes for your project.

ZEUKMXOO Book Shelf,6 Tier Bookshelves,Industrial Wood Bookcase,72" H Ladder Bookshelf,Home Office Bookcase Shelf Storage Organizer,Ladder Shelf for Bedroom,Living Room
【Customizable Book Shelf Storage, Effortlessly Organized】 Standing 72 inches tall with 6 thoughtfully spaced shelves, this industrial wood...
As an affiliate, we earn on qualifying purchases.
Preparing Your Workspace Safely and Effectively
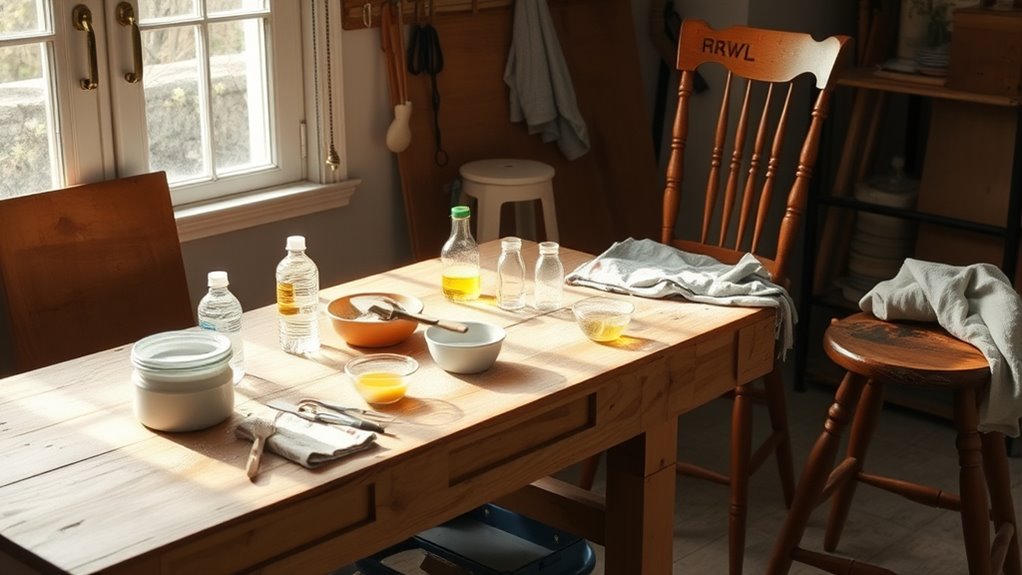
Creating a safe and effective workspace is vital for successful furniture refinishing. For the best refinishing workspace, set up outdoors on a covered porch or driveway to guarantee proper ventilation and reduce fume buildup. Use a pop-up canopy or tent lined with drop cloths to contain overspray and protect surrounding areas. Cover work surfaces and floors with reusable canvas drop cloths or plastic sheeting to prevent stains and damage. Good lighting is essential; rely on natural sunlight or bright LED lights to see imperfections clearly. Always prioritize safety precautions by wearing protective gear like masks and gloves. Avoid enclosed indoor spaces to minimize fume inhalation and interior damage. A well-organized workspace setup makes the refinishing process safer and more efficient. Additionally, understanding contrast ratio helps you evaluate how well your projector will display dark and bright scenes, which can be useful when setting up your home cinema. To further enhance safety, consider using household items such as old towels or plastic wrap to cover or protect delicate furniture parts during refinishing.

LINLUX 35.5 Inch Large Leather Storage Ottoman, Extra Large Square Lift Top Ottoman Coffee Table with Storage, Tufted Leather Ottoman Footrest Toy Box for Living Room, Black
Spacious Storage Solution: This oversized ottoman measures 35.43" W x 35.43" L x 16.93" H, with an inner...
As an affiliate, we earn on qualifying purchases.
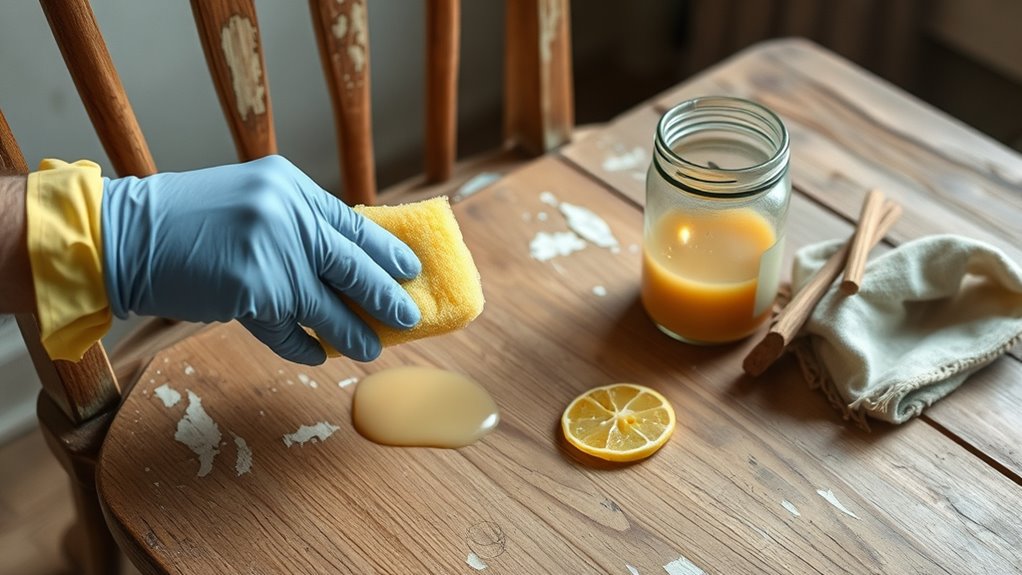
Assessing and Cleaning the Furniture Before Refinishing

Before starting the refinishing process, it’s essential to carefully assess and clean the furniture to guarantee ideal results. Inspect for existing finishes, damage, or repairs needed. Use mineral spirits with a clean cloth to test the current finish—if it wets easily, it’s suitable for refinish; if not, removal may be necessary. Clean the surface thoroughly with soapy water, gently scrubbing carved details and moldings to remove dirt and grime. Rinse with a damp cloth to eliminate soap residue, then dry completely to prevent moisture damage. Proper prep includes repairing cracks and chips with household fillers. This ensures a smooth, clean surface for a successful refinishing project. Additionally, considering waterproofing techniques can help protect your furniture from future water damage and prolong its lifespan. Incorporating protective finishes after cleaning can further enhance durability and appearance. Being aware of AI-driven personalization in e-learning can also inspire innovative techniques for DIY projects, making the process more engaging and tailored to your needs. Paying attention to surface compatibility can help ensure that the refinishing products adhere properly and last longer. Furthermore, understanding local climate conditions can influence your choice of finishes and protective methods to better suit your environment.

Redlife 35 Inch Large Square Storage Ottoman, Storage Ottoman Coffee Table with Lift Top Linen Ottomans Bench Square Footrest Oversized Upholstered Coffee Table for Living Room Bedroom (Beige)
Spacious Sorage Space : Square sorage ottoman has two storage compartments, it provides ample space to store blankets,...
As an affiliate, we earn on qualifying purchases.
Removing Old Finish Using Household Items
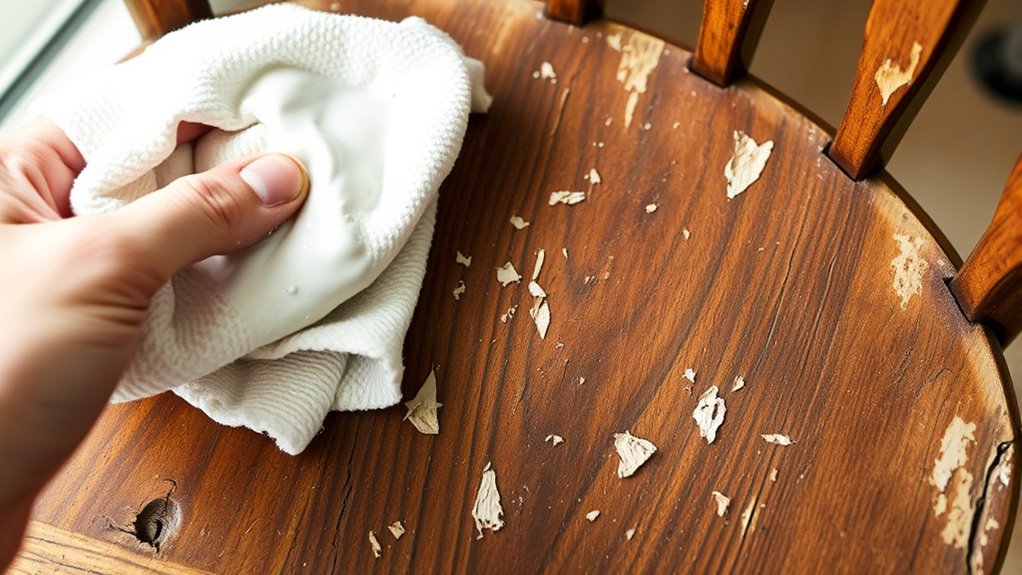
Removing old finishes can often be accomplished with simple household items, saving you time and money. Start by testing if the existing finish can be cleaned and revived with a damp cloth dipped in mineral spirits. If it looks good when wetted, proceed with cleaning. For stubborn white rings and water stains, apply petroleum jelly and let it sit overnight to lift marks. To remove old paint or splatters, carefully use a razor scraper wrapped with masking tape to avoid damaging the surface. Understanding proper surface preparation can help you achieve a smoother refinishing process and prevent future issues. Additionally, using gentle sound vibrations can sometimes loosen residues or finishes that are difficult to remove through traditional methods. For chipped wood or veneer, mix epoxy putty or use wax repair sticks to fill cracks, smoothing with a tool. Furthermore, understanding the importance of toilet maintenance can help you prevent issues that might damage furniture or fixtures nearby. Incorporating common household items like baking soda or vinegar can also be effective for cleaning and stripping finishes, making the process more accessible and eco-friendly. Proper techniques for stripping old finishes with household items can ensure minimal damage and better results, especially for delicate surfaces. These household items make refinishing furniture accessible, effective, and budget-friendly.
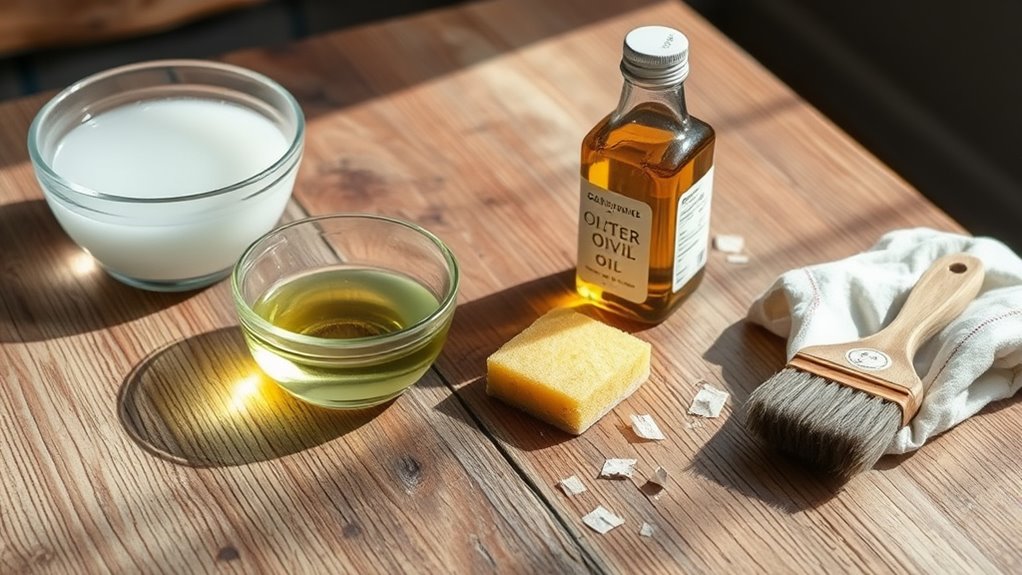
Applying a New Finish With Common Household Materials
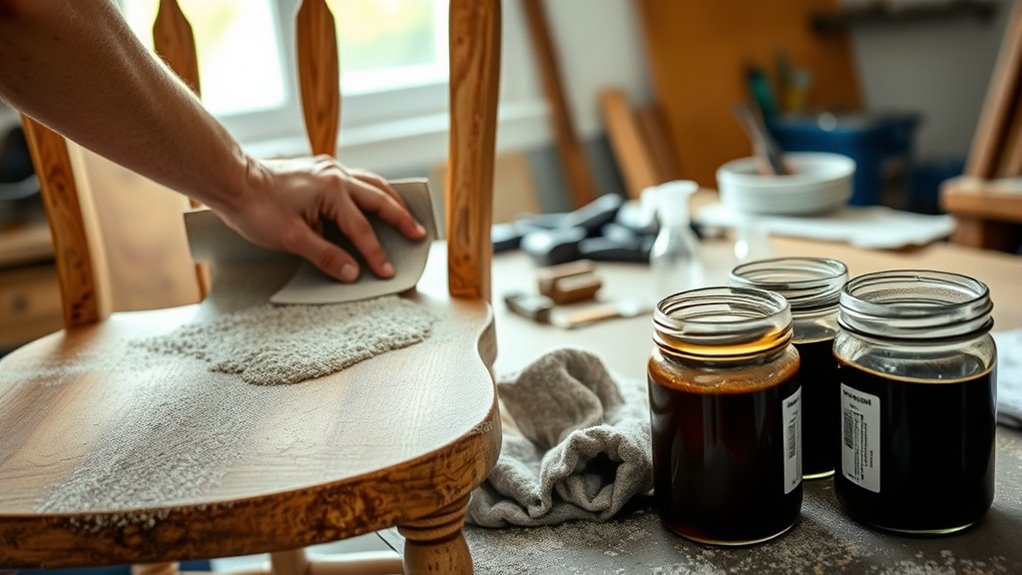
To apply a new finish using common household materials, start by thoroughly cleaning the wood surface with a soft cloth dampened in a mixture of dish soap and water. This guarantees the surface is free of dust and grease, ideal for refinish furniture. Next, nourish the natural wood with household oils like mineral or olive oil to enhance its appearance. For a protective topcoat, rub in clear wax or beeswax, then buff to create a subtle shine. You can also create a simple stain substitute by mixing coffee or tea with a small amount of dish soap, applying it with a cloth for a tinted, aged look. Finish with a vinegar and olive oil solution to clean and add a durable finish, safeguarding the wood surface with household items easily found around your home. Additionally, understanding the importance of family photoshoot fails can help you avoid mishaps during home projects, ensuring a smooth and enjoyable refinishing process. Incorporating diy home decor ideas can further personalize your furniture and make your space uniquely yours.
Frequently Asked Questions
How to Refinish Furniture for Beginners?
Refinishing furniture for beginners can be simple if you follow a few steps. First, clean your piece thoroughly with dish soap and water, then dry it completely. Lightly sand the surface with medium-grit sandpaper to remove the old finish. Use household items like a rag and mineral spirits to apply a natural wax or oil finish. Finish by buffing with a soft cloth to add shine and protect your furniture.
How Do You Restore Weathered Wood Furniture Without Sanding?
So, your weathered furniture looks like it survived a hurricane and a mudslide? No worries! You can restore it without sanding by applying a wood conditioner like Restor-A-Finish, which penetrates the surface and revives its color. Clean it thoroughly with a damp cloth, then rub in some olive oil and lemon juice or mineral oil. Finish with a buffing cloth, and voila – your furniture’s back from the dead!
How Do You Bring Old Wood Furniture Back to Life?
To bring old wood furniture back to life, start by cleaning it with a damp cloth to remove dirt and grime. Use mineral spirits to test the finish; if it looks good, reapply a wipe-on finish to enhance the wood’s shine. Fill cracks with homemade wax fillers, then sand and stain to match. Finish with a light coat of polyurethane or varnish using household items like rags for a refreshed, protected surface.
How to Restore Dark Wood Furniture?
To restore dark wood furniture, start by checking if the finish is still viable with mineral spirits; if it’s intact, you can proceed. Clean the surface thoroughly with a soap and water mixture, then apply a gel or dark stain using a cloth, working into the grain and wiping off excess. Lightly sand to smooth, then seal with a clear wipe-on polyurethane or wax for protection and shine.
Conclusion
Now you’re ready to transform your furniture effortlessly using only what’s already in your home. With a little patience and some simple household items, you can turn dull, worn-out pieces into show-stopping masterpieces that will wow everyone. Imagine the pride swelling inside you as you see your furniture glow with a fresh new life—faster than you can blink! So go ahead, conquer your DIY project and make your home the envy of all!